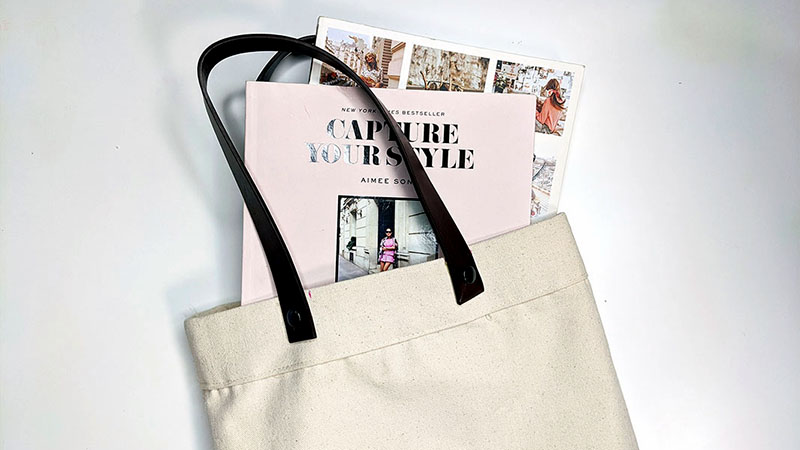
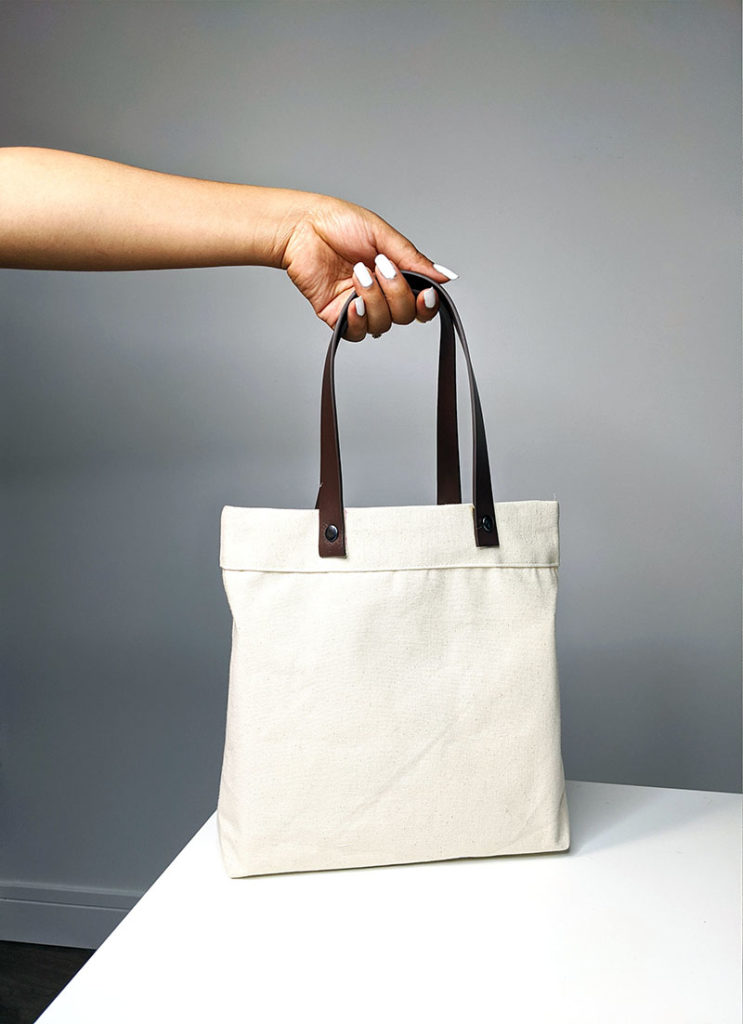
I wanted to share with you all how you can take a basic sewing pattern and use it as inspiration to create the look you want. Before I start a crafting project, I have already found an inspiration photo that I want the final product to look like. I take that photo and then find or create a design pattern that looks similar to the one I aspire to make. From there, I purchase the materials based on my inspiration photo (with a few tweaks in color to match my style and my personality).
This DIY tote bag is a two-part project. I’d love for you to check out how you can customize this tote bag and make it your own. Click the link below for the second part to this post.
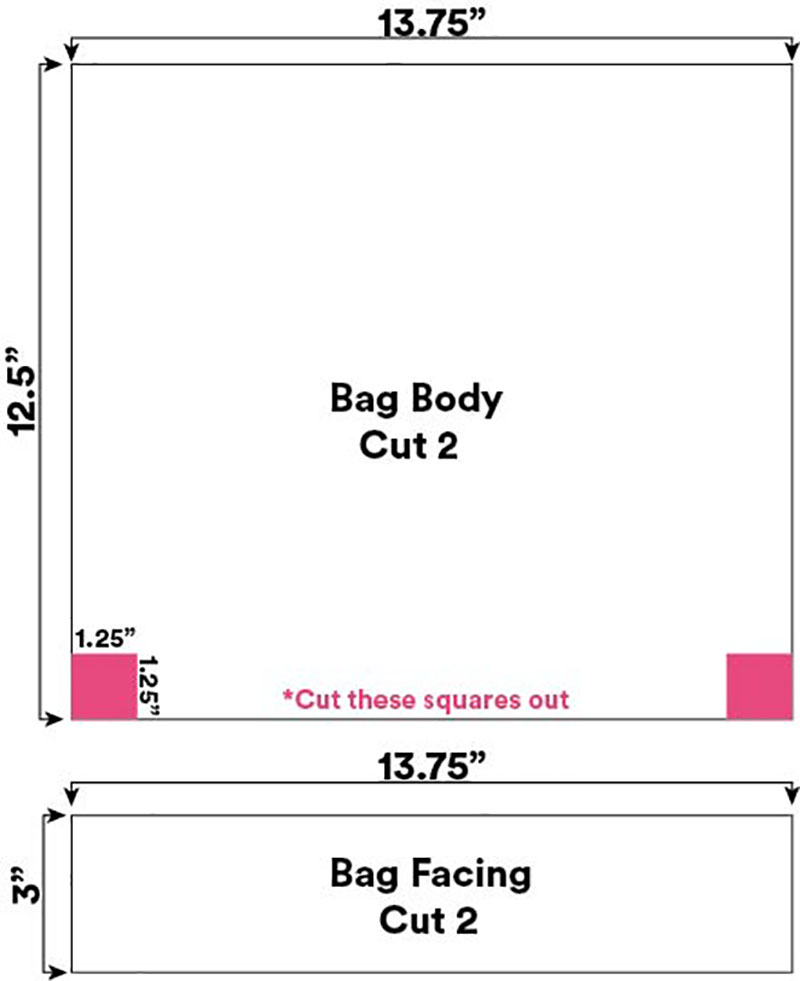
Create your pattern according to the measurements given (or draw right on your fabric with a removable pen or chalk).
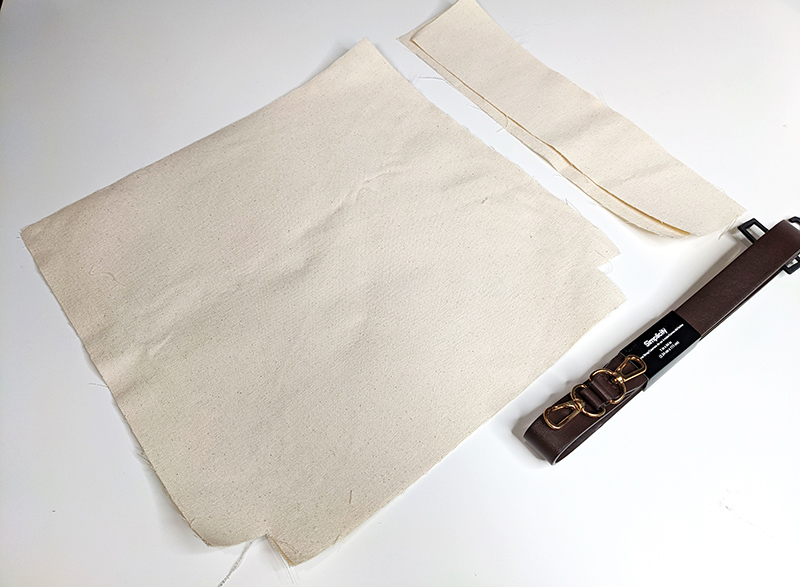
Cut out your bag pieces (2 main body, 2 facing)
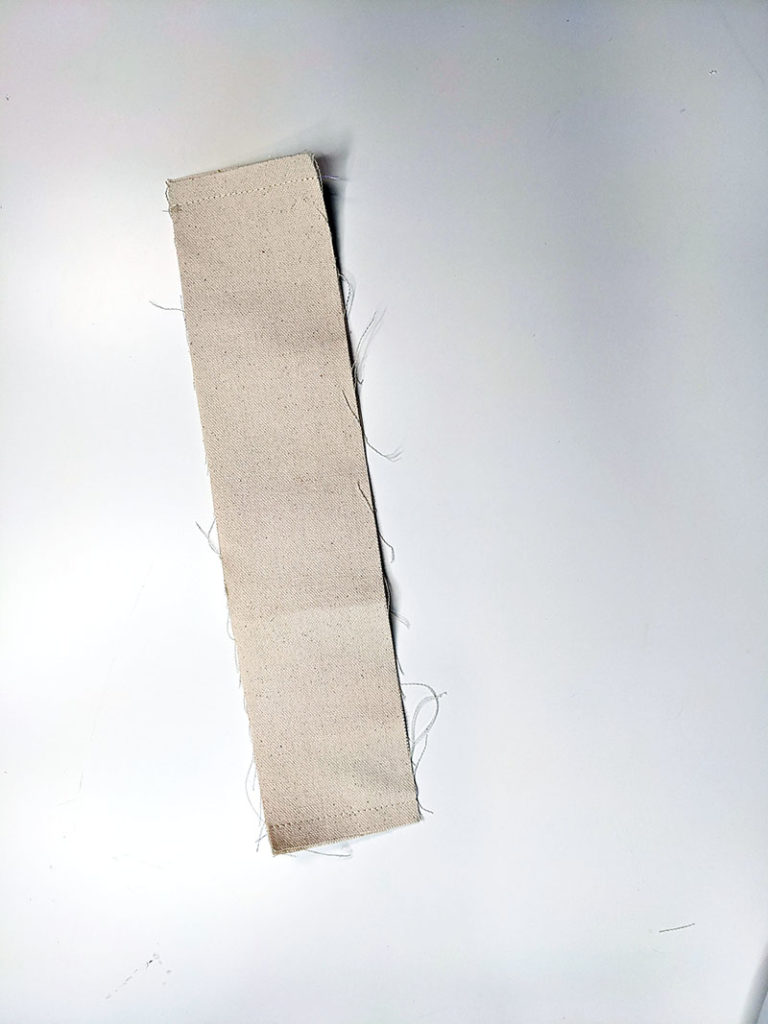
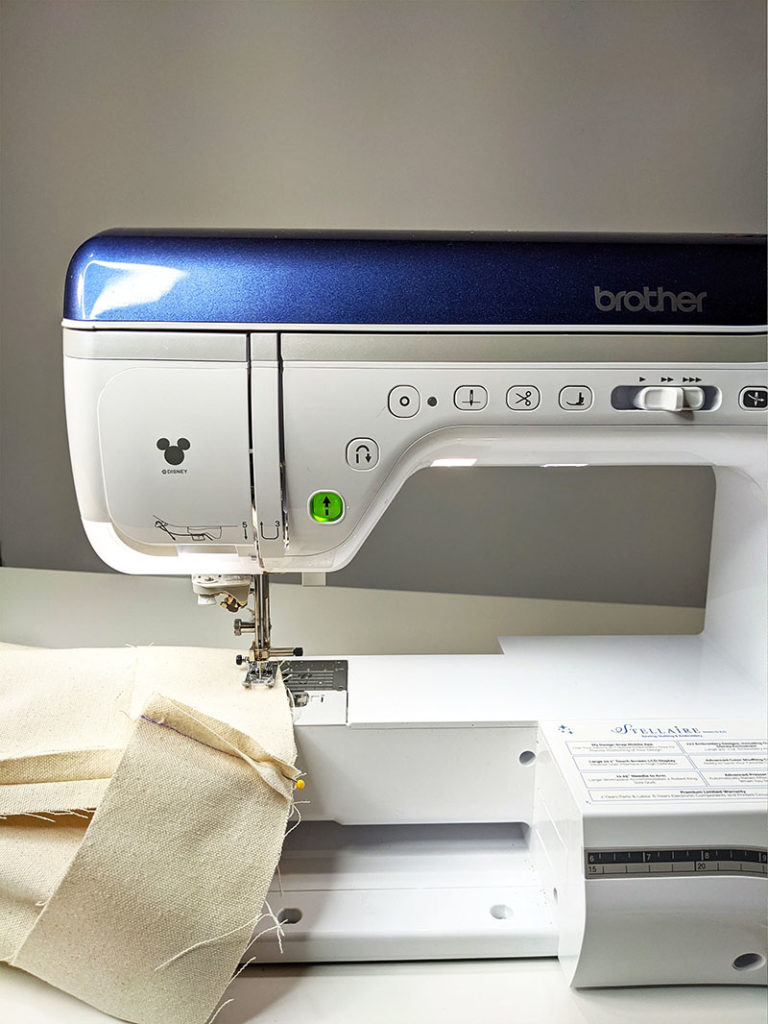
Starting the with the main body of the tote bag, with right sides facing, sew the side seams and the bottom of the bag.
Take the facing and sew down the sides. Make sure the right side of the fabric is facing each other.
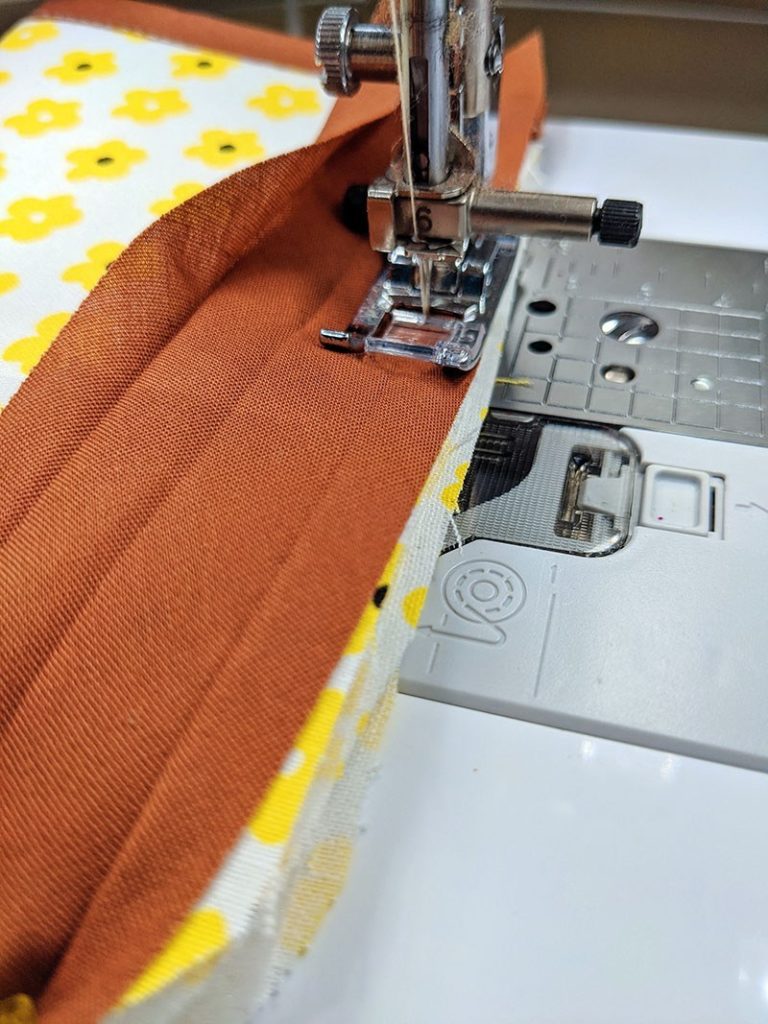
With the wrong side of the bag facing out, attach the Facing to the top of the bag. The right side of the Facing should be facing the wrong side of the bag. (See image) Sew in place.
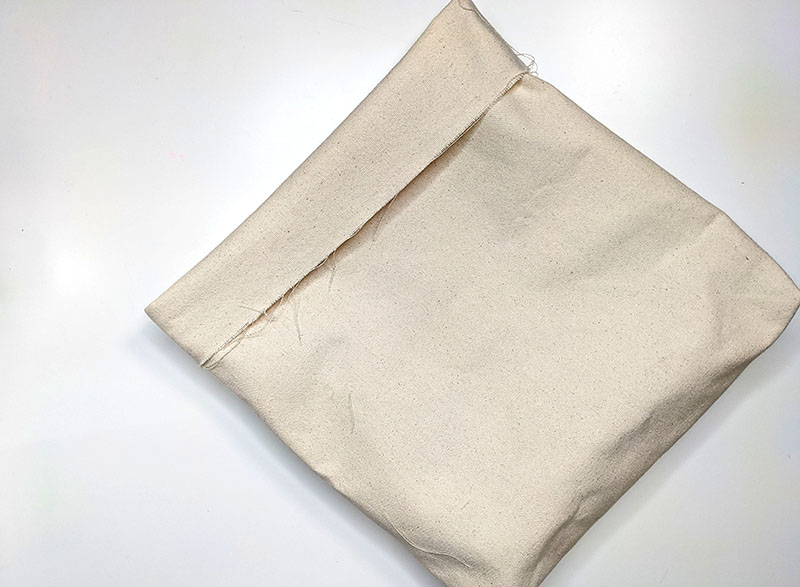
Turn your bag right side out and pull the facing to the outside. Press the seam down.
Fold the facing under about 1/2” and press. Pin and stitch in place.
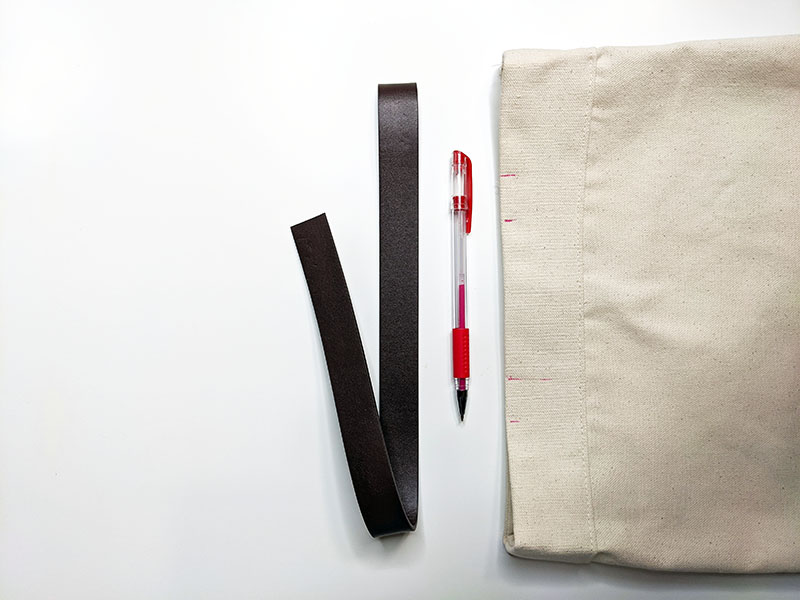
It’s time to attach the handles! Before we do that. Mark the placement of your handles with a fabric marking tool. Markings remain the exact same on the opposite side.
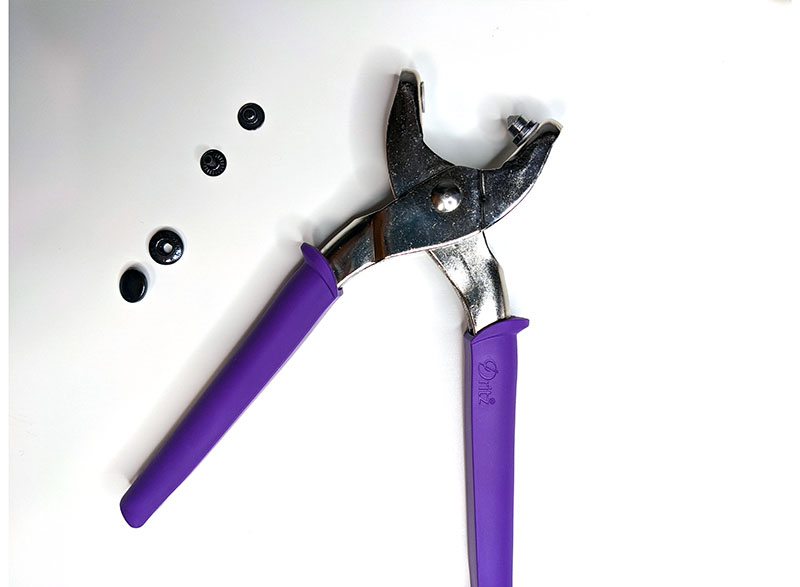
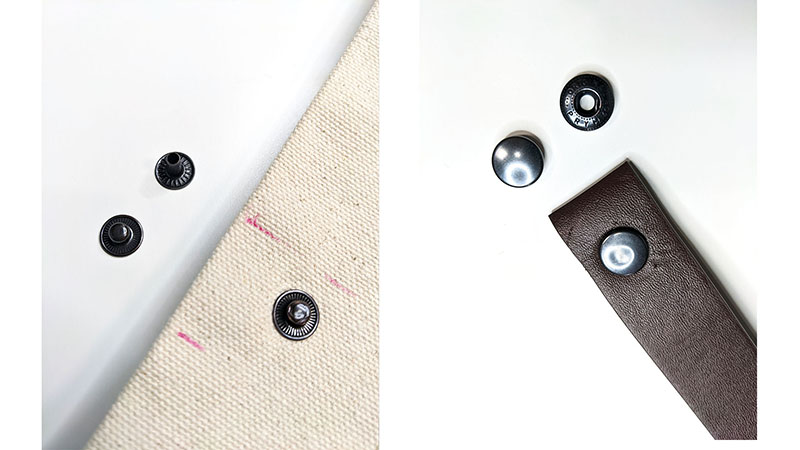
Let’s move on to the rivets. With the rivets, you want to make sure you gather the correct rivet pieces for the handles on your DIY bag. You’ll need a front and back for the canvas and front and back for the leather.
You’ll connect the rivets to the bag and strap according to the instructions on the back of the rivet packaging. When connecting, you’ll need the snap pliers.
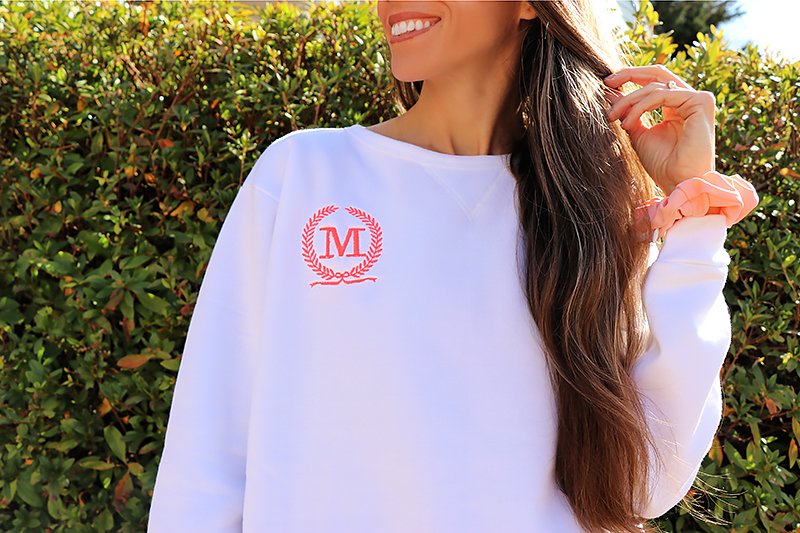
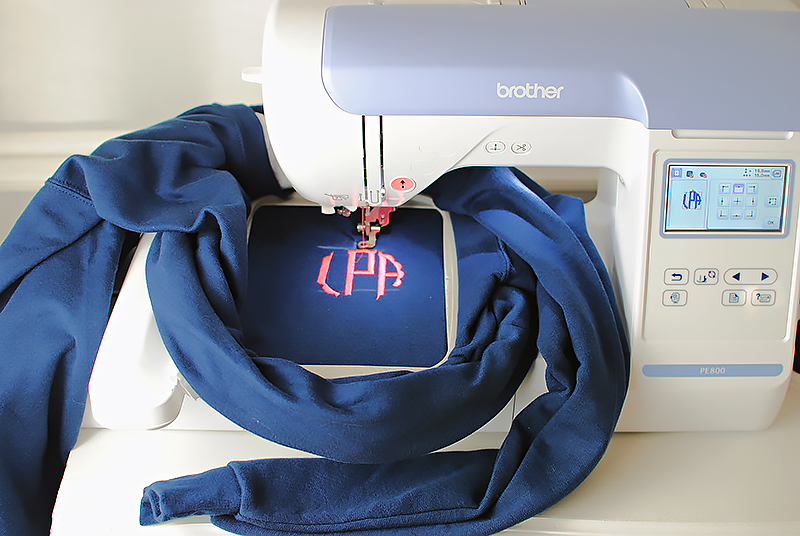
Take a plain sweatshirt to the next level of style with machine embroidery. From monograms to fun designs, you can customize this cozy wardrobe essential for yourself and others. These DIY monogrammed sweatshirts make great gifts for family and friends alike! Check out the tutorial below on how to embroider a sweatshirt with your Brother embroidery machine.
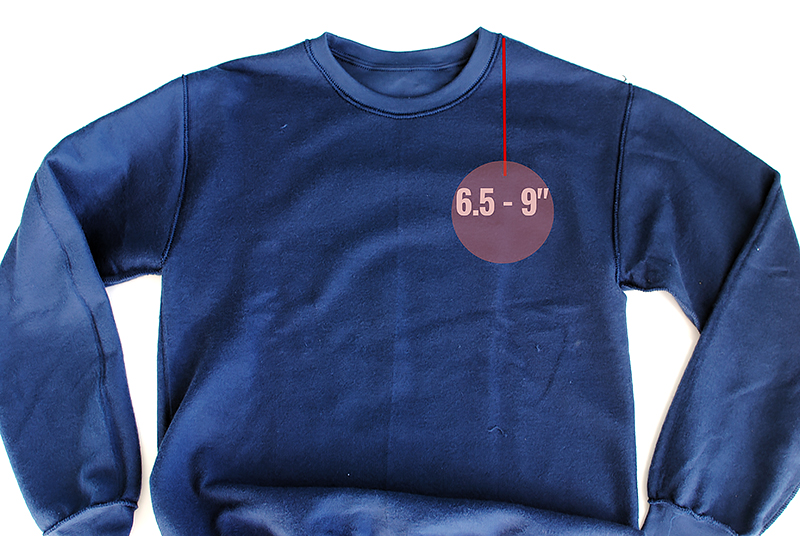
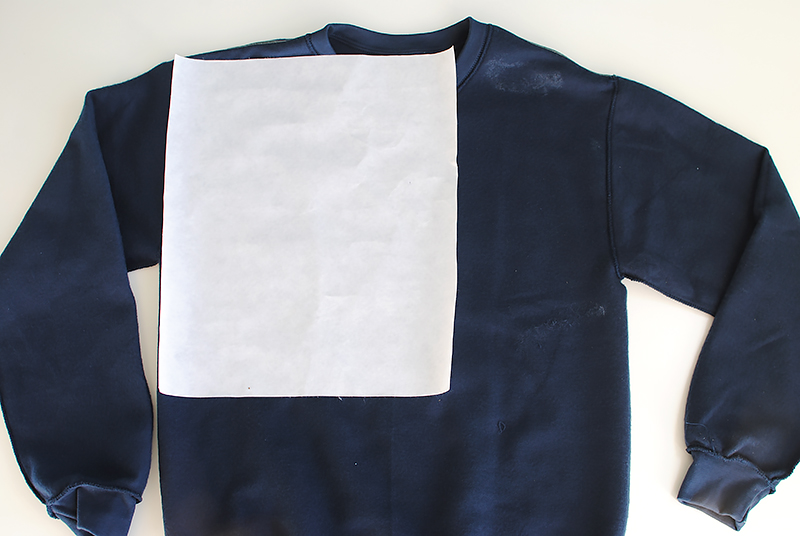
Lay out the sweatshirt and mark the location you want the monogram with a fabric marking tool. It’s a good idea to print out a template or create a sample stitch out to figure out your preferred placement. Traditionally, a monogram is embroidered 6.5”- 7” down the left shoulder seam. However, I did one on the right shoulder seam that came out great! I also like to place the monogram in the center front as well (typically 3” down from the center neckline line).
Once you find the location you want, mark the center, vertical, and horizontal locations (basically create a rectangle). I like to create a cross and center the design at the center of the cross where the lines intersect. Mark what works best for you.
Step 2
Flip inside out.
Use a Cut Away stabilizer that will cover the embroidery area and hoop size. Spray with a temporary spray adhesive and press onto the area that will be embroidered. I use Cut Away stabilizer on sweatshirts because they’re worn and washed often. This will help the embroidery last a long time compared to other stabilizers.
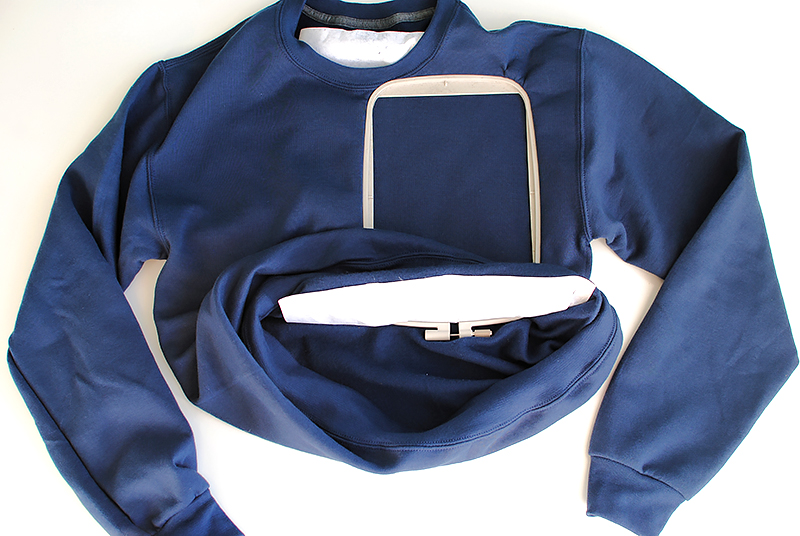
Step 3
Flip right side out.
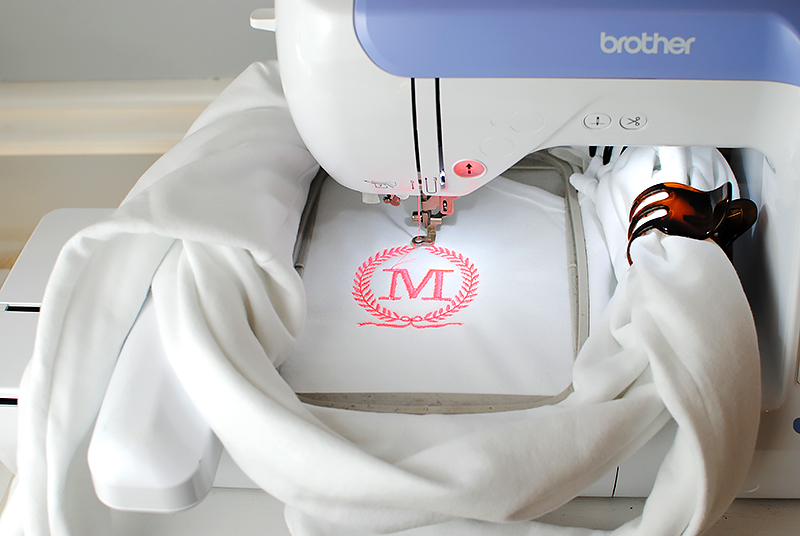
Place the outer hoop inside the sweatshirt and put the inner hoop on the top, making sure the design is centered in the hoop.
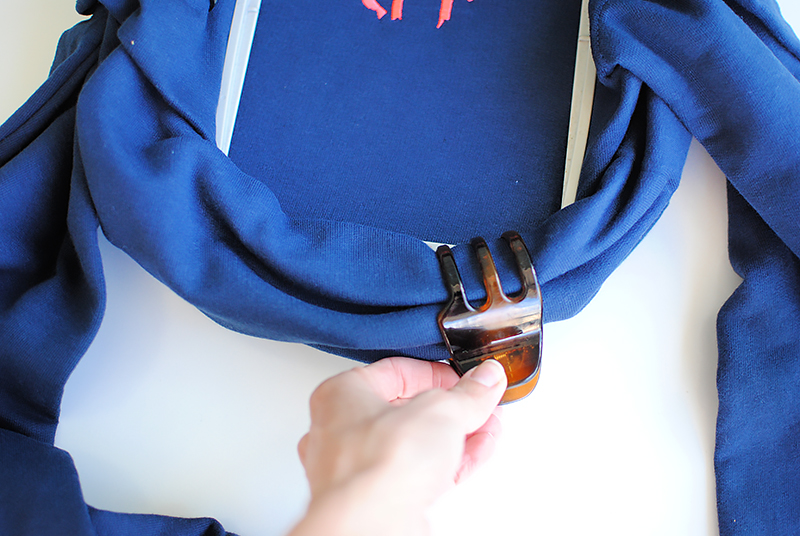
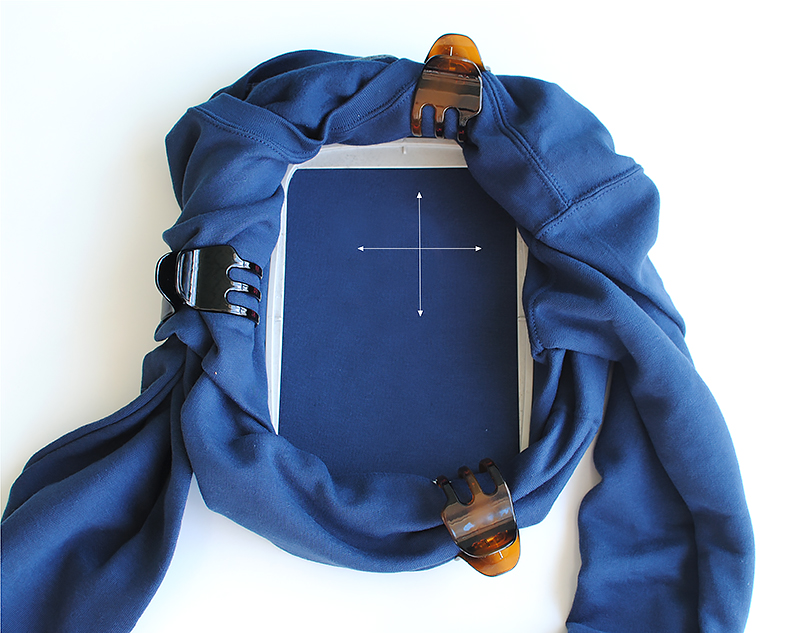
Step 4
Roll the excess material towards the outer hoop and away from the hoop area. You can use clips to keep the excess material in place (I use hair clips, an embroidery tip I got from a friend).
Step 5
Create your monogram. You can create your own or use the built-in ones that the Brother Machines offer. My designs measured about 3 x 3 “. You can use software to create your design and lettering, or just piece it together on the Brother Touch Screen. I have the Brother NV800E, which makes it easy to add and edit designs right on the screen.
Step 6
Embroider away!
Once your embroidery is complete, turn the shirt the wrong side out and cut away the stabilizer. I typically cut it about ¼’ away from the design. Over time and after multiple washes, the stabilizer will soften.
Other examples / Valentine theme (optional images)
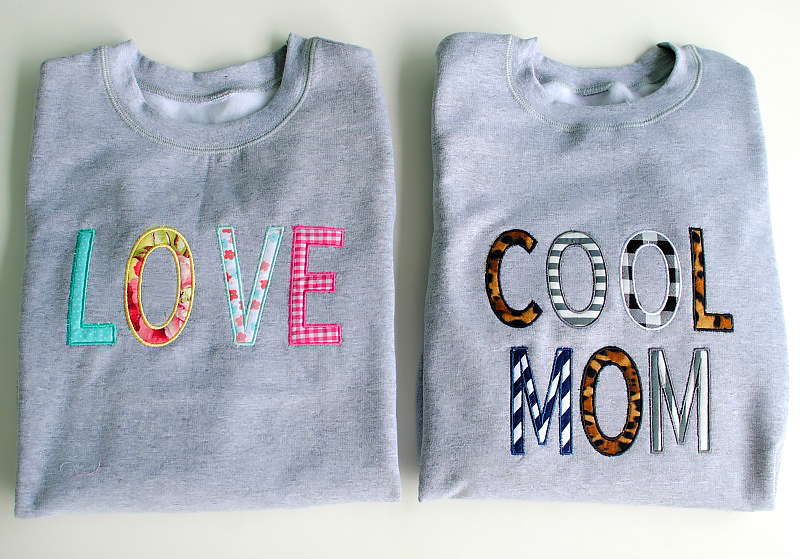
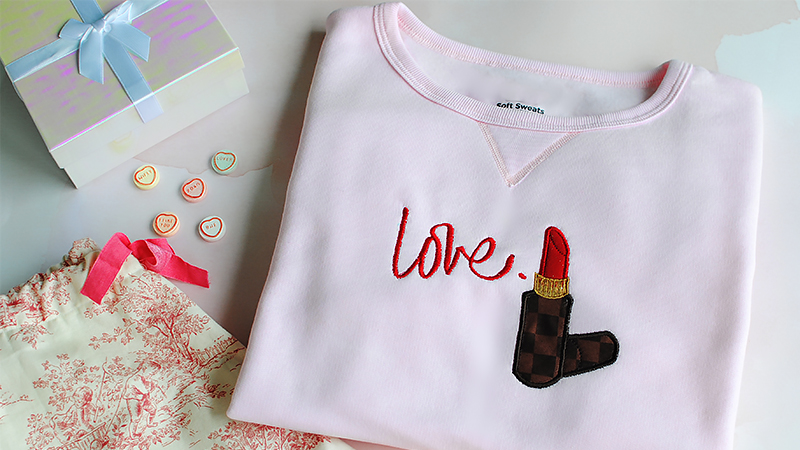
I hope this inspires you to give embroidery a try on your garments. It’s a great way to upcycle old t-shirts, sweatshirts, and denim jackets. Here are a couple other examples.
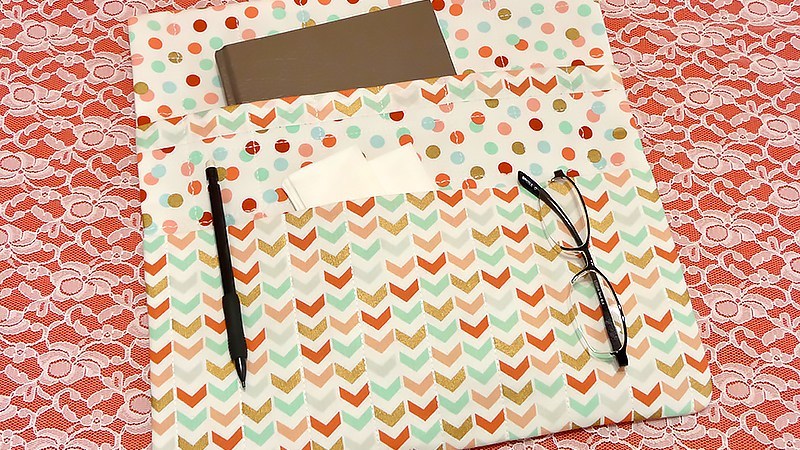
Create a beautiful custom bed caddy using your Brother sewing machine and a few Brother accessories. Quilt your own fabrics for a lightly padded finish that will match your décor and unique style. This handy craft will help organize bedside items you reach for on a regular basis. Pick some pretty fabrics, gather up your tools, and prepare to tackle this easy sewing project. You’ll learn more about the use of several optional accessory feet featured in these instructions. Are you ready? Let’s go sew!
Materials and Supplies:
Brother sewing machine with basic built-in stitches.
SA190 Roller Foot for attaching gripper material to bed caddy.
Additional accessory feet for this project, optional but very helpful:
Basic notions, including thread to match or blend with fabrics and a removable marker. I recommend a rotary cutter, mat, and ruler for cutting fabric pieces.
Materials for bed caddy, including fabric, thin fusible craft fleece, and gripper material:
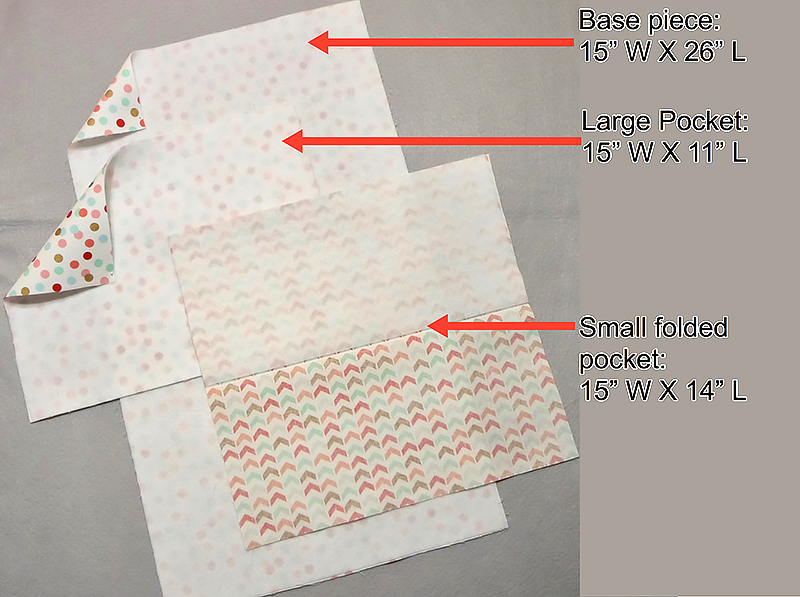
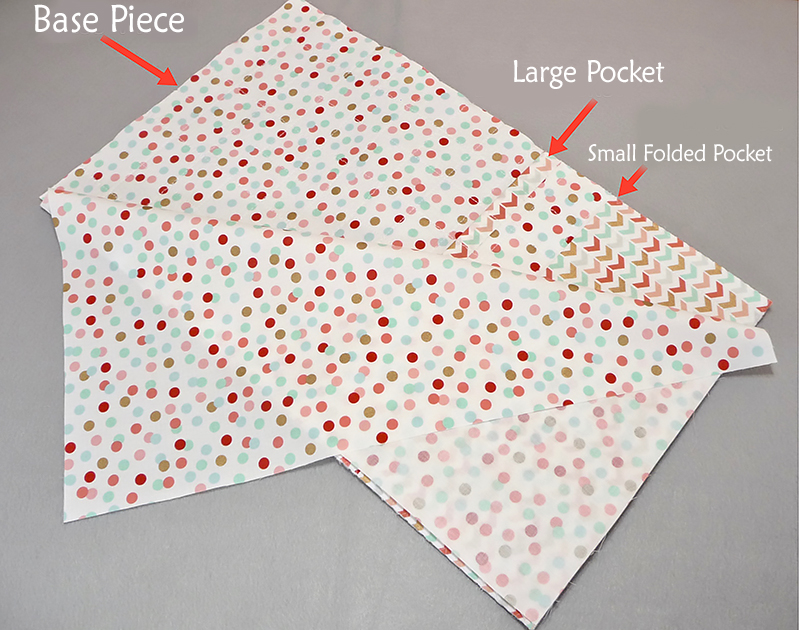
Cut one piece of quilt weight cotton measuring 15-inches wide X 26-inches long for base of bed caddy. Fuse thin craft fleece to wrong side.
Cut one piece of quilt weight cotton measuring 15-inches wide X 11-inches long for large pocket. Fuse thin craft fleece to wrong side.
Cut one piece of quilt weight cotton measuring 15-inches wide X 14-inches long for small folded pocket. Note: Fold pocket piece in half lengthwise and press to form a fold line. Next, fuse thin craft fleece measuring 15-inches wide X 7-inches long to wrong side, matching fleece with fold line and raw edges on half the piece.
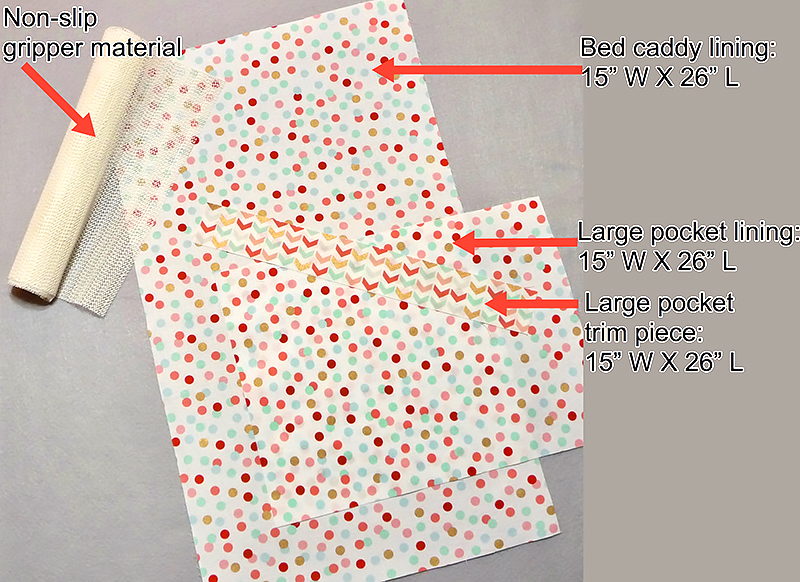
Cut one piece of quilt weight cotton measuring 15-inches wide X 26-inches long for bed caddy lining.
Cut one piece of quilt weight cotton measuring 15-inches wide X 11-inches long for large pocket lining.
Cut one piece of quilt weight cotton measuring 15-inches wide X 2-inches long for large pocket trim.
Cut one piece of non-slip “gripper” material measuring 13-inches wide X 9-inches long for top edge.
See all pieces in Figure #1a and Figure #1b.
Figure #1a
Figure #1b
Fabric tips: Choose two or more coordinating fabrics, mixing and matching as desired. You can eliminate the large pocket trim piece if you choose a third coordinating fabric. I used remnants left over from another project for this bed caddy. Since I only had two fabric prints to work with, I added the trim strip for extra contrast on the pocket.
Tips for using accessory feet listed with supplies:
SA190Roller Foot – The non-stick and roller capabilities on this foot are ideal for stitching “sticky” materials such as the gripper material on the top edge of the bed caddy. In this project you’ll see that I also used the roller foot to quilt single layers of fabric with thin fleece. Note that there are other feet better suited for quilting thicker layers.
SA160Stitch Guide Foot – Marked lines on this foot allow for consistent stitching of seamlines in a wide range of widths.
SA132Quilting Guide – The quilting guide fits snugly into the small hole found in the back of the presser foot holder so it can be used with any foot you choose. Simply slide the guide a measured distance from the needle and line up the guide with a previous line of stitching for consistent and evenly spaced lines of stitching.
Finished bed caddy measures approximately 14-inches wide X 25-inches long. Please read through all instructions before beginning this project.
Basic steps for creating bed caddy:
Add fusible fleece to caddy pieces.
Add trim, then quilt caddy base and pocket pieces.
Layer pieces and add lining.
Attach gripper material to top edge to finish. Note: This piece helps keep the caddy from moving when placed between the mattress and box springs.
1. Prepare large pocket if you are adding the contrast trim. Add contrast strip as follows:
Attach stitch guide foot. Layer 15-inch wide X 2-inch long strip along top edge of large pocket, with right sides together, placing it a scant 1-inch from top raw edge. See Figure #2a.
Figure #2a
Sew strip to top edge using a 1/2-inch seam allowance, following a specific line on the foot. See line spaced ½-inch from needle position in Figure #2b.
Figure #2b
Flip strip so right side faces up and press toward top edge.
2. Prepare to quilt pieces backed with fleece as follows:
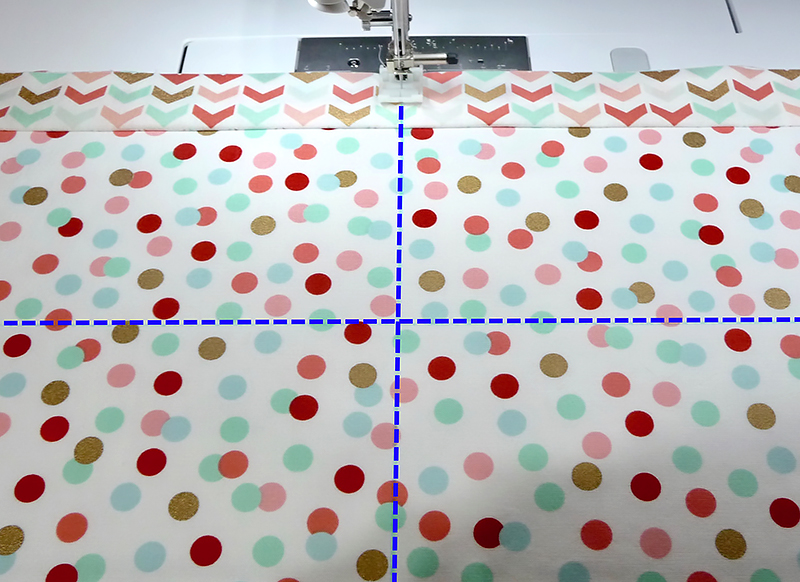
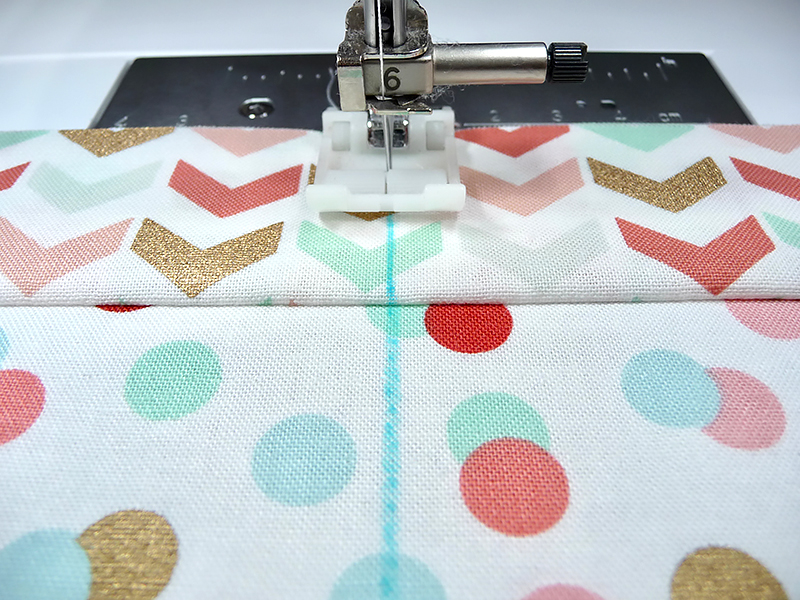
Mark starting lines along lengthwise and cross wise center on 15-inches wide X 26-inches long base piece and 15-inches wide X 11-inches long large pocket piece. Mark a lengthwise line on the center of folded pocket piece. Note: This smaller piece doesn’t require quilting in both directions. I used the fabric print to space lines on my small pocket. See example of marked lines on the large pocket piece in the enhanced photo in Figure #3.
Figure #3
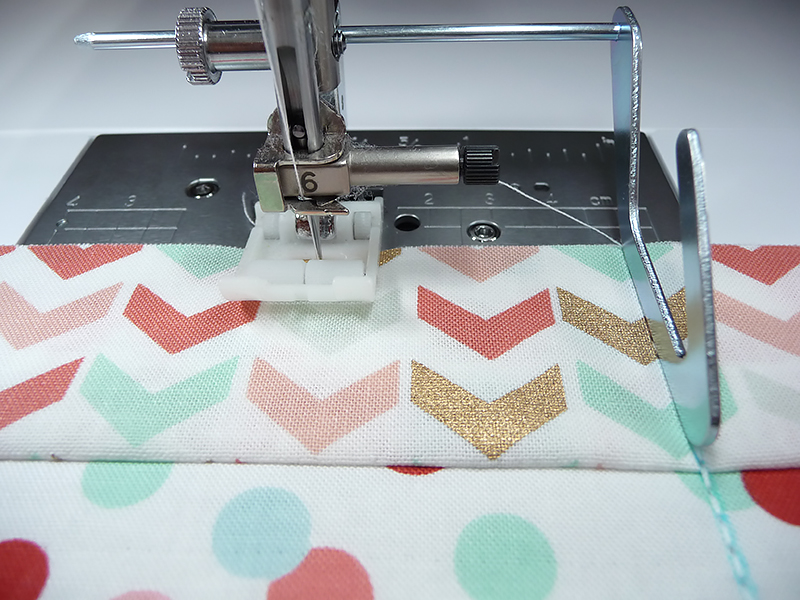
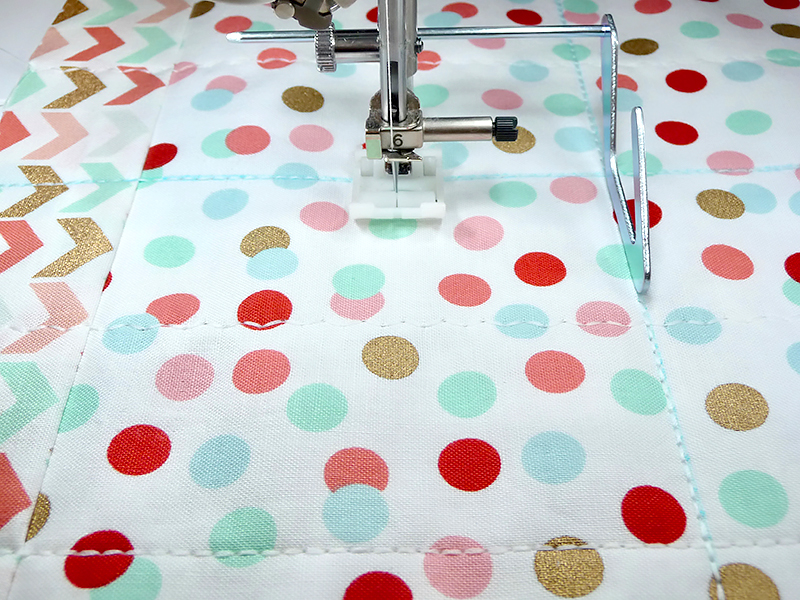
Attach the roller foot if you have it and quilt all pieces, stitching evenly spaced lengthwise and crosswise lines.
Tips for Quilting Stitches: Stitch the first center line and then use the quilt guide set for evenly spaced remaining lines to the left and right of the first center line. I like to stitch all my vertical lines first and then turn the fabric to stitch horizontal lines. Fusible fleece does not require closely spaced lines. I spaced mine 1 ½-inches apart. Straight stitches are traditionally used for this type of quilting. However, I chose the triple stretch straight stitch along with alternating lines of the rick-rack stitch. Stitch settings listed below:
Triple Stretch stitch: Center needle position, stitch length, 3.5mm.
Rick-Rack stitch: Width 1.5mm, length 4.0mm.
See examples of quilting in Figure #4a, Figure #4b, and Figure #4c.
Figure #4a
Figure #4b
Figure #4c
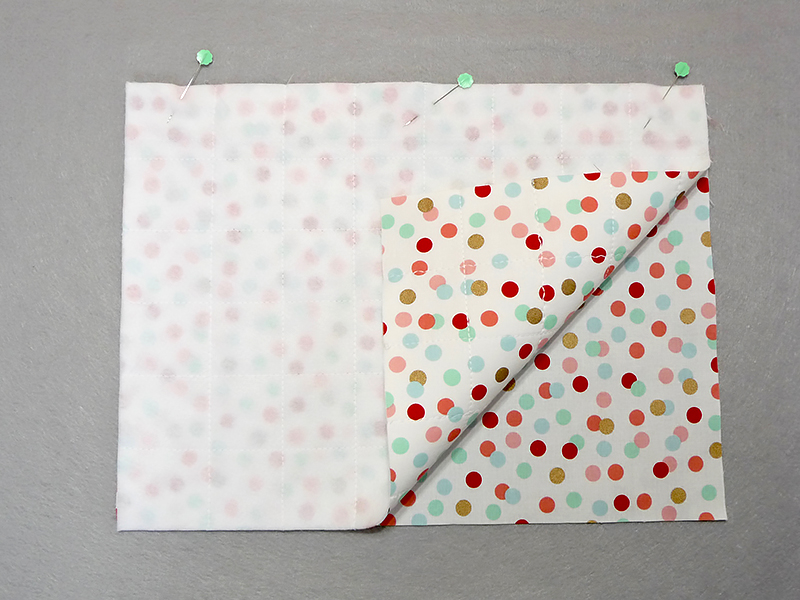
3. Layer large pocket with matching lining piece. See Figure #5.
Figure #5
Sew top edge using a ½-inch seam allowance. Press lining to back side.
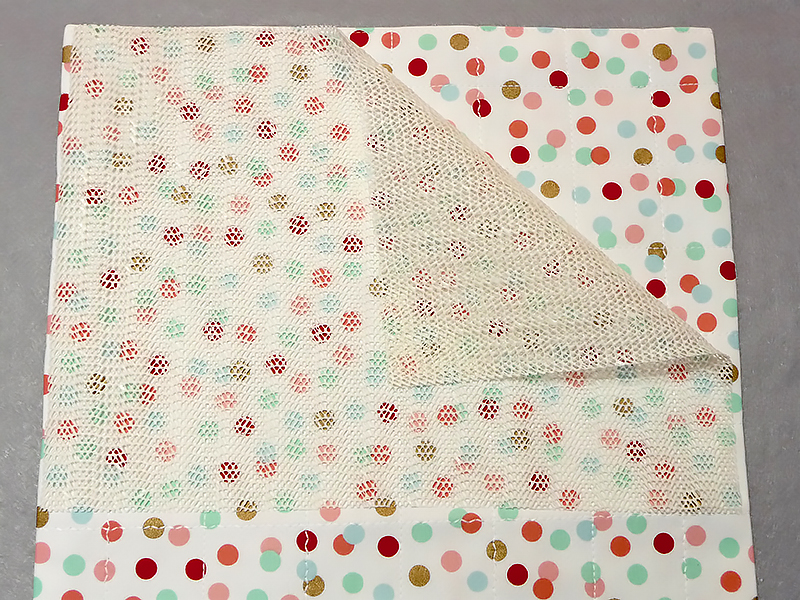
4. Layer bed caddy pieces as follows:
Bed caddy base piece, right side facing up.
Large pocket, right side facing up.
Folded pocket, right side facing up.
Bed caddy lining, wrong side facing up.
See layered pieces in Figure #6.
Figure #6
Sew layers together using a ½- seam allowance, leaving a 5-inch opening along the top edge for turning right side out. Tip: Use a small round object to mark off a slightly rounded stitching line for bottom corners. This gives a more attractive finish to the caddy and makes it easier to trim excess bulk.
Trim corners and lower rounded edges to reduce bulk. Turn caddy right side out, with lining on back side and quilted pieces positioned on the front side. Press carefully and close top by stitching close to edge.
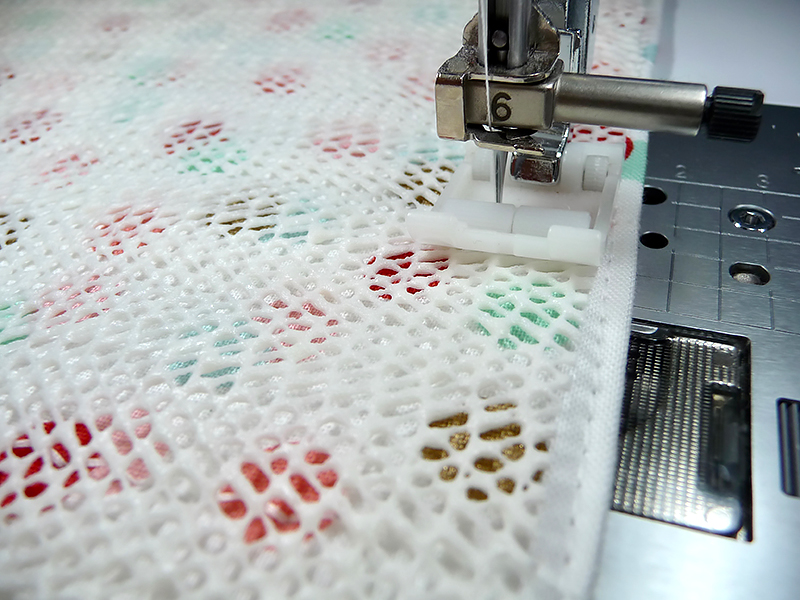
5. Center gripper material along edge opposite pockets. See Figure #7.
Figure #7
Sew to bed caddy using the non-stick roller foot. Tip: Make sure the entire foot is riding on the gripper fabric as you stitch. Sew slowly to keep material from shifting. See Figure #8.
Figure #8
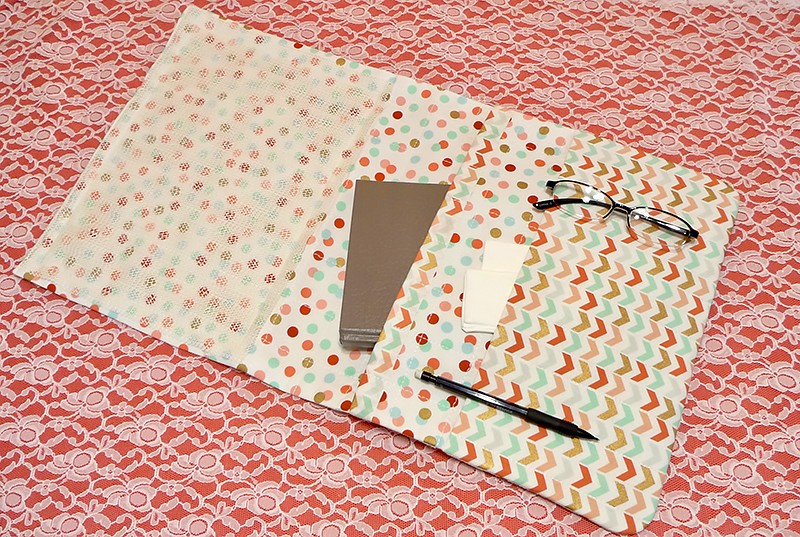
You are finished! See completed bed caddy in Figure #9.
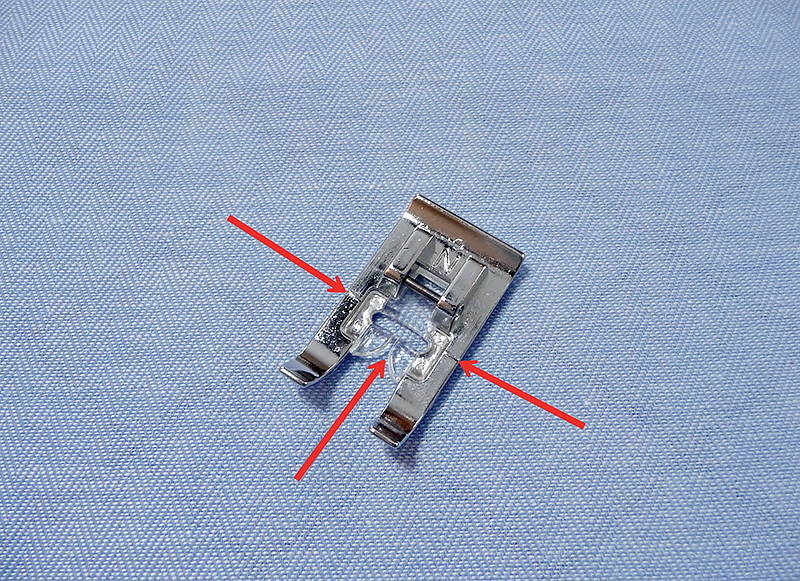
This embroidery tutorial highlights the Brother monogramming foot, labeled with an “N.” The N foot is commonly found in the included accessories for many Brother machines. If you’re looking for a replacement, this foot would be listed as a part available from your Brother dealer.
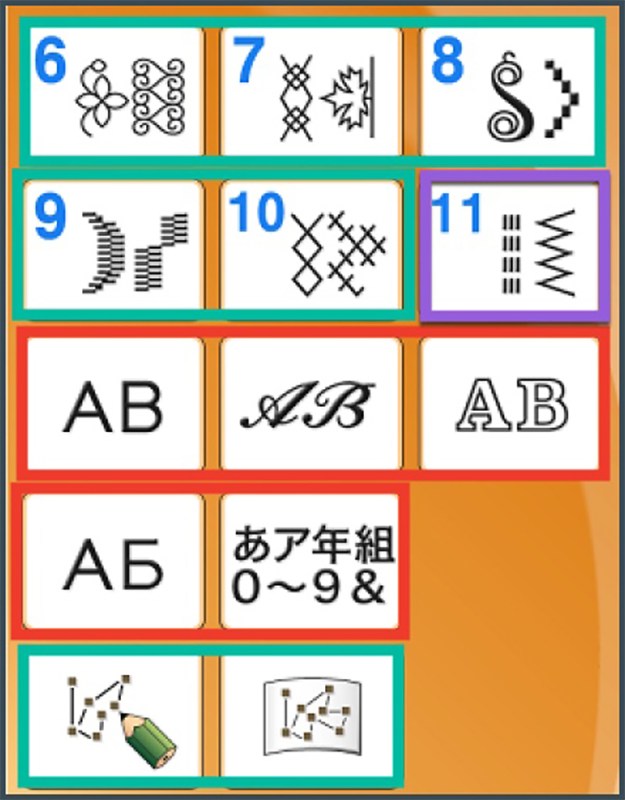
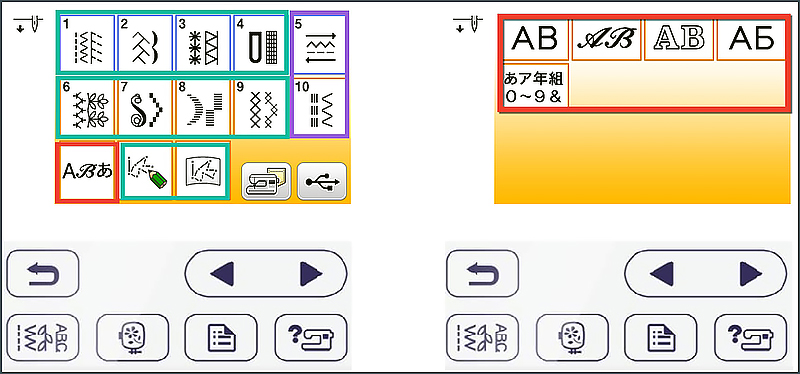
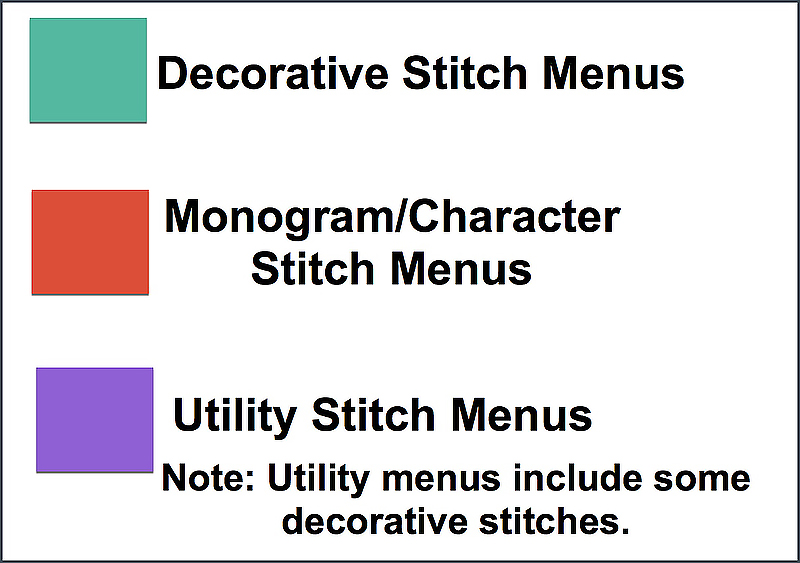
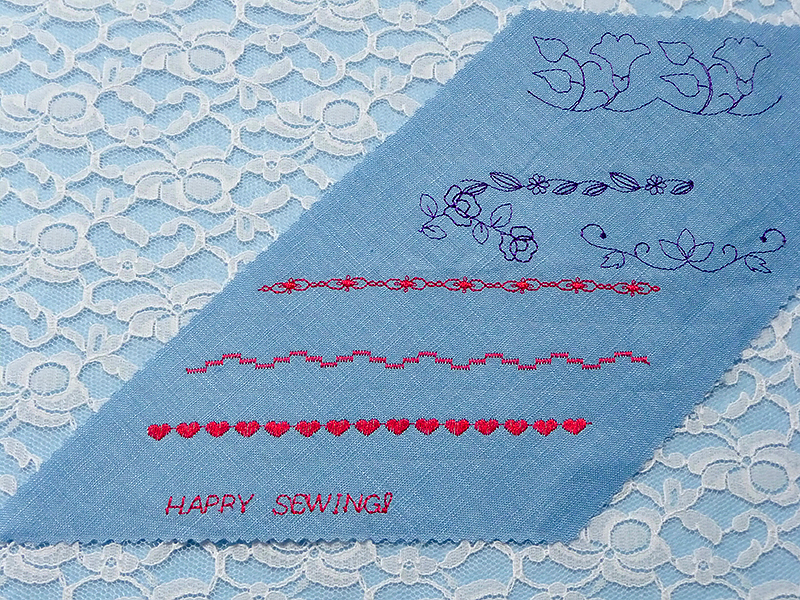
The monogramming foot is designed for decorative stitching and for sewing out lettering and characters, (commonly known as monogramming) patterns in your machine. While there are some utility stitches mixed into the decorative menu, foot N is primarily for decorative patterns and stitches that do not lay totally flat on the fabric. See examples of various stitches from different Brother machine models in Figure #1a, Figure #1b, and Figure #1c.
Figure #1a
Figure #1b
Figure #1c
Important Tips: Unless you are stitching stiff or firm fabric, you’ll likely have the best results when using foot J for utility stitches. If you select foot N in place of foot J, be sure to test your stitching on fabric scraps. Fabric should be well stabilized when stitching decorative and character stitches. Essentially, you are creating mini embroidery without a hoop. Be sure to test stitches on fabric scraps and add stabilizer as needed.
Below are features that make foot N ideal for stitching decorative patterns and characters.
The N foot is a genuine Brother Accessory, made from quality materials and designed to use with patterns included in the Decorative and Character/Monogram menus of your Brother embroidery machine.
This wide, snap on foot has a 7mm opening in the center.
The clear view in the center provides excellent visibility.
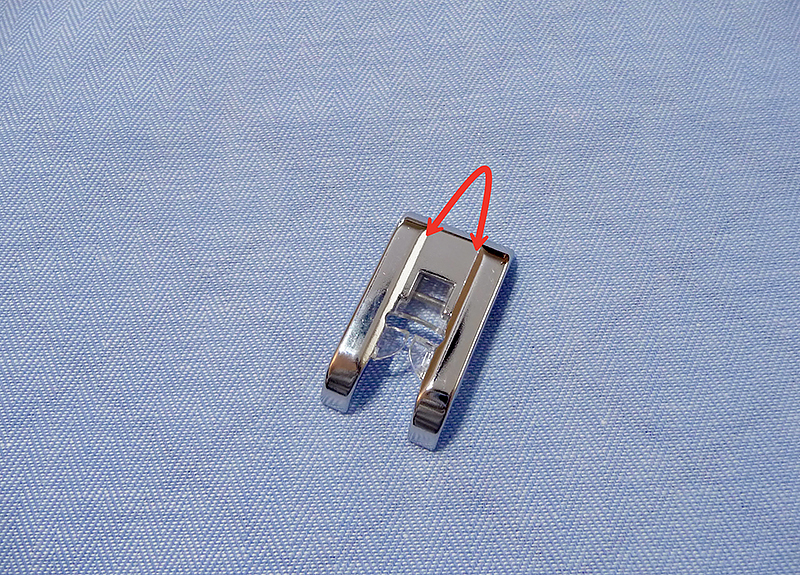
Designed with a deep groove on the bottom side, the monogramming foot slides easily over bulky decorative stitches.
Use the monogram foot for satin stitching with a dense zigzag, and your stitches will flow smoothly under the deep groove on the foot.
Dash lines on the foot show where stitching starts and can also be used as an alignment guide when pivoting a corner.
Notice the clear view in the center of the foot along with dash lines that show where the stitching starts. See Figure #2.
Figure #2
The deep groove extends from the front all the way to the back of the foot. See Figure #3.
Figure #3
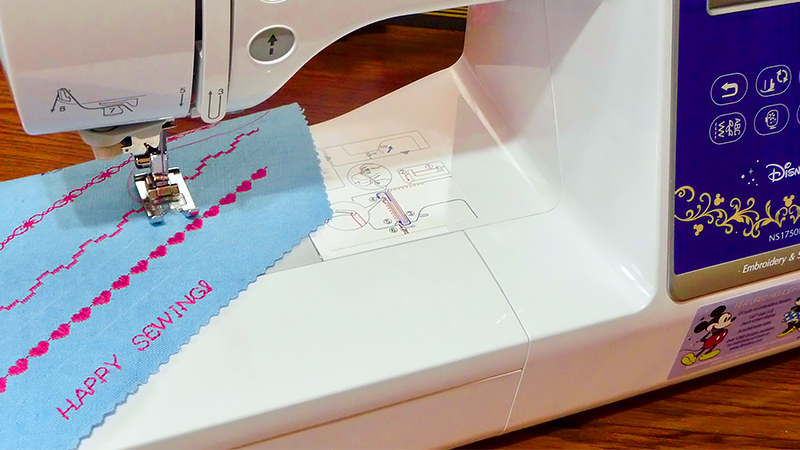
Decorative sewing stitches on some Brother models fit within the 7mm opening on the foot. On other Brother models, you’ll find multi-directional stitches where the feed dogs move from side to side as well as front to back, forming large decorative patterns. The oversized base of sewing foot N helps keep the fabric flat and secure while these large stitches form on the fabric. See examples of 7mm stitches in pink and large, and larger multi-directional decorative patterns in purple in Figure #4.
Figure #4
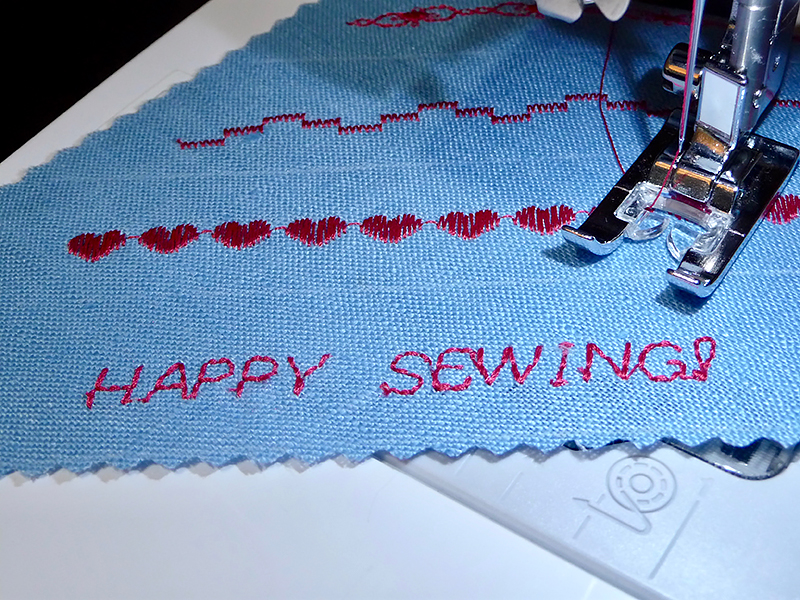
Now that you know more about your Brother N monogramming foot, experiment with the wide variety of decorative patterns and character stitches built-in to your machine. Have fun sewing with presser foot N! See Figure #5.
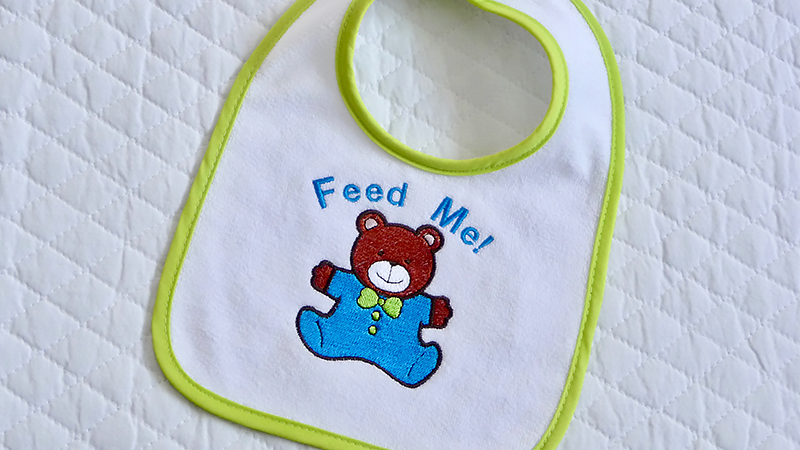
This month we’re featuring a few projects for the precious little ones in your life, starting with a cute embroidered baby bib. The Brother Free Design for this Month is an adorable bear design. It’s sized just right for most baby bibs. Read through this tutorial and you’ll learn about font editing features found in many Brother sewing machine models. You’ll also find tips for improving your embroidery skills throughout the instructions. While your Brother embroidery machine may not look exactly like the images shown here, I suggest you compare names of the keys on the screen to those found in your own machine to learn more about these features and put them into practice. Exploring embroidery font features makes this project perfect for sewing beginners and beyond. Are you ready? Let’s go sew!
Materials and Supplies:
Brother sewing and embroidery machine. Note: Machine featured in this project is the Brother NV 180. You can use any machine with 4-inch hoop capability.
Brother Embroidery Threads and Bobbin Thread for embroidering.
SA5929 Brother Cut-Away stabilizer cut to fit hoop size.
Temporary adhesive spray specifically for machine embroidery.
Plain low nap baby bib, sized large enough for featured design.
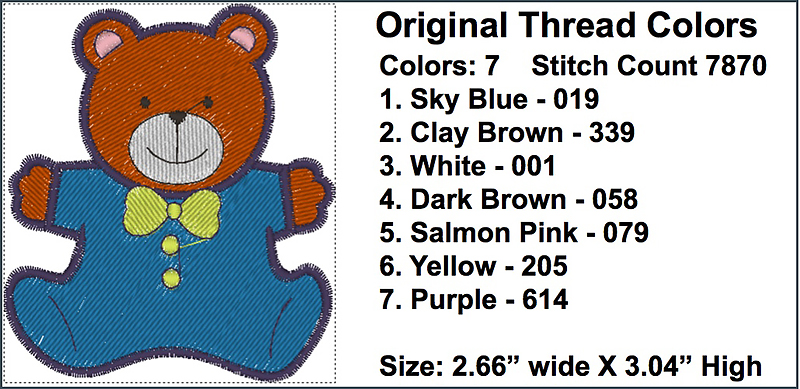
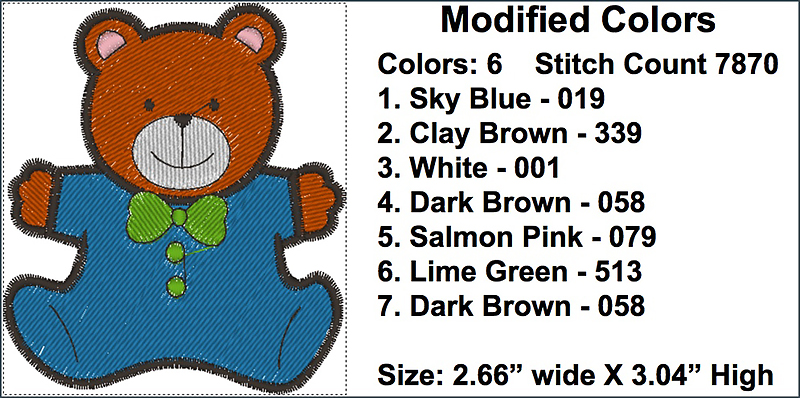
Brother Free Design for March. See Figure #1a for original thread color and stitch information. See Figure #1b for modified colors.
Figure #1b
Basic steps for creating embroidered baby bib:
Prepare bib for embroidery and hoop with stabilizer.
Create design using edit mode of sewing machine for changing size and configuration of lettering.
Embroider design and remove stabilizer.
1. Transfer design to machine. Create a combination design with bear and lettering as follows:
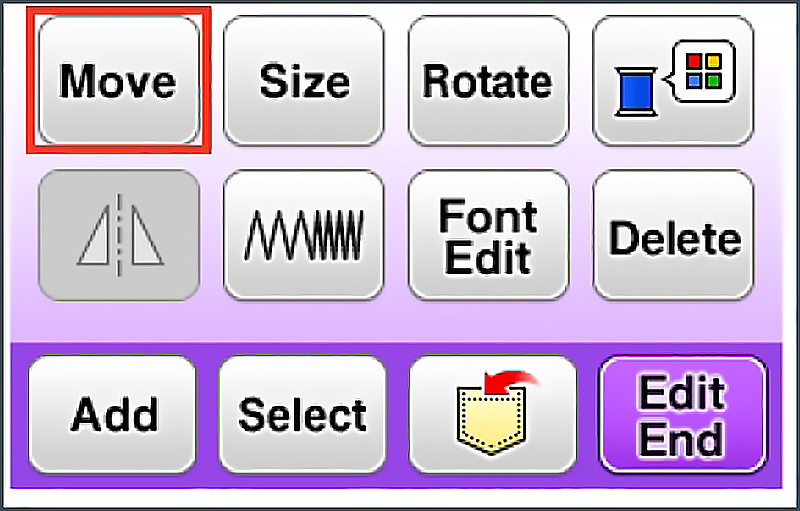
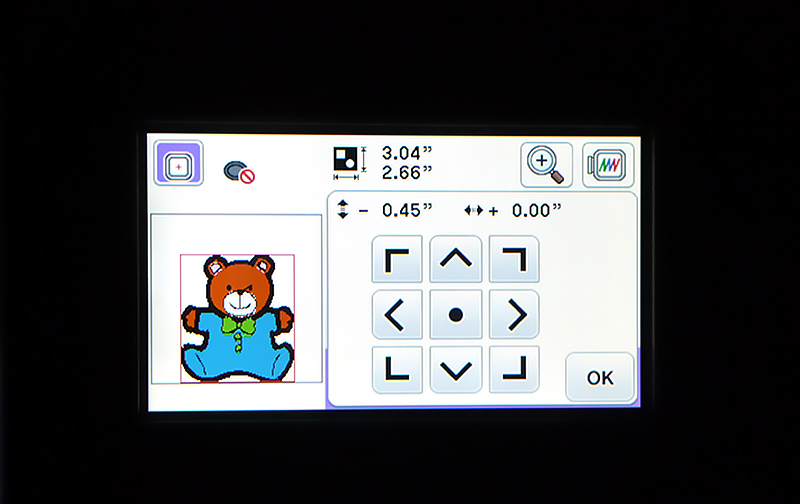
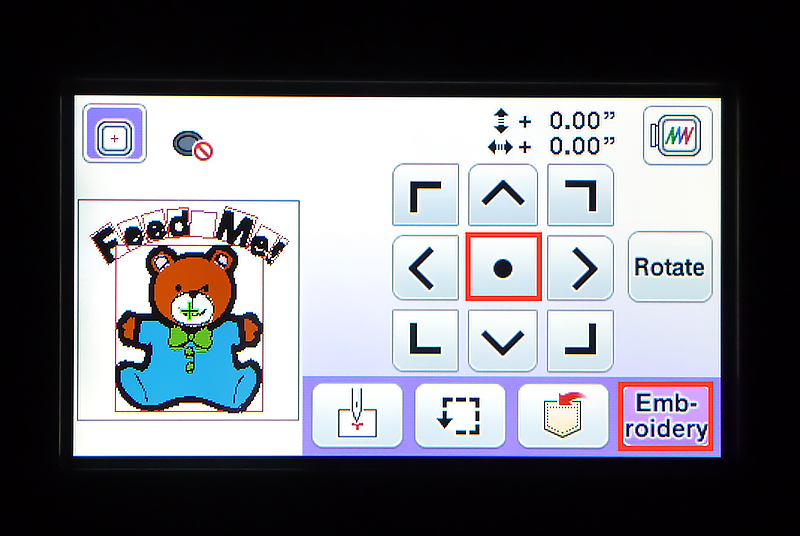
Select design, touch Set and then touch the Move key. Use arrow keys to move design to bottom of hoop and touch OK. See Figure #2a and Figure #2b.
Figure #2a
Figure #2b
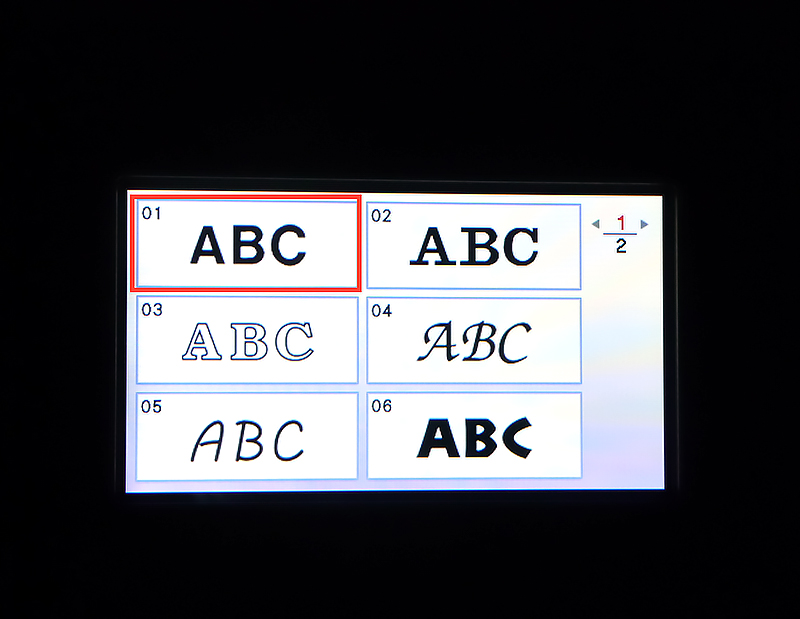
Touch Add and select a block style font from the font menu. See Figure #3a and Figure #3b.Tip: Block style fonts work better than fonts with thin columns on this low nap fabric.
Figure #3a
Figure #3b
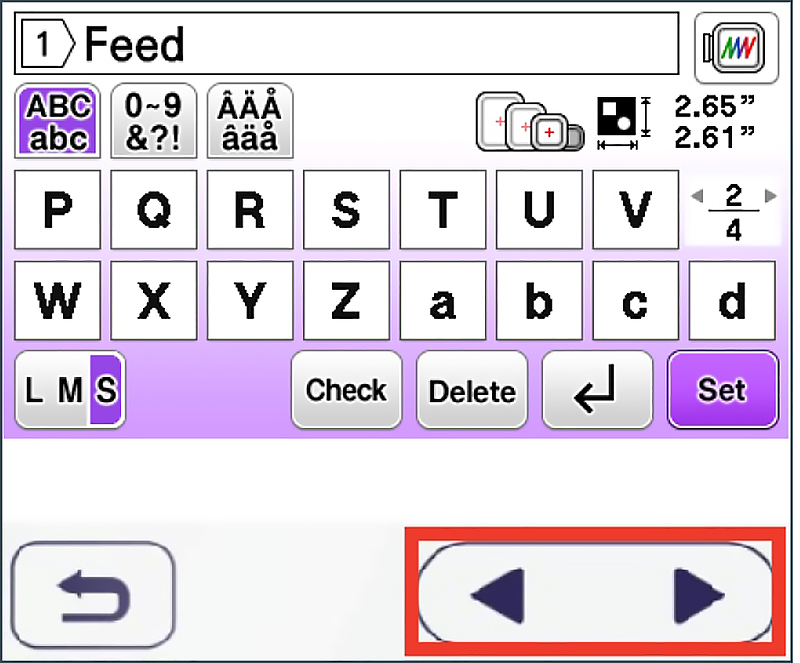
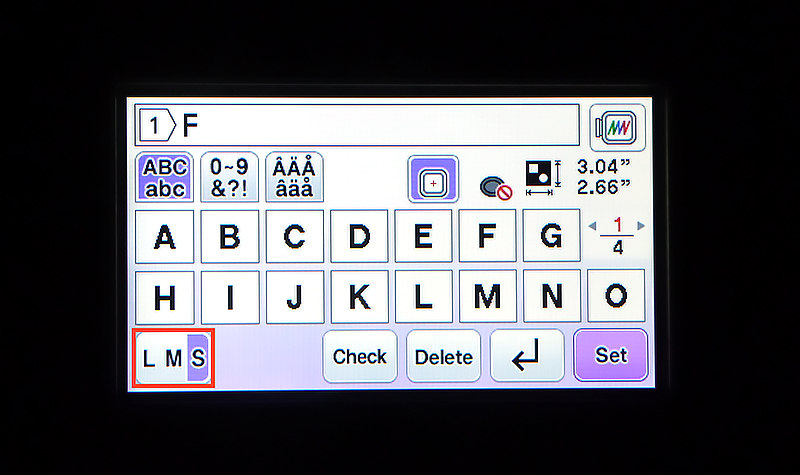
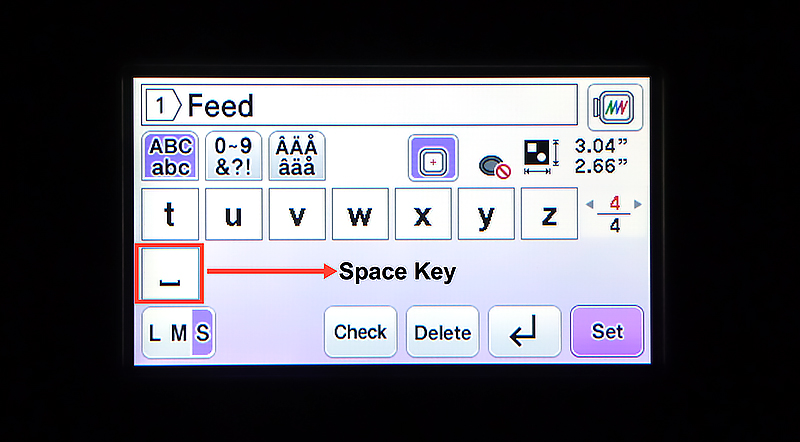
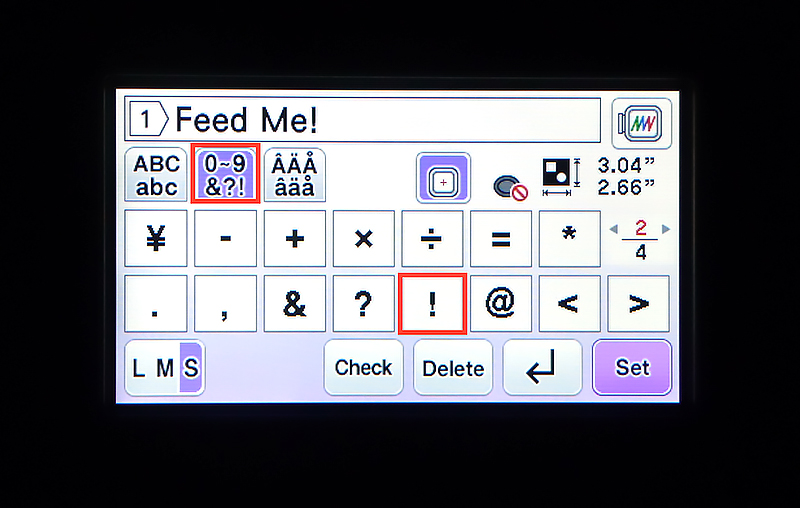
Program lettering using small font size, using arrows on machine to navigate through the lettering screens to select both upper and lower case letters. Add a space between the two words, and an exclamation point at the end. Tip: Be sure to select S for small, right after selecting the first letter. See Figure #4a, Figure #4b, Figure #4c, and Figure #4d.
Figure #4a
Figure #4b
Figure #4c
Figure #4d
Tip: I like to start with smaller, rather than larger lettering and then use the sizing feature to increase the lettering size to fit the hoop area. This is especially helpful when using the Array feature, as larger lettering will sometimes prevent you from using various array functions. Here is my formula: Start small, add the array, and then change sizing last.
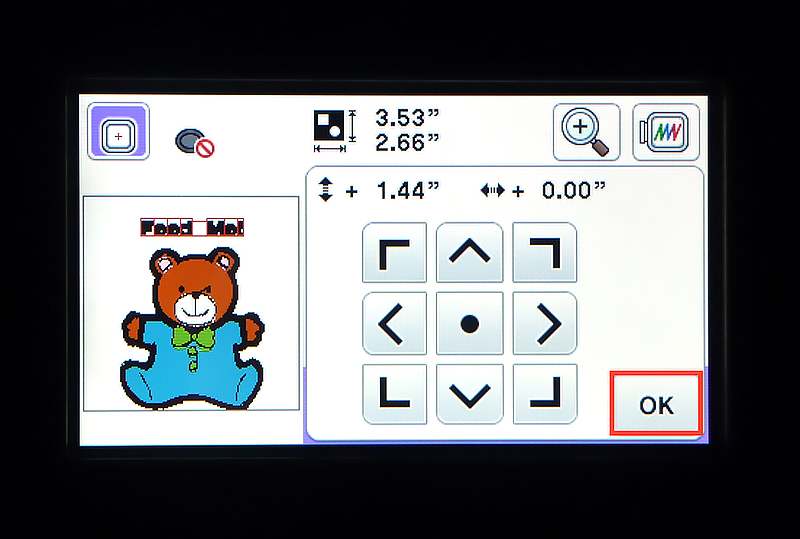
Set your lettering, touch move key, and use arrow keys to move lettering above the bear head. Touch OK. See Figure #5.
Figure #5
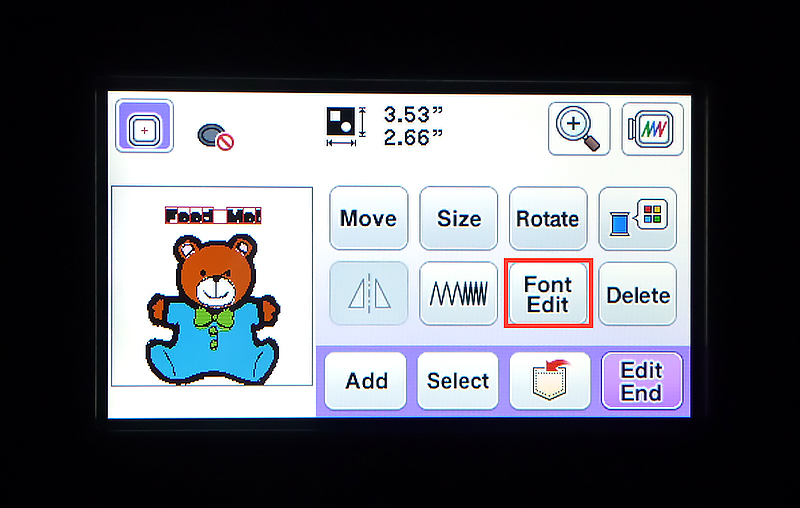
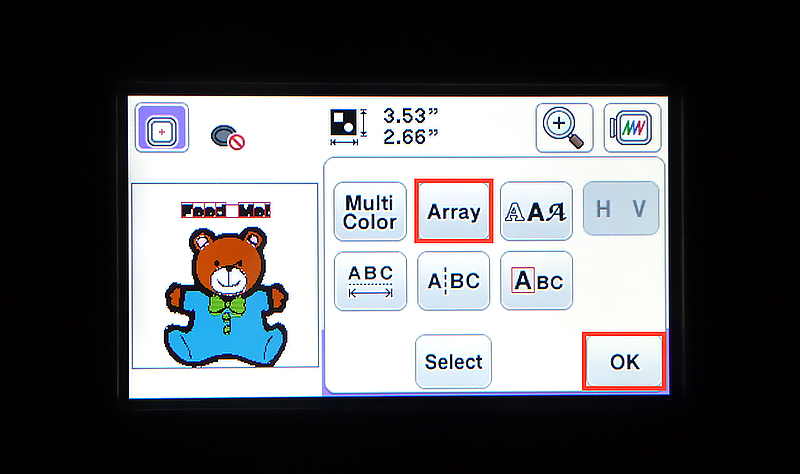
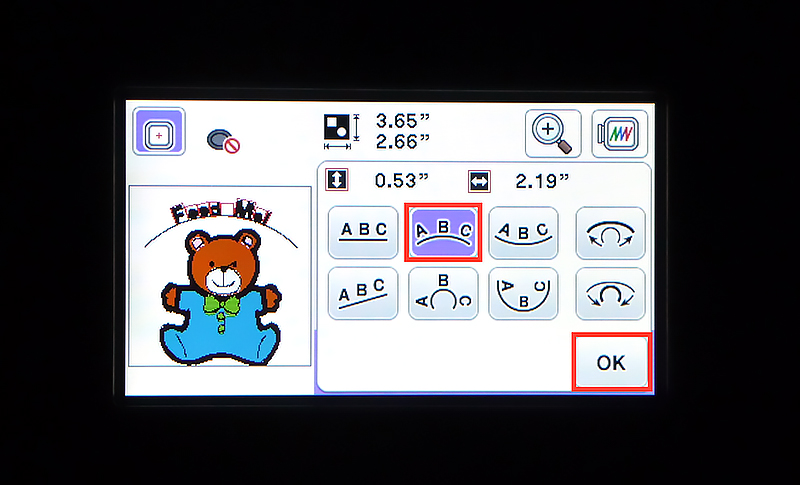
Touch font edit key. Touch array key. Curve lettering over bear head. Touch OK, then OK again to return to embroider edit screen. See Figure #6a, Figure #6b, and Figure #6c.
Figure #6a
Figure #6b
Figure #6c
Tip: There are many more options for editing embroidery fonts. Watch for more in future tutorials!
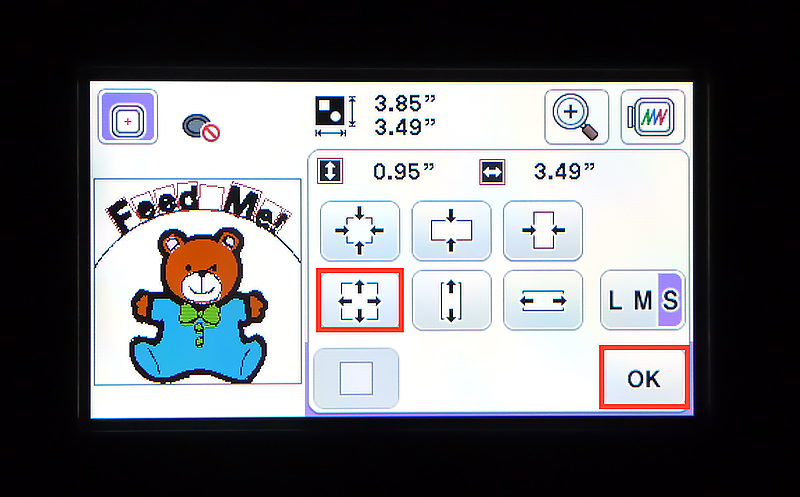
Touch size key and increase lettering until the machine stops at the maximum size. Touch OK. See Figure #7.
Figure #7
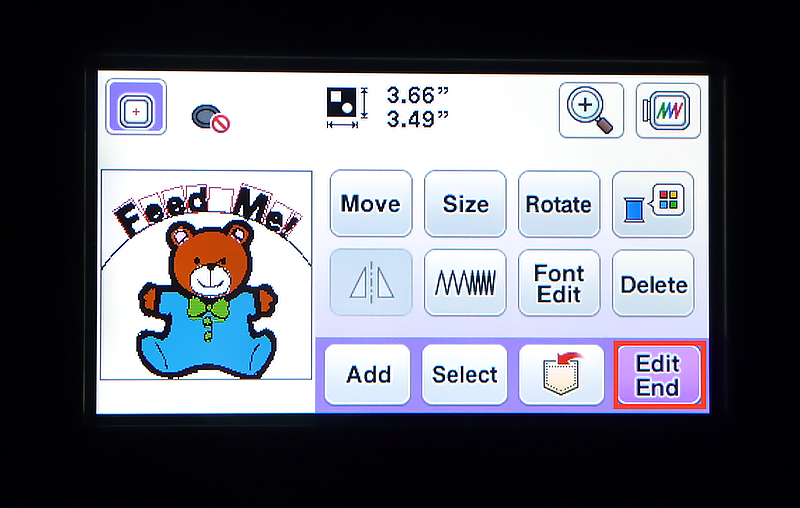
2. End editing. Center combination on the screen, then touch Embroidery. See Figure #8a and Figure #8b.
Figure #8a
Figure #8b
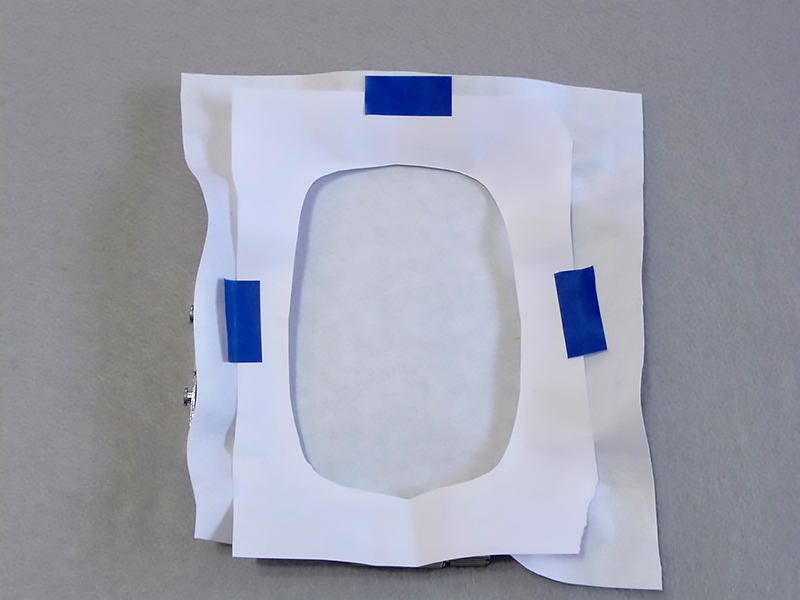
3. Hoop cut-away stabilizer and lightly spray with adhesive, following manufacturer’s directions on the can. Note: It is very important to avoid over spraying. Tip: To keep adhesive from getting on the hoop, I like to cut a window in a piece of scrap paper and tape it over the hoop to protect the edges. Spray over paper, then remove and discard. See Figure #9.
Figure #9
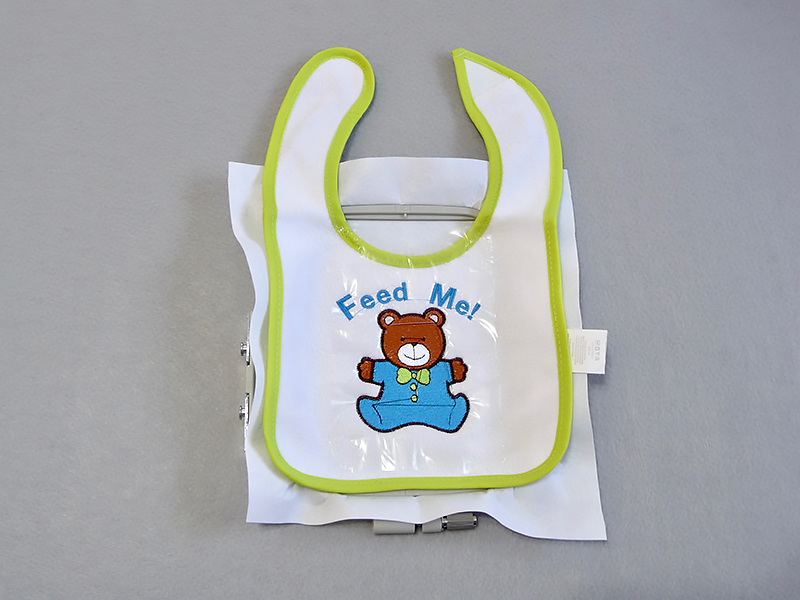
4. Center bib in hoop, securing it to the tacky surface. Place water-soluble over the bib to help tame the nap and keep the design from sinking in. Tip: Lightly dampen the outer edges of the stabilizer to make it tacky and it will adhere to your fabric. Embroidery design on bib. See Figure #10.
Figure #10
5. Remove from hoop and trim stabilizer, leaving a margin of ½ to 1-inch of stabilizer around the design. Tip: Bonding from temporary spray adhesive will usually disappear within 2 to 5 days. To dissipate earlier than that, iron the sprayed fabric with a warm dry iron. This type of adhesive does not wash out. You’ll want to make sure spray adhesive is gone before thoroughly washing out water-soluble as recommended on the package.
You are finished with embroidering your baby bib! Enjoy!
Options and ideas:
Feel free to sew your own multi-layer bib. Embroider on the top piece then add a lining to hide stitches on the wrong side.
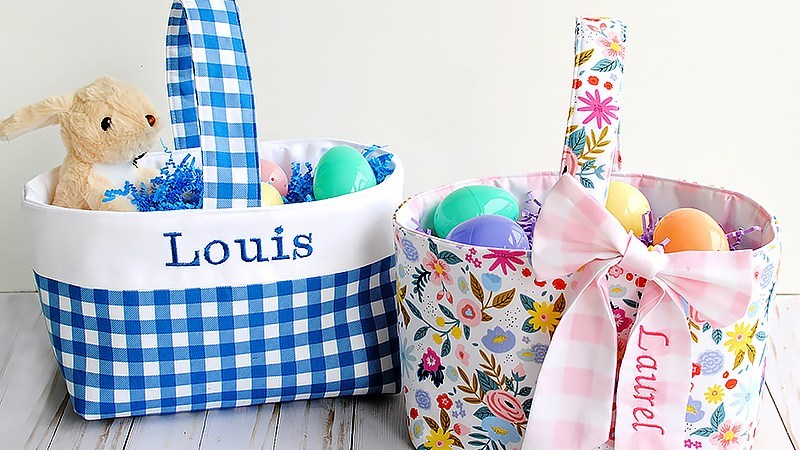
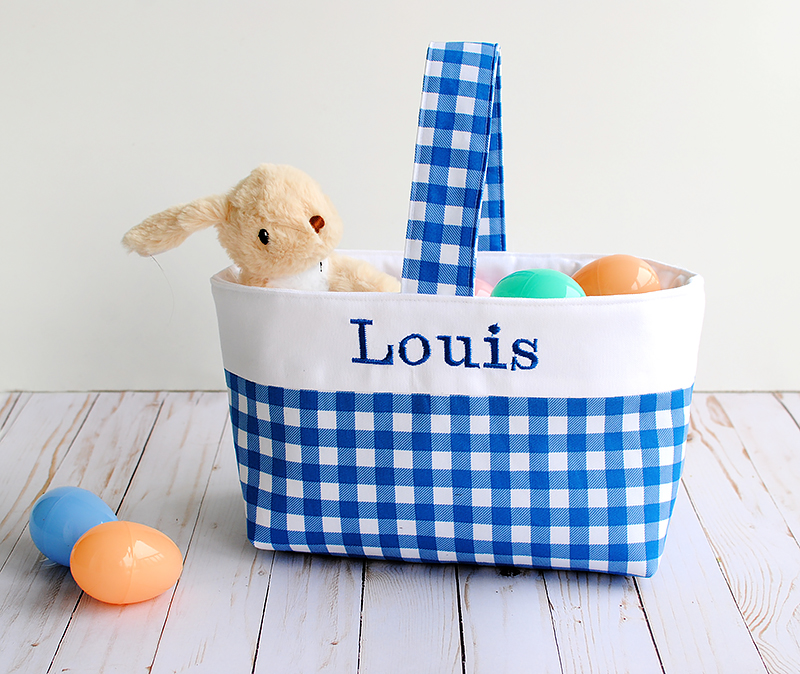
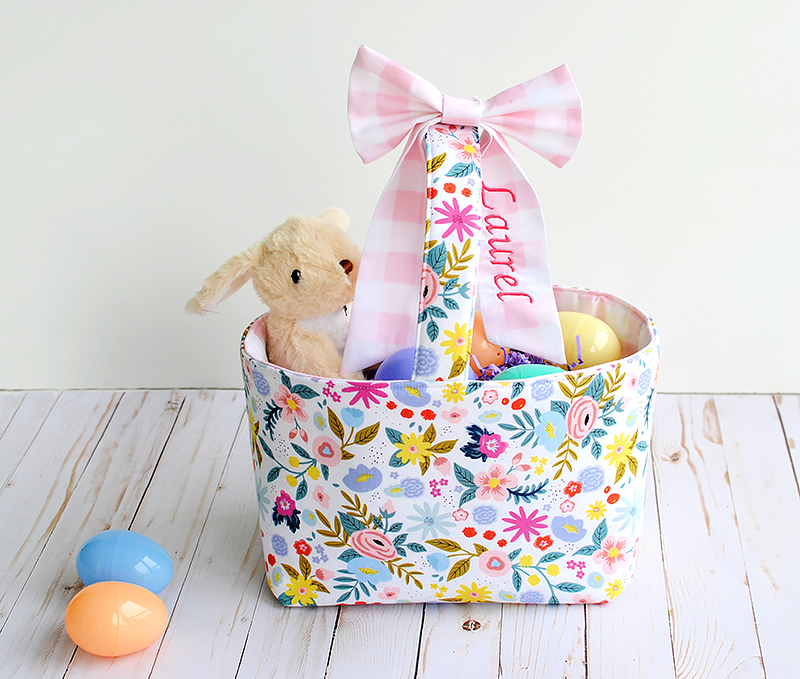
With Spring just around the corner, I thought I’d share how to sew a fabric Easter basket. These homemade Easter baskets aren’t just for Easter though – they make great gifts for all different occasions, holidays, and themes! I sew these DIY fabric baskets for everything from baby showers to teachers’ gifts and more. Add machine embroidery for a nice custom touch. Use these homemade fabric baskets for custom storage bins as well! Get the tutorial below on how to sew your very own fabric Easter basket.
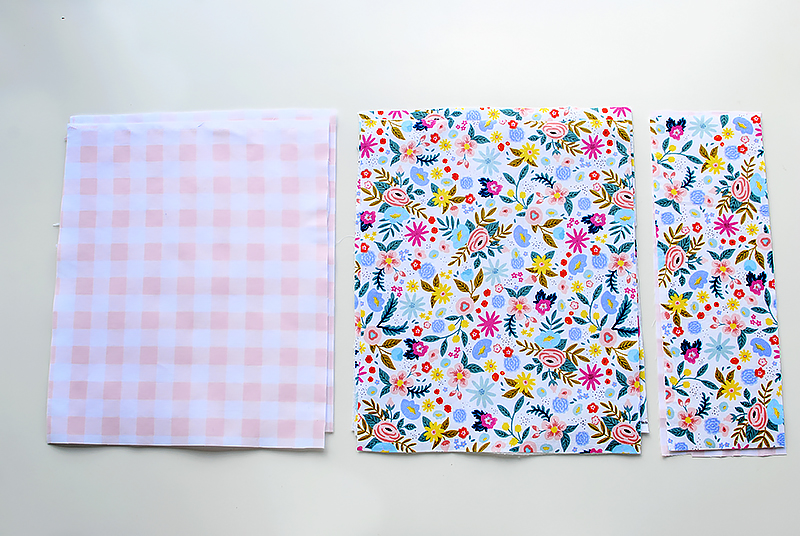
Cutting: Exterior: 2 pieces that measure 17” (wide) x 13” long Liner: 2 pieces that measure 17 x 13” Fusible Fleece: 4 pieces that measure 17 x 13” Strap: 1 piece 17 x 6” Fusible Fleece: 17 x 6”
For the 2 piece (Blue Checkered) Exterior: Top section: 17 x 3 x ¾” Exterior: Bottom section: 17 x 10 ¼” The rest of the pieces measure the same as above.
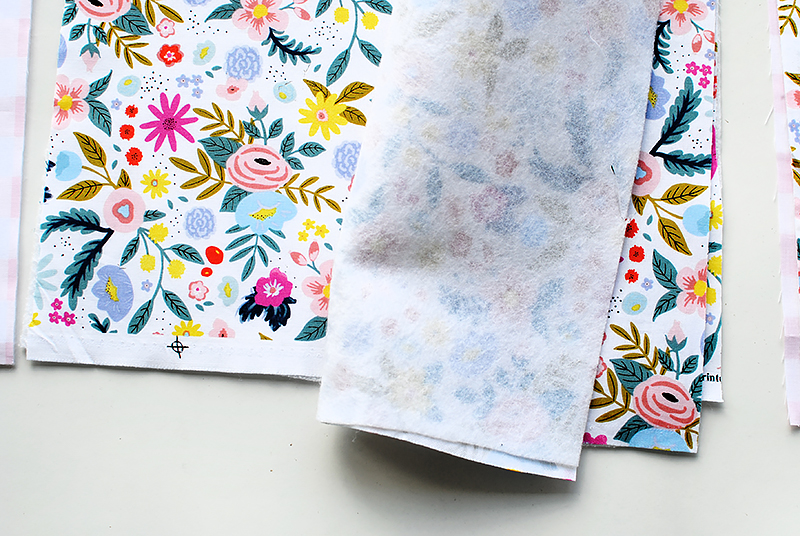
Fuse the fusible fleece to the wrong side of all pieces.
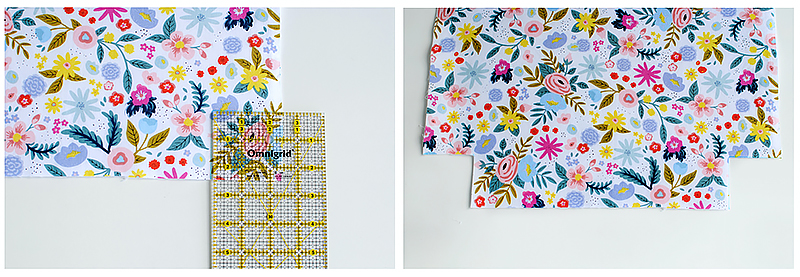
Use a grid ruler and mark off a 3” square at the bottom corners for both exterior and liner and cut.
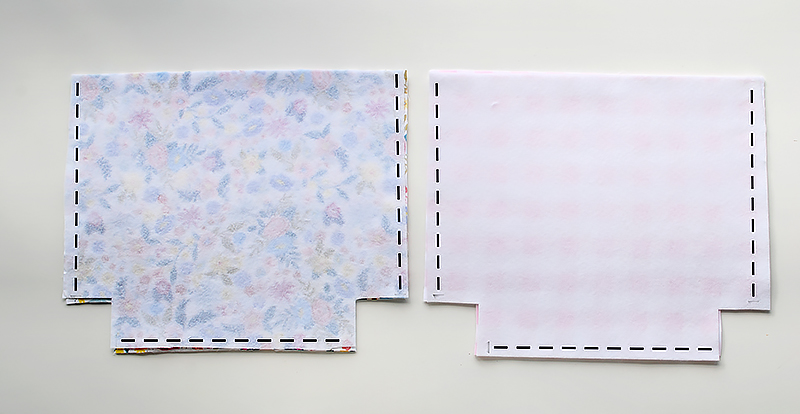
Place exterior and liner pieces right sides together. Stitch the sides and bottoms with a 1/2” seam allowance.
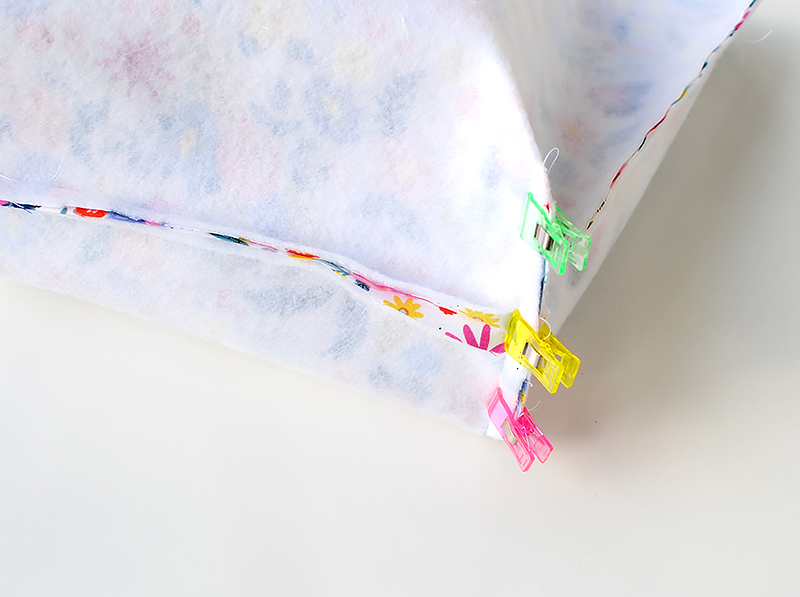
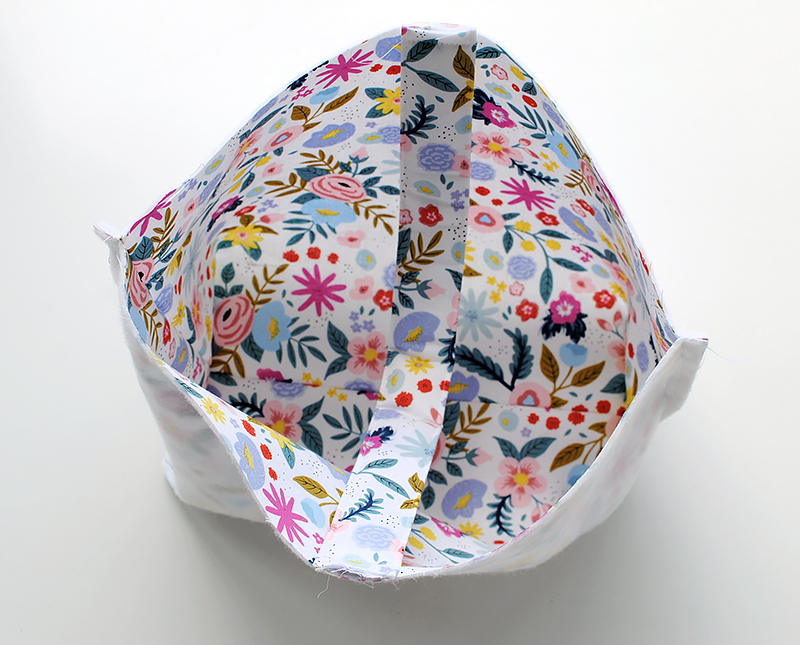
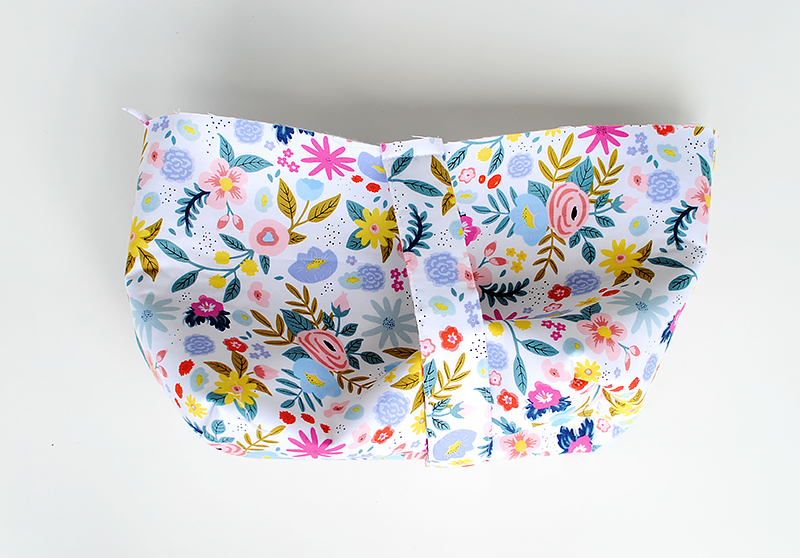
For the corners: With right sides together, connect the seam so it’s centered to the other side and clip or pin.
Stitch together and repeat for all corners. (1/2” seam allowance).
The bottom should look like this when complete.
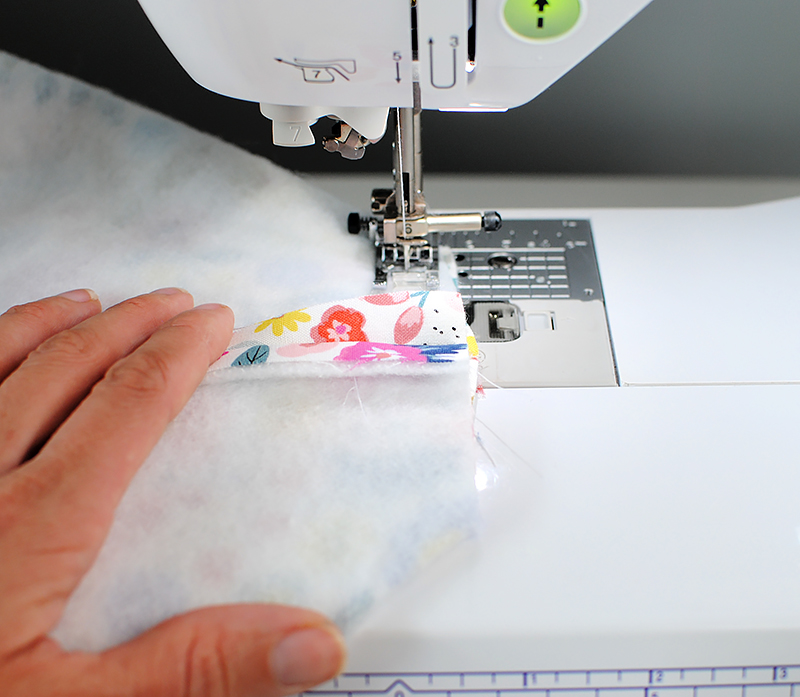
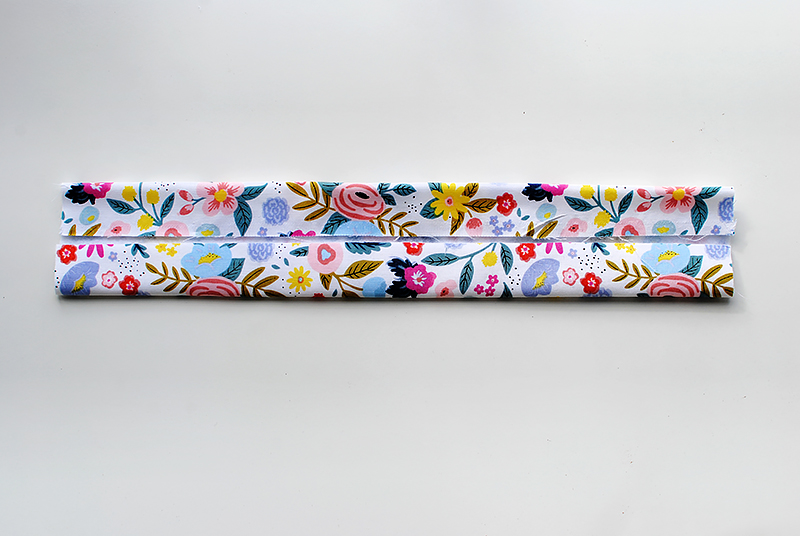
Now let’s sew the handle.
Fuse the fleece to the wrong side.
Fold the sides into the center and press.
Fold in half so the edges are together and press.
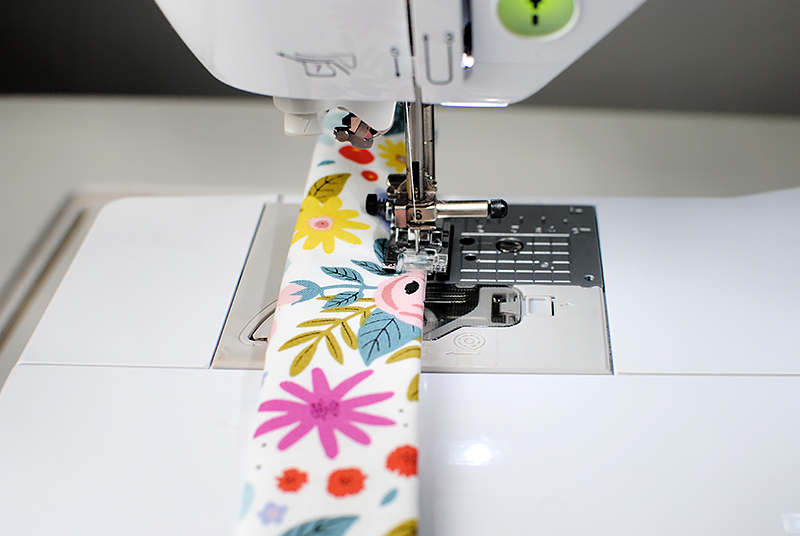
Top stitch down both sides (about 1/8” from the edge).
Find the center front and center back of the basket and mark. Place the handle right sides together with the basket over those marks and sew (1/4” seam allowance).
Flip the basket so right sides are out including the handle.
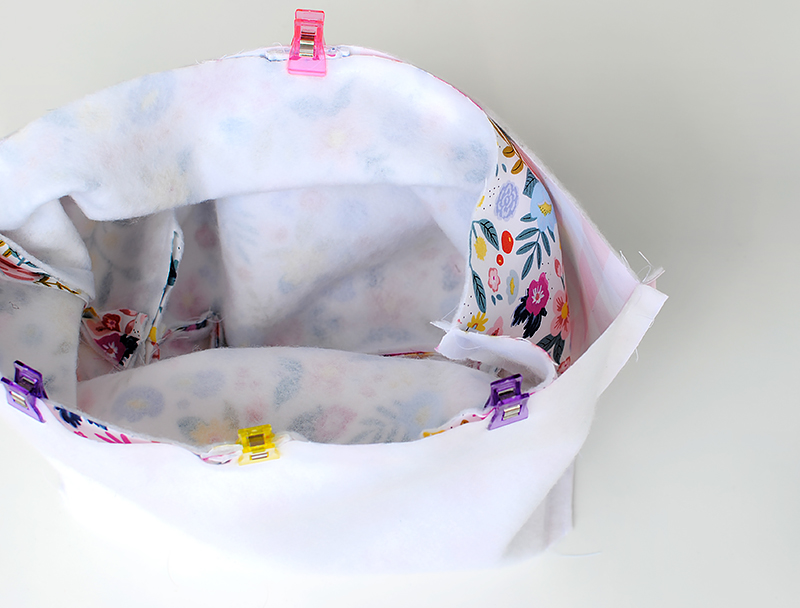
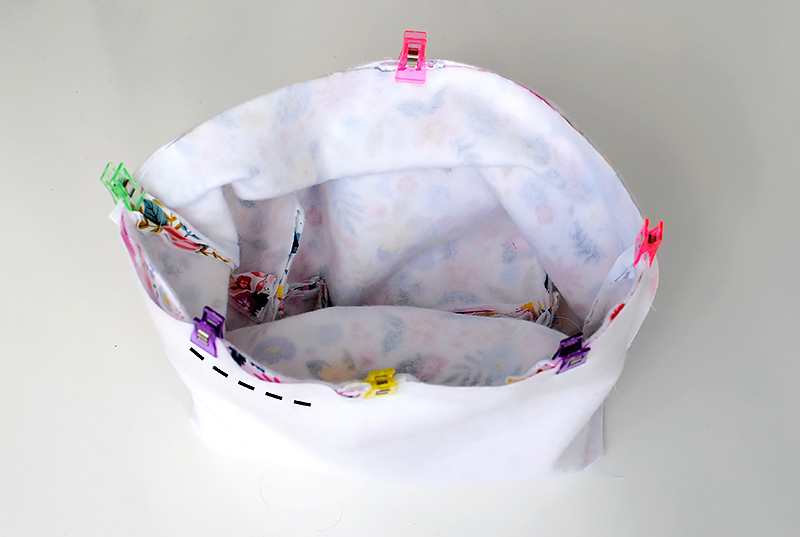
Place the basket into the liner so the right sides are together. Attach seams to seams and pin or clip all the way around.
Sew ½” seam allowance all the way around the edge leaving a 3” opening just an inch off one of the handles. This will be the opening to flip right sides outs.
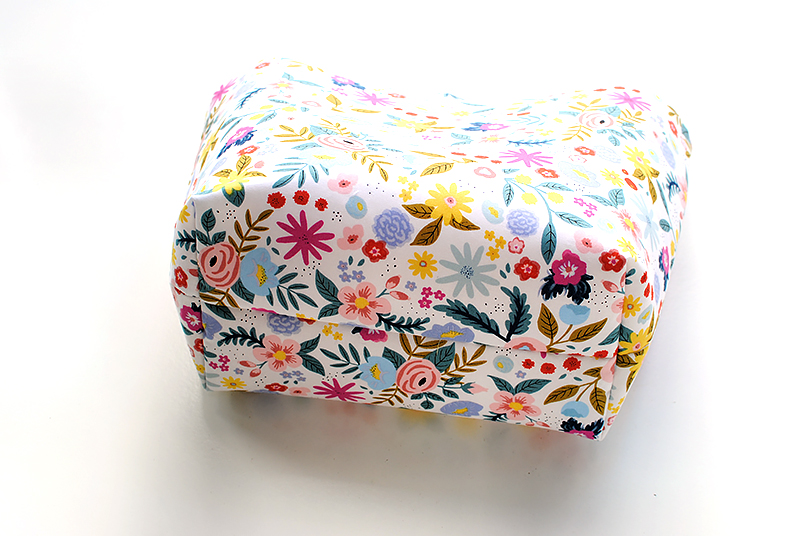
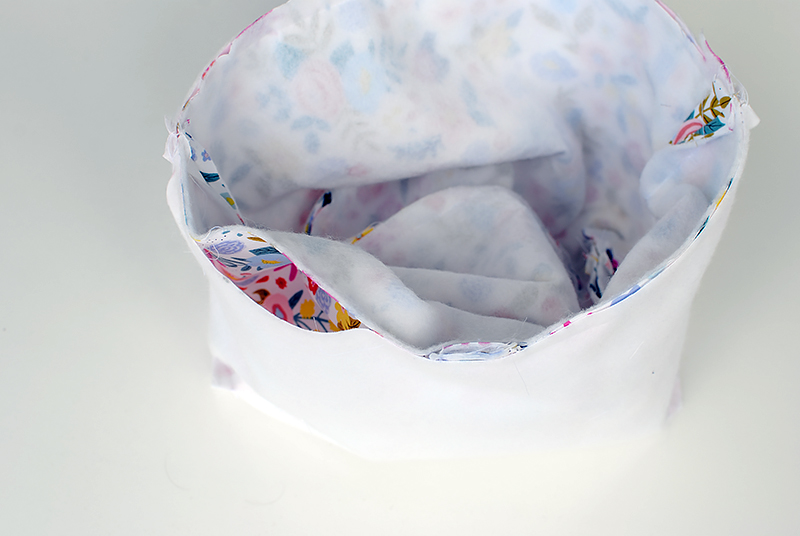
Flip right sides out through the opening.
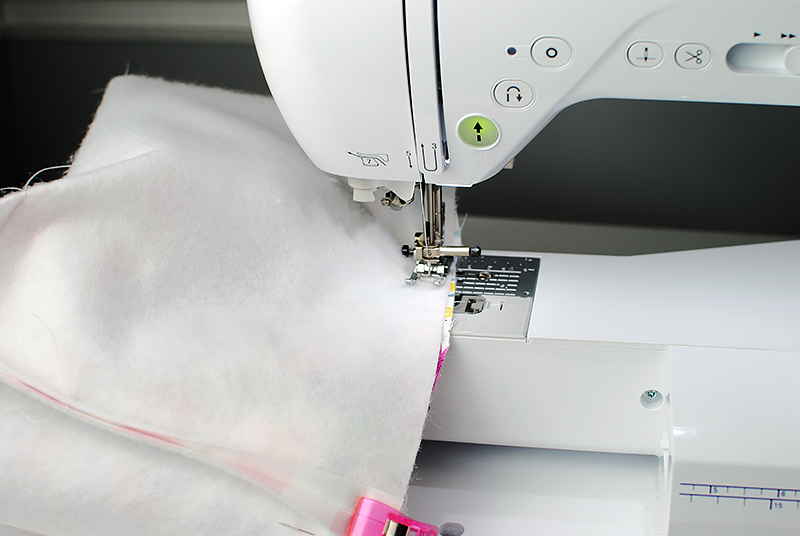
Press the basket. Top stitch with a 3.0 stitch length and just off the edge (1/8” or so) around the top edge of the basket, closing the opening as well.
Now fill your homemade Easter basket with all sorts of goodies. I sew these fabric baskets for gifts, but they’re also great to use as homemade storage bins. You can add some machine embroidery to customize them. For the blue checkered basket, I embroidered the name on the top section. I also embroidered a sash to tie around the floral basket. Make these for all different occasions: I love sewing them for party favors, Mother’s Day gifts, and more. Use your imagination and take your homemade gift baskets to the next level of fun!
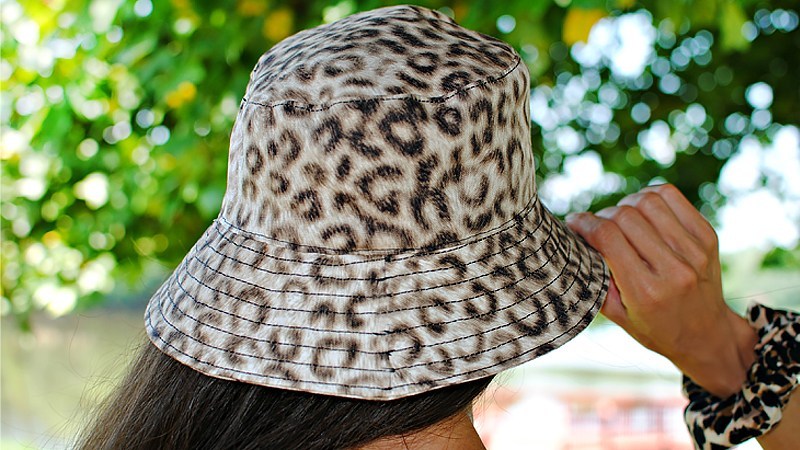
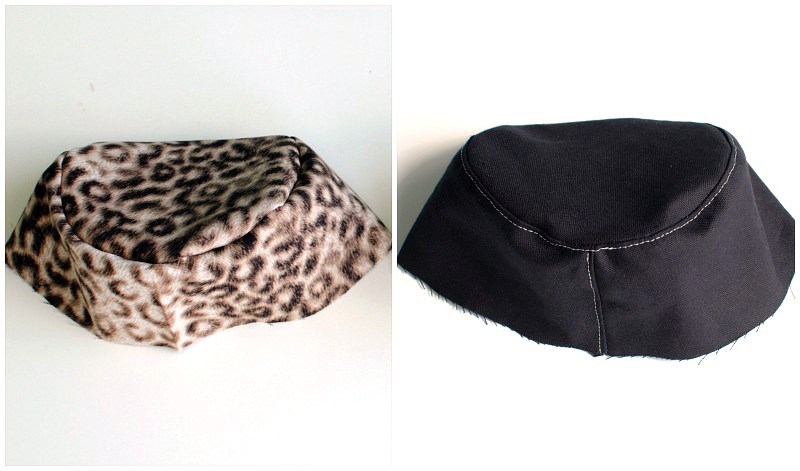
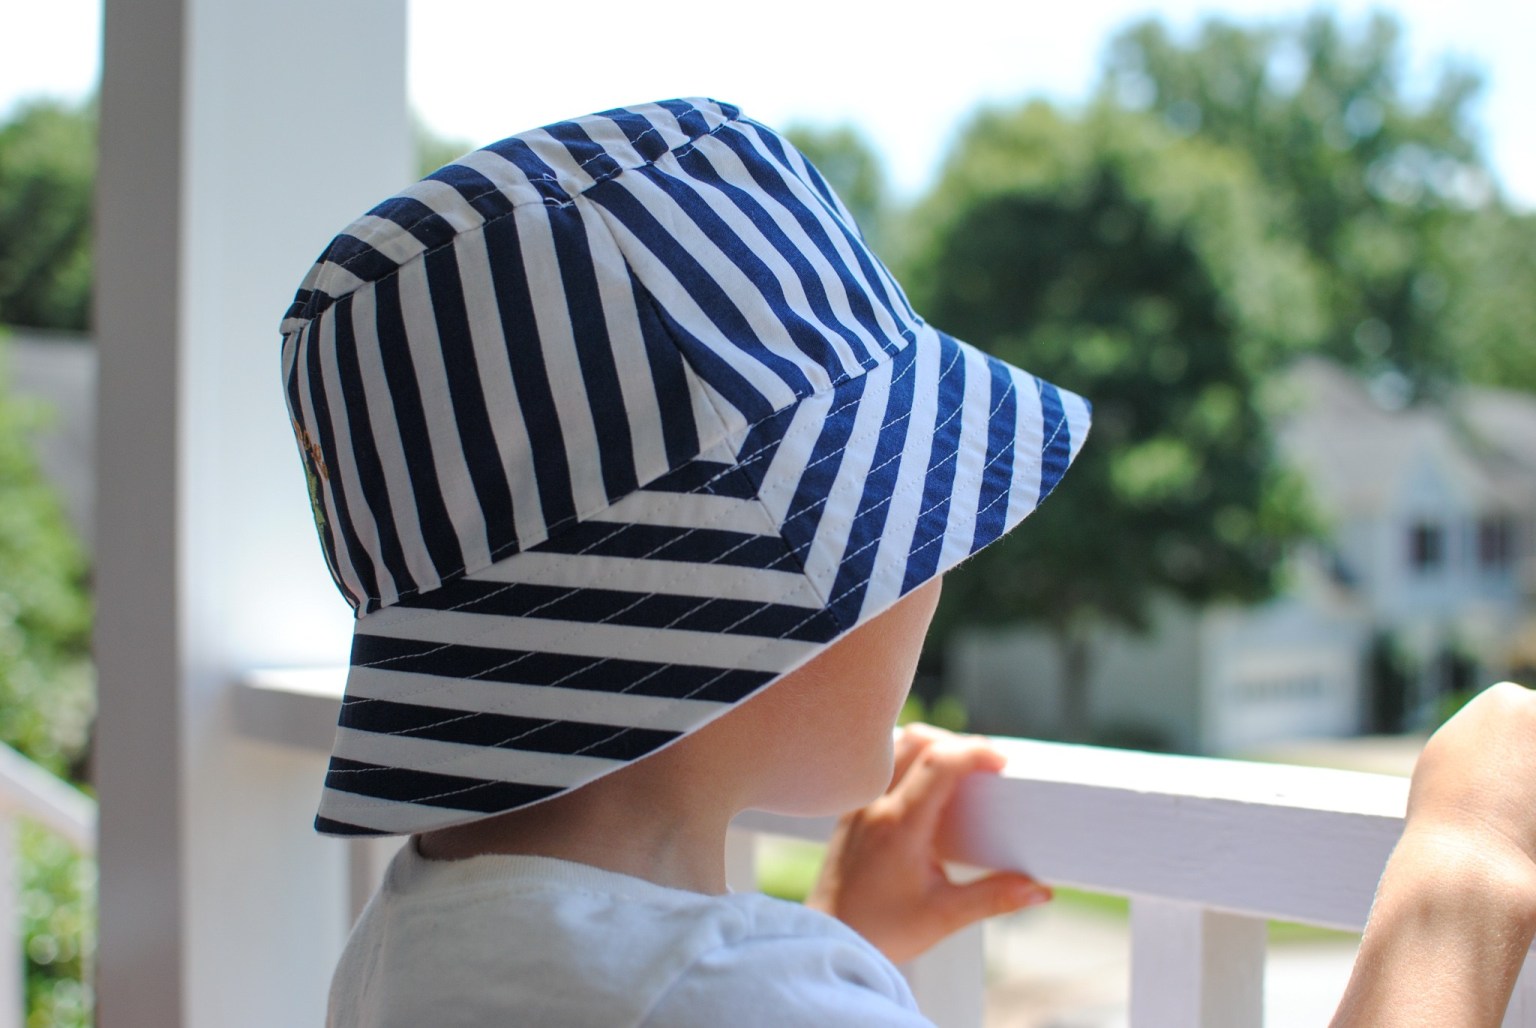
As a mother of 3 boys who love being outdoors, I’ve had my fair share of sewing bucket hats. In the Summer we spend most of our time outside near the water, at various sports, or just playing in the yard. I’ve made so many for my children but never really made one for myself. Seeing they’re on trend lately (90’s cool) I thought it would be fun to make one for myself this time. I even made it so it’s reversible. You can have so much fun with these! Get the details below and sew your own.
Supplies:
45” 5/8 yd. 60” 1/2 yd exterior fabric (I’m using a medium weight canvas)
½ yard liner fabric (I’m using a medium weight cotton
1/2 yard medium to heavy weight interfacing for brim. (*I did not use interfacing on the other parts because my fabric was sturdy, if you want you can stabilize the crown and the top).
*I drafted this pattern and it fit my head well. I am sharing the pattern but understand you may have to adjust to fit your measurements. I also suggest making a sample first to make the adjustments necessary before the main one. I had to do a couple at first. Feel free to use your own pattern as well.
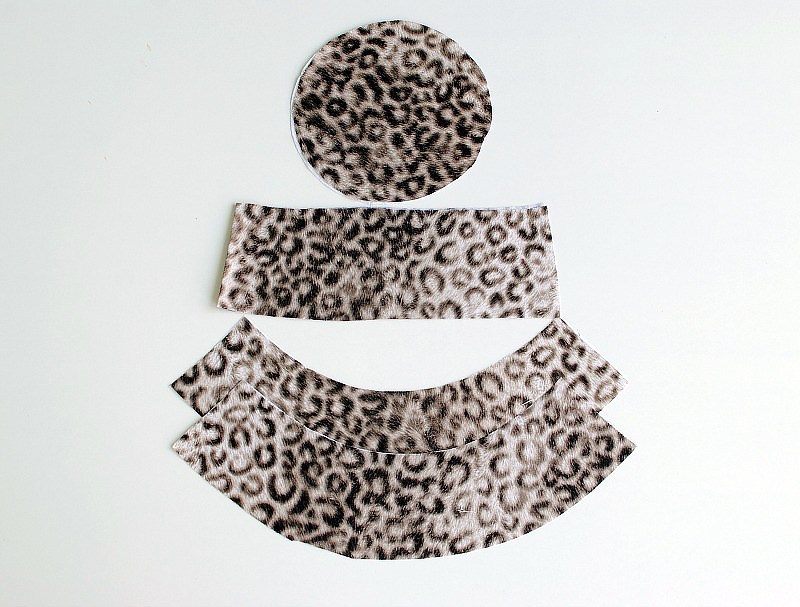
Cut out pattern for main, liner, and interfacing.
Press interfacing to liner of brim (mine are the same material).
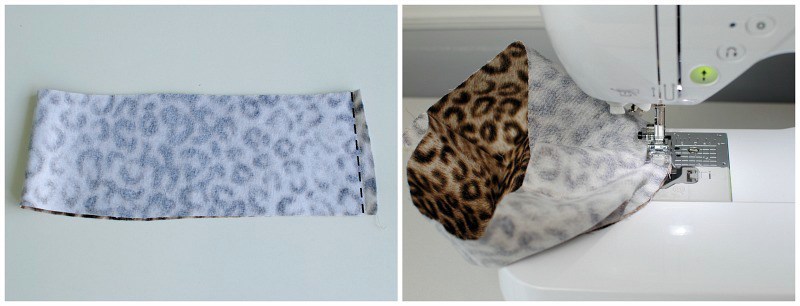
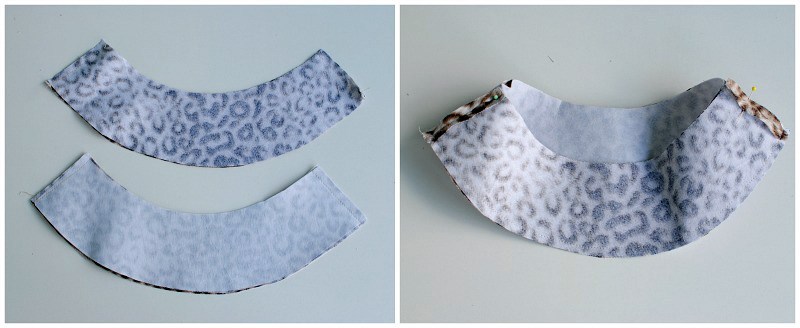
Stitch crown ends right sides together with a ½” seam allowance.
Press seam allowance flat.
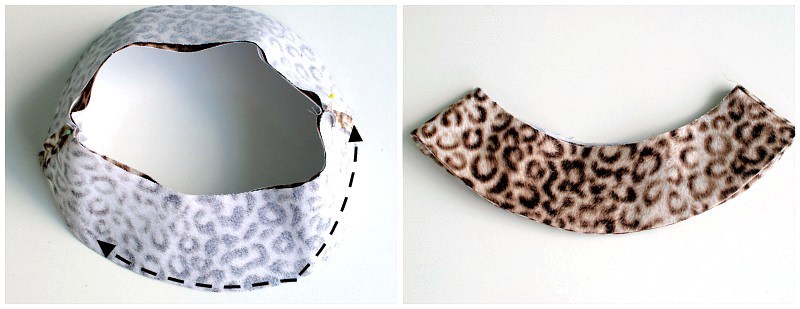
Pin crown to top (circle) right sides together, easing to fit if necessary.
Sew with 1/4” seam allowance all the way around.
Clip curve seam allowance if necessary.
Repeat for the liner.
Topstitch if you’d like around the top of the crown and the center seam.
For the brim.
Stitch side seams (RST) on both main and liner (1/4” seam allowance).
Place liner and main (RST) matching seams and stitch along bottom edge (1/4” seam allowance).
Clip seam allowance.
Flip right side out and press.
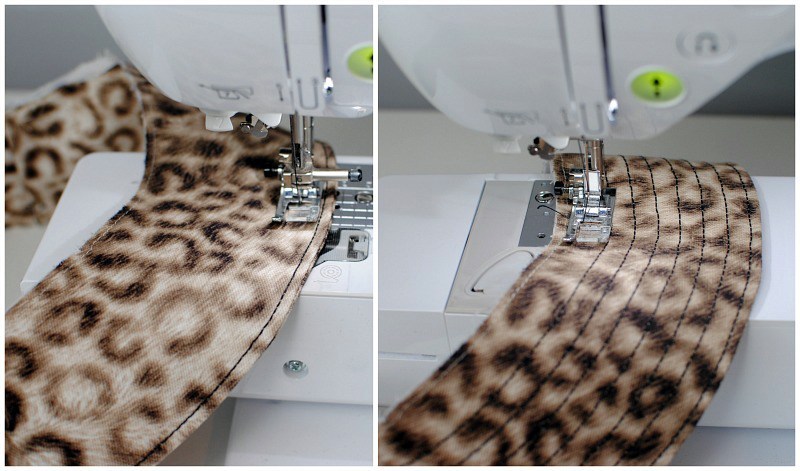
Baste stitch along top edge to keep raw edges together.
Start at seam and topstitch outer edge of brim. Stitch as many rows as it takes to get to the top. Spacing rows ¼” apart. (*use a medium weight thread for extra detail).
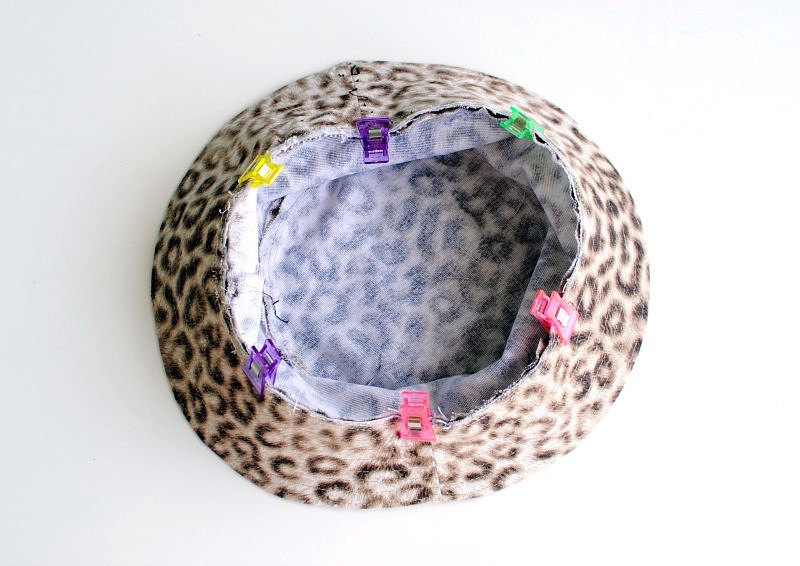
Pin brim to crown (RST). I had the seam of the crown in the center and the seams of the brim on the sides.
Stitch the brim to the crown (1/4” seam allowance).
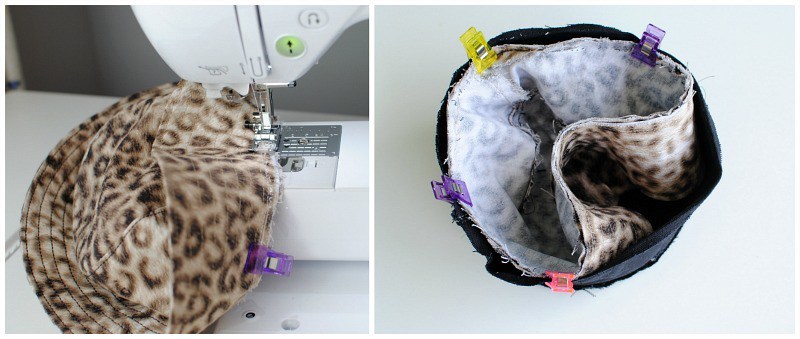
Place main hat (brim included inside the liner (RST) and pin
Stitch the liner and main together leaving a 3” opening (1/4” seam allowance)
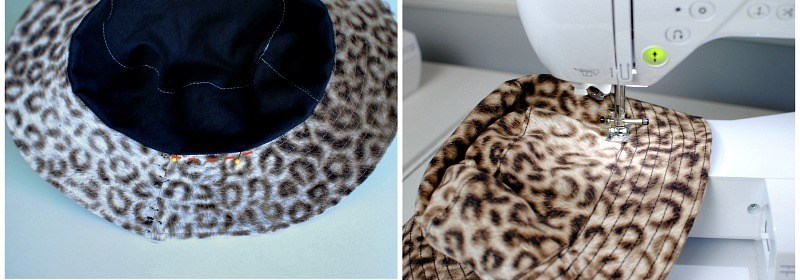
Flip right sides out through the opening.
Stitch the opening closed with a slipstitch or topstitch all the way around the edge to finish it.
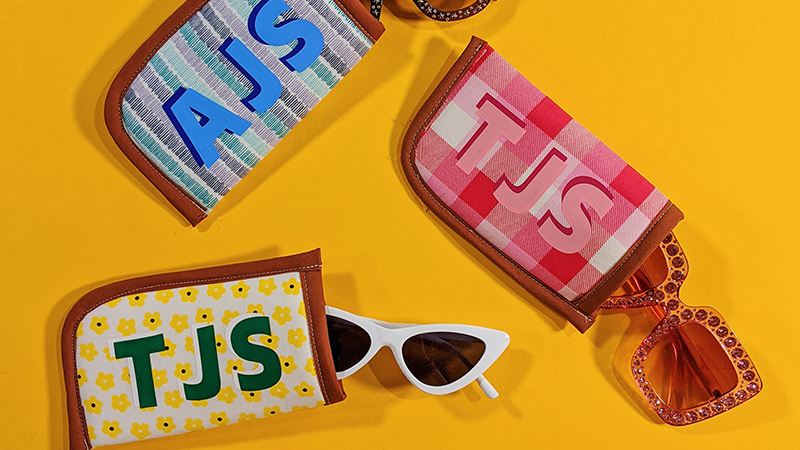
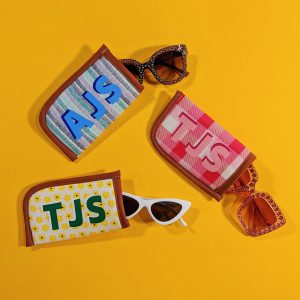
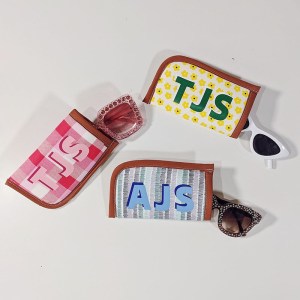
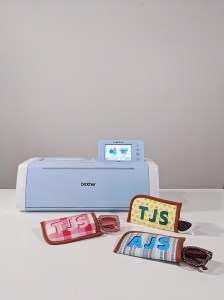
Want a quick project to try over the weekend? This eyeglasses case is it! I love how you can customize it with anyone’s initials. This eyeglass case makes for a great gift for your friends and family. Customize your DIY eyeglass case with your favorite colors and prints. The sky’s the limit! I know that you will enjoy this project. Have fun!
Supplies:
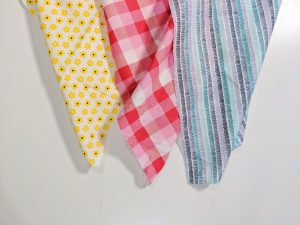
Fat Quarter Cotton Fabric or ¼ yard of Cotton Fabric
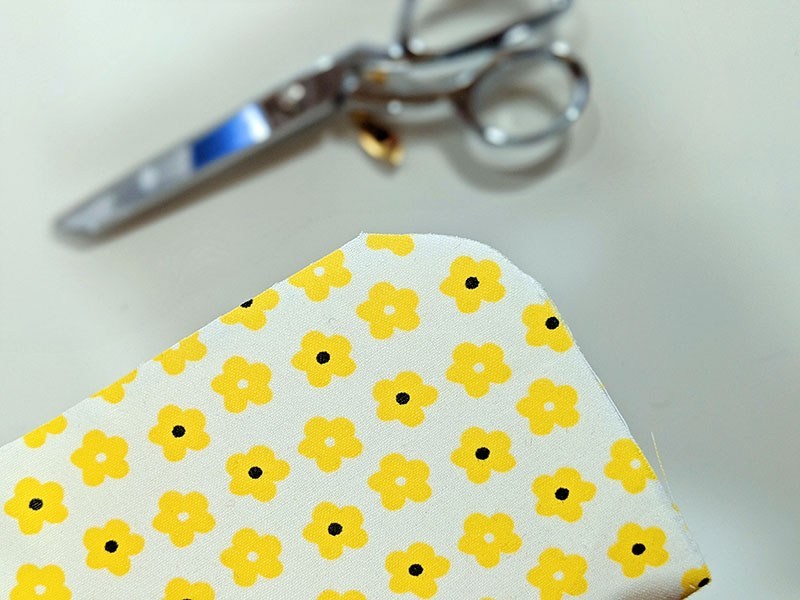
Cut two rectangles out of your fabric at 8” x 13.5”. On the bottom end of one corner, cut a curved corner.
Processed with VSCO with al3 preset
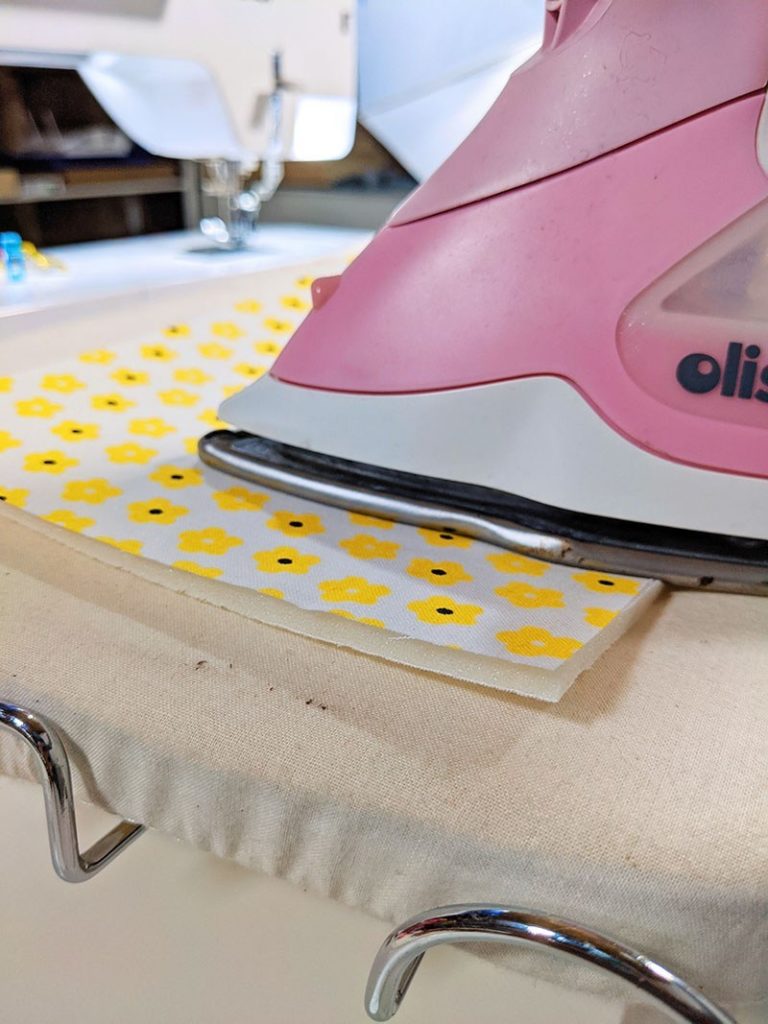
2. Cut one rectangle of your flex foam at the same measurement, 8” x 13.5”. 3. Adhere the fabrics to both sides of your flex foam with your iron. Make sure the right side of your fabric is facing out.
Processed with VSCO with al3 presetProcessed with VSCO with al3 preset
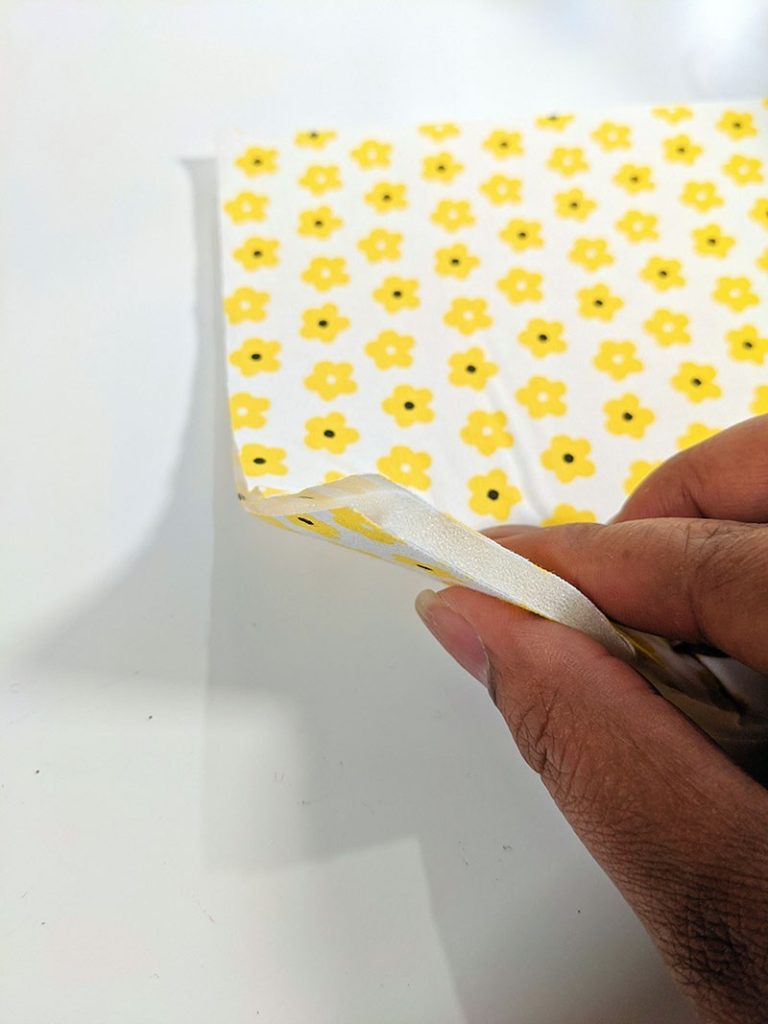
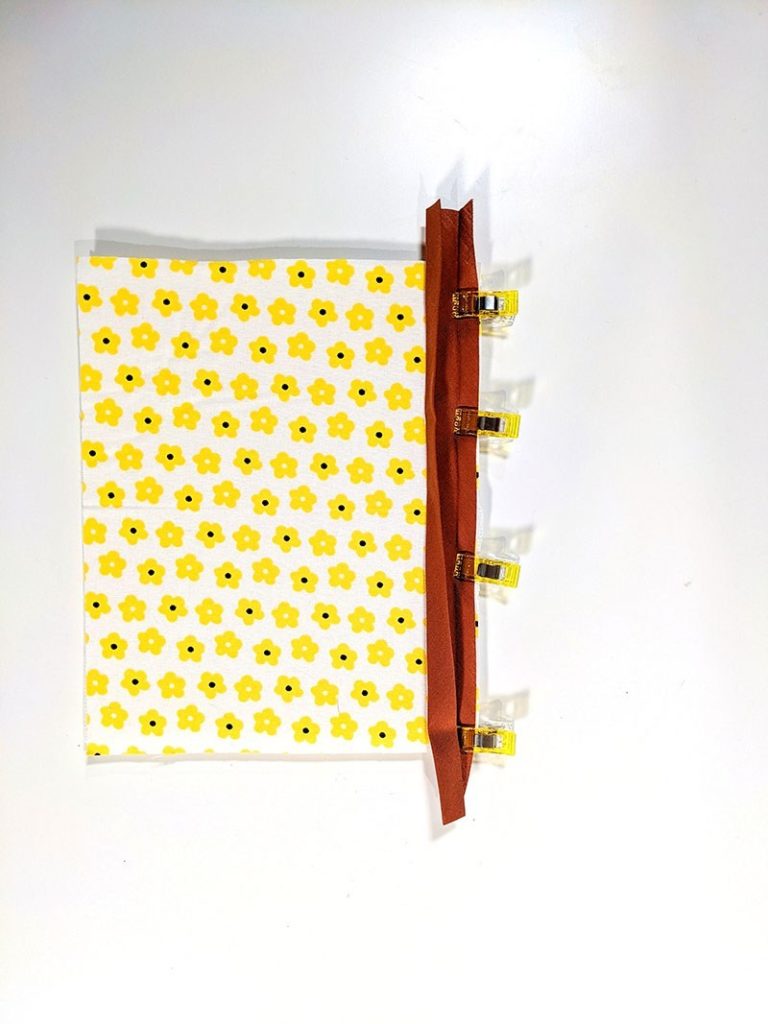
4. On the long side, pin your bias tape in place. On each end, the bias should extend about ½”.
Processed with VSCO with al3 preset
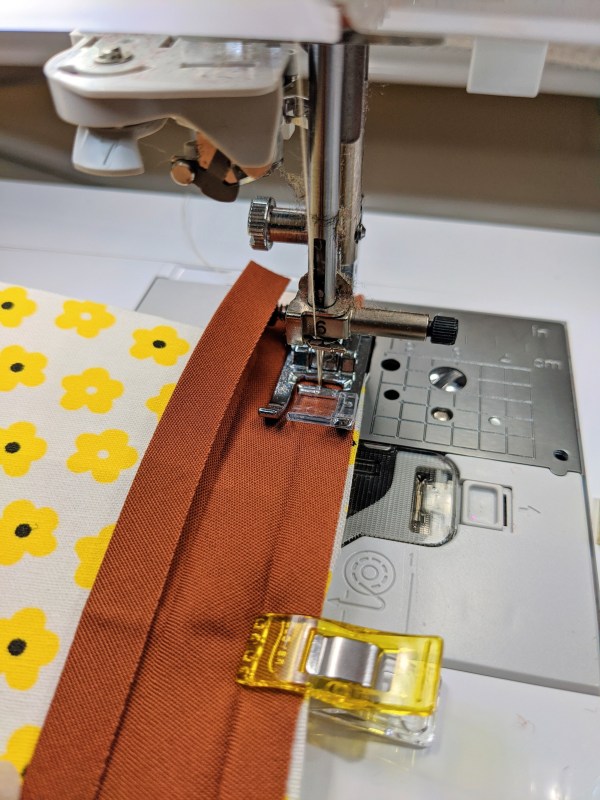
5. Stitch bias tape in place. As you are sewing, don’t forget to fold the ends of the bias tape inside the bias tape.
Processed with VSCO with al3 preset
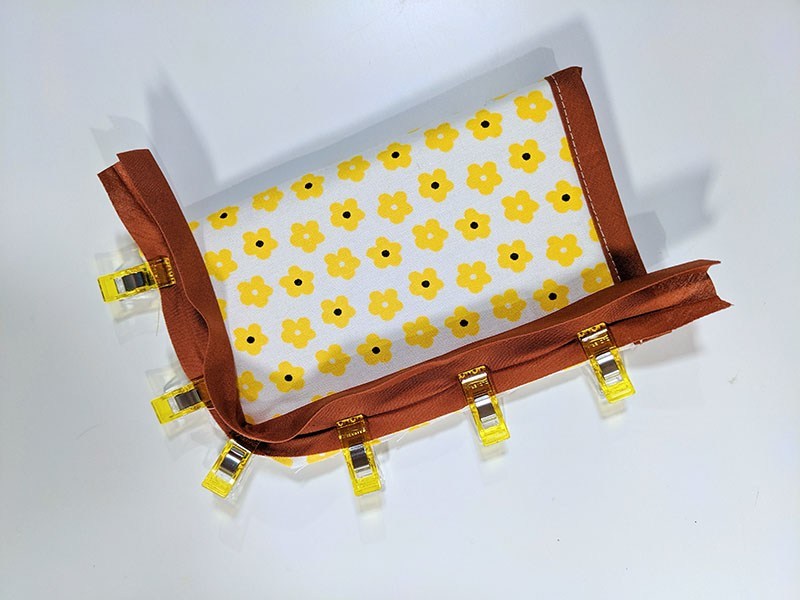
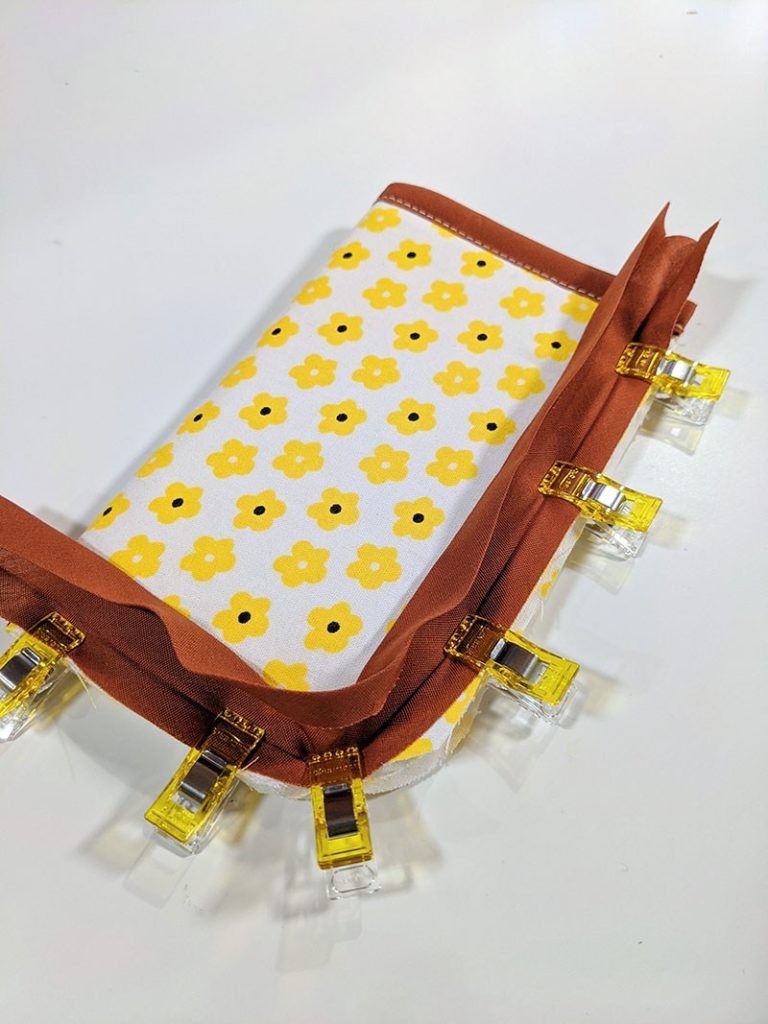
6. Fold your DIY eyeglass case in half and attach the bias tape on the outer edge.
Processed with VSCO with al3 presetProcessed with VSCO with al3 presetProcessed with VSCO with al3 preset
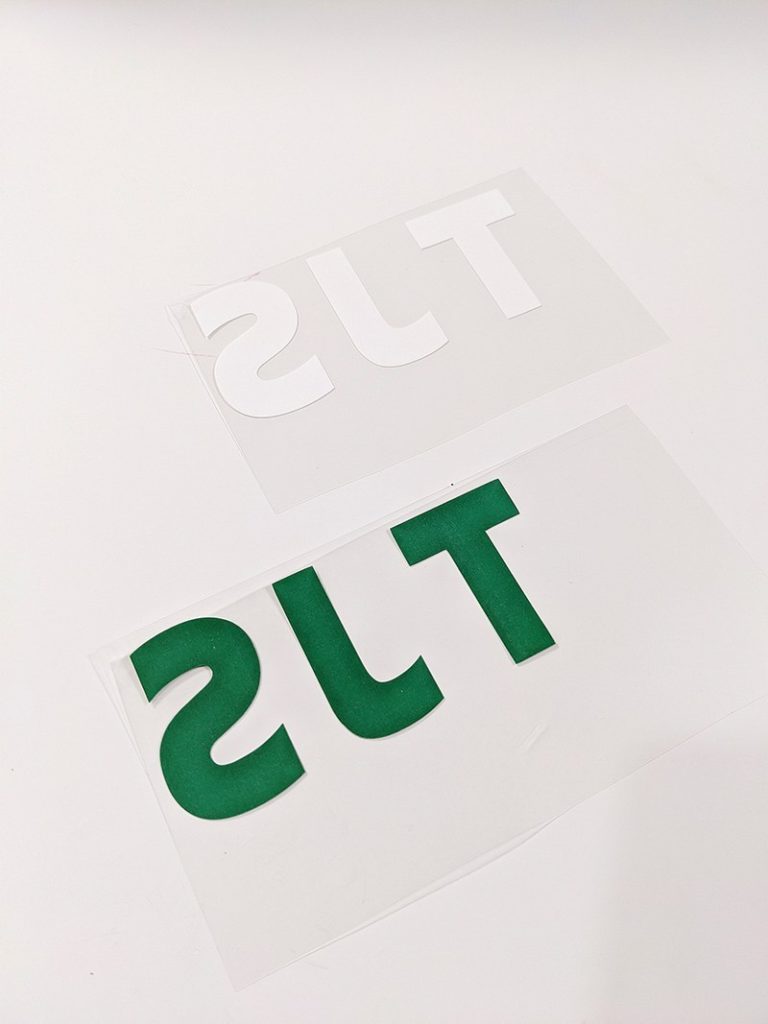
Cut Letters with Your ScanNCut:
Place vinyl with shiny side down.
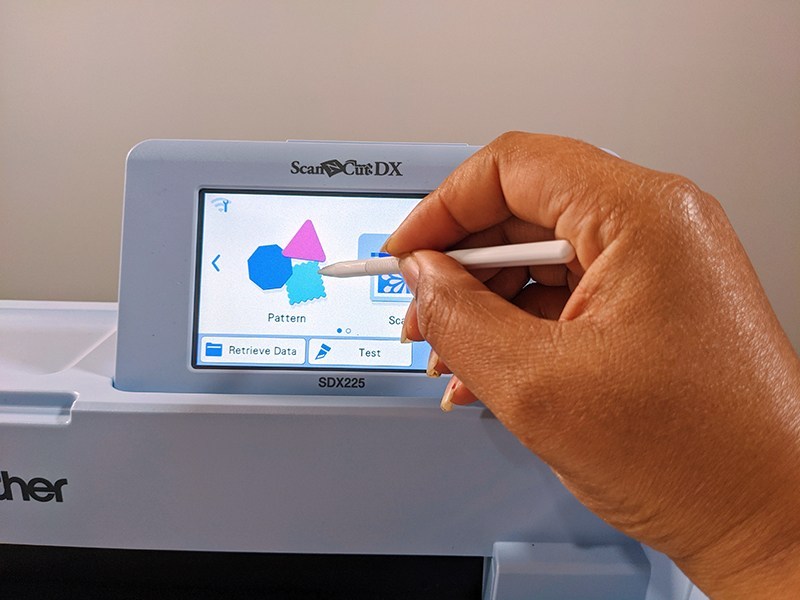
On the ScanNCut, press on pattern
Processed with VSCO with l4 preset
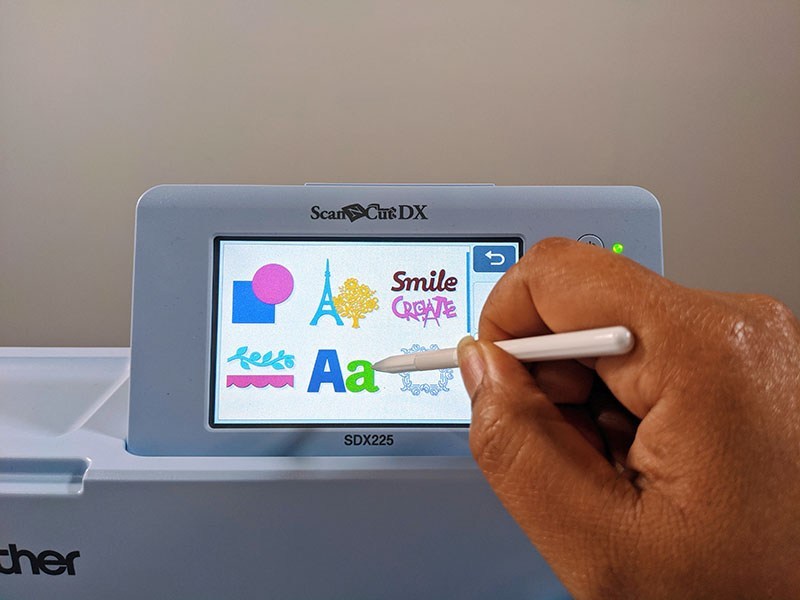
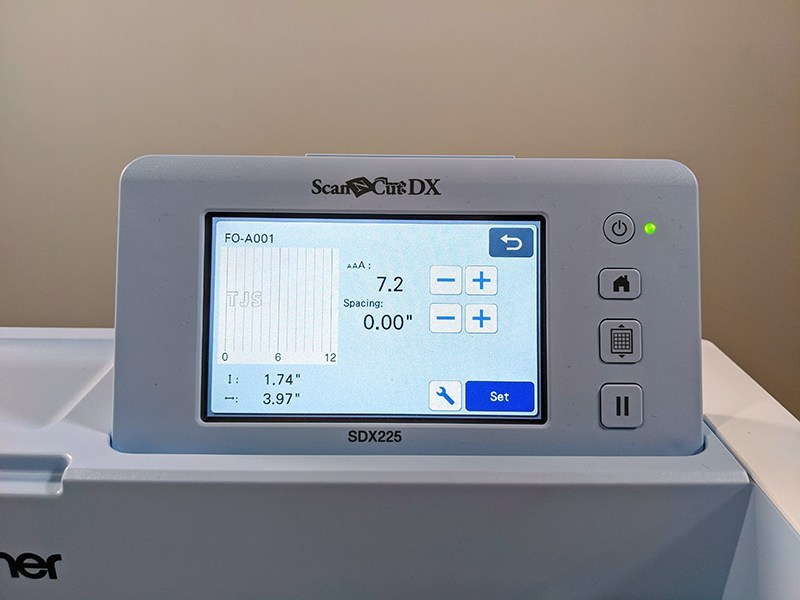
3. Press on the letters and choose your font. I chose FO-A001.
Processed with VSCO with l4 preset
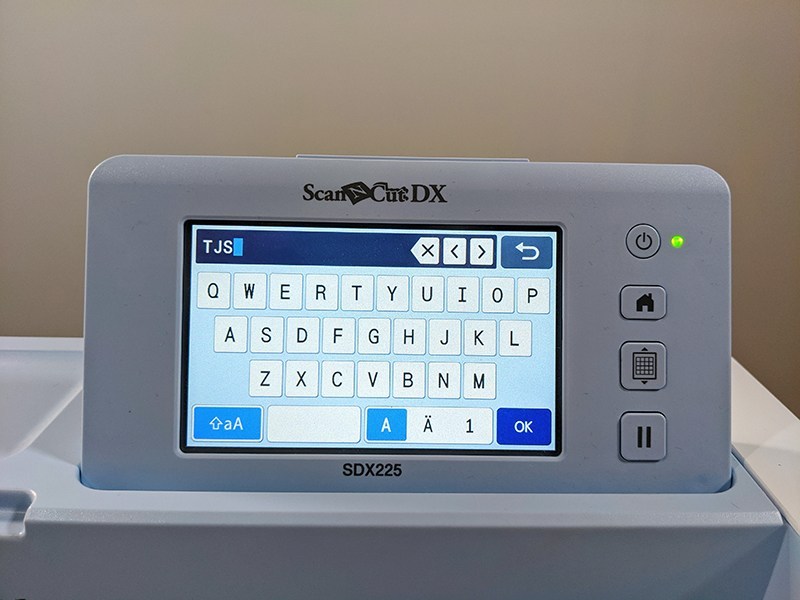
4. Type in your letters and press ok.
Processed with VSCO with l4 preset
5. Adjust size to 1.74” height and pre-set.
Processed with VSCO with l4 preset
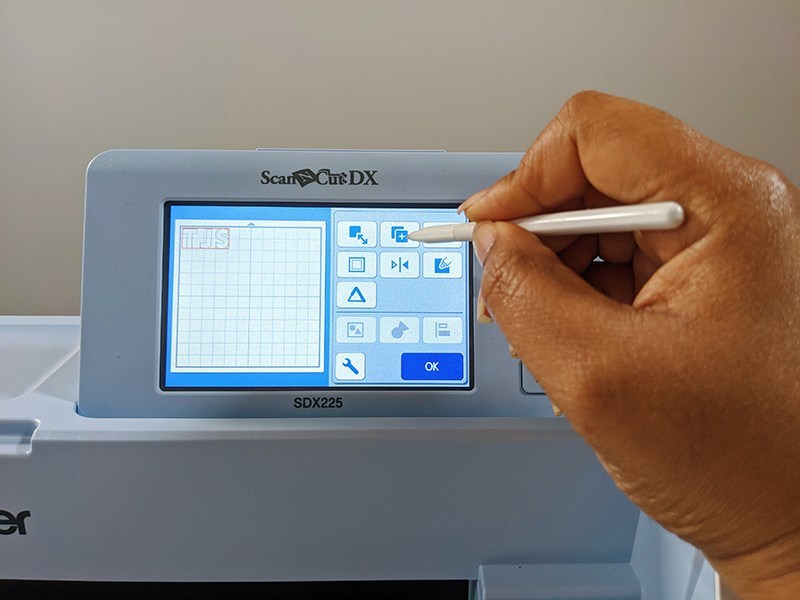
6. Press Edit, then Edit Object. 7. Press on the duplicate button. You want to create two of the same image so adjust the number to 2.
Processed with VSCO with l4 preset
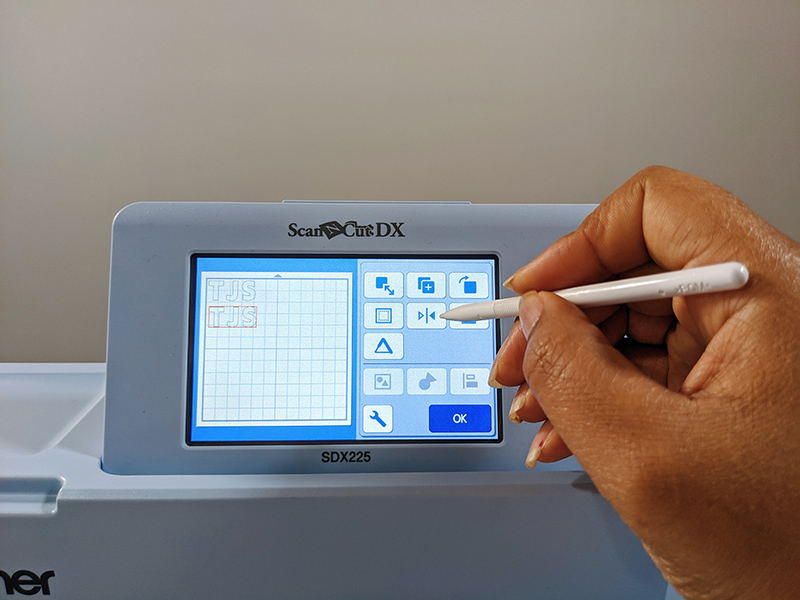
8. Now, press the mirror button. Be sure to mirror both sets of letters.
Processed with VSCO with l4 preset
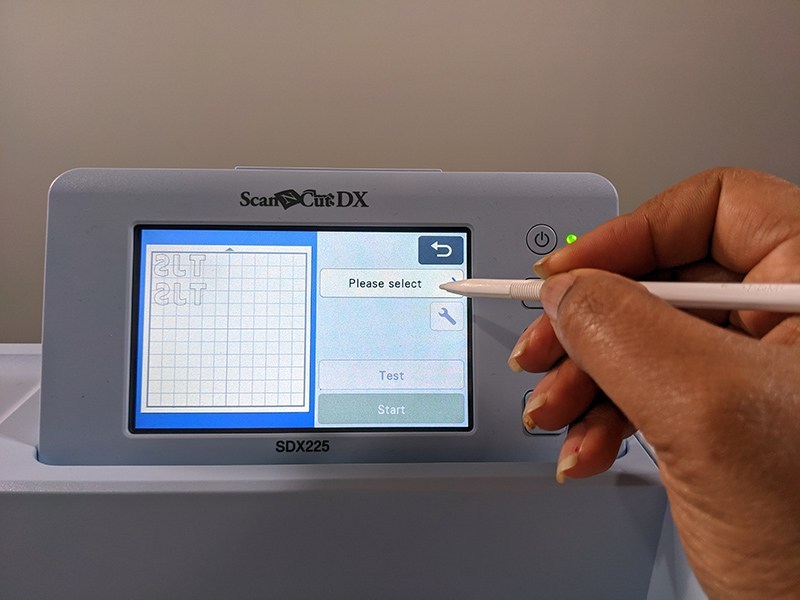
9. Click ‘OK’ three times to pass through the menu. Then, press ‘Please Select’ and ‘Cut’.
Processed with VSCO with preset
10. Click on the wrench to edit your cut to half cut 11. Before making your final cut, test your cut first. 12. If your letters come out clean, proceed with your cut. If not, adjust the pressure and test again until it comes out clean. 13. Once you’re finished cutting, press ok.
Processed with VSCO with s1 preset
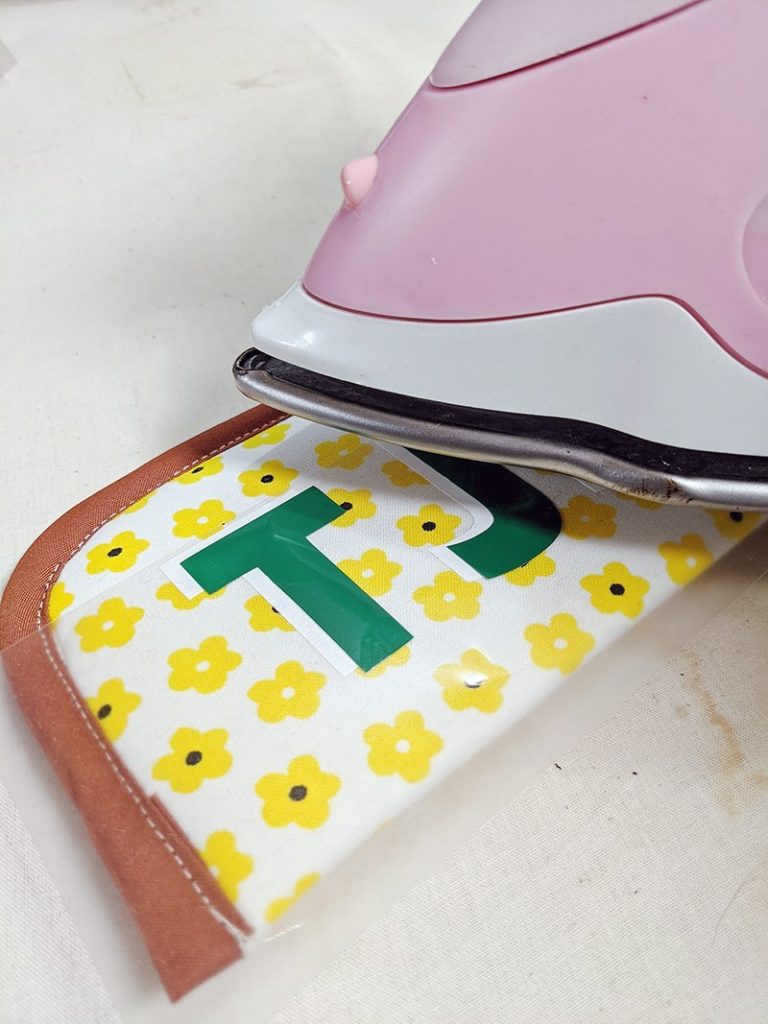
Press Your Letters onto Case:
Center your first set of letters in the middle of your case. Press in place.
Place your second set of letters on top but, move it slightly over to create a shadow effect. Press in place.