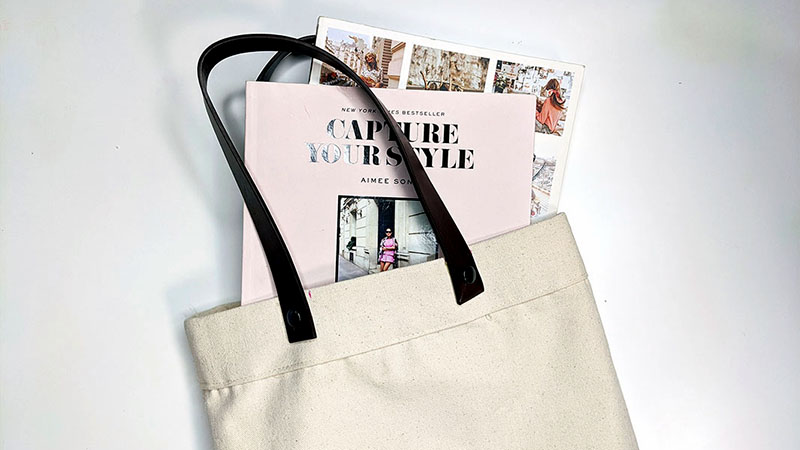
I wanted to share with you all how you can take a basic sewing pattern and use it as inspiration to create the look you want. Before I start a crafting project, I have already found an inspiration photo that I want the final product to look like. I take that photo and then find or create a design pattern that looks similar to the one I aspire to make. From there, I purchase the materials based on my inspiration photo (with a few tweaks in color to match my style and my personality).
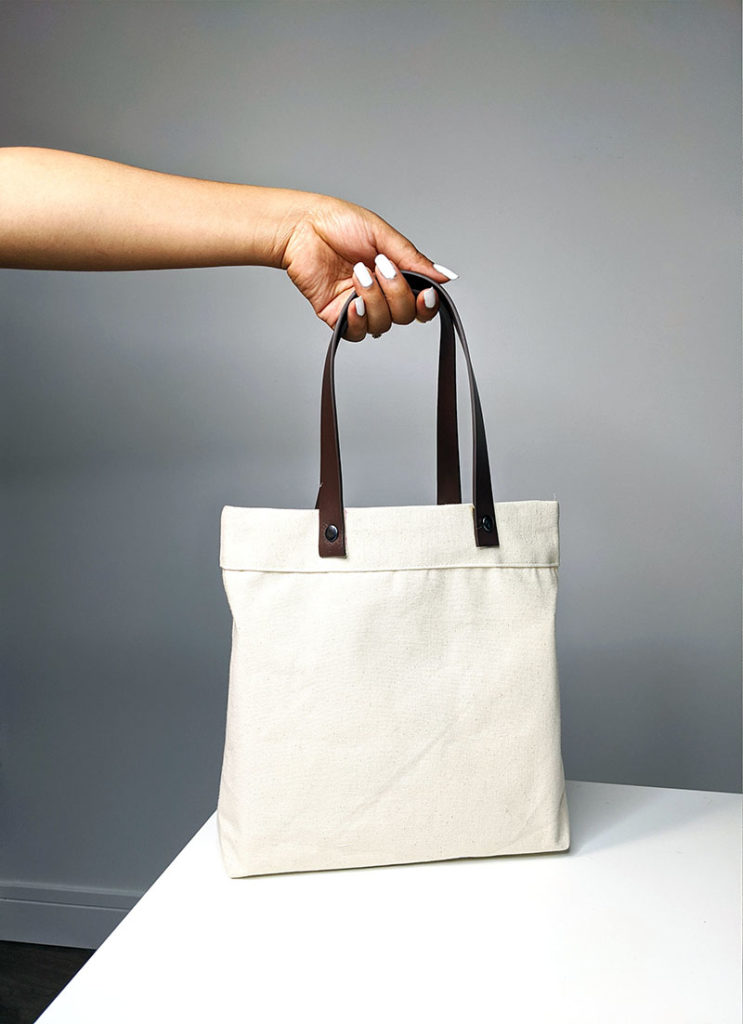
This DIY tote bag is a two-part project. I’d love for you to check out how you can customize this tote bag and make it your own. Click the link below for the second part to this post.
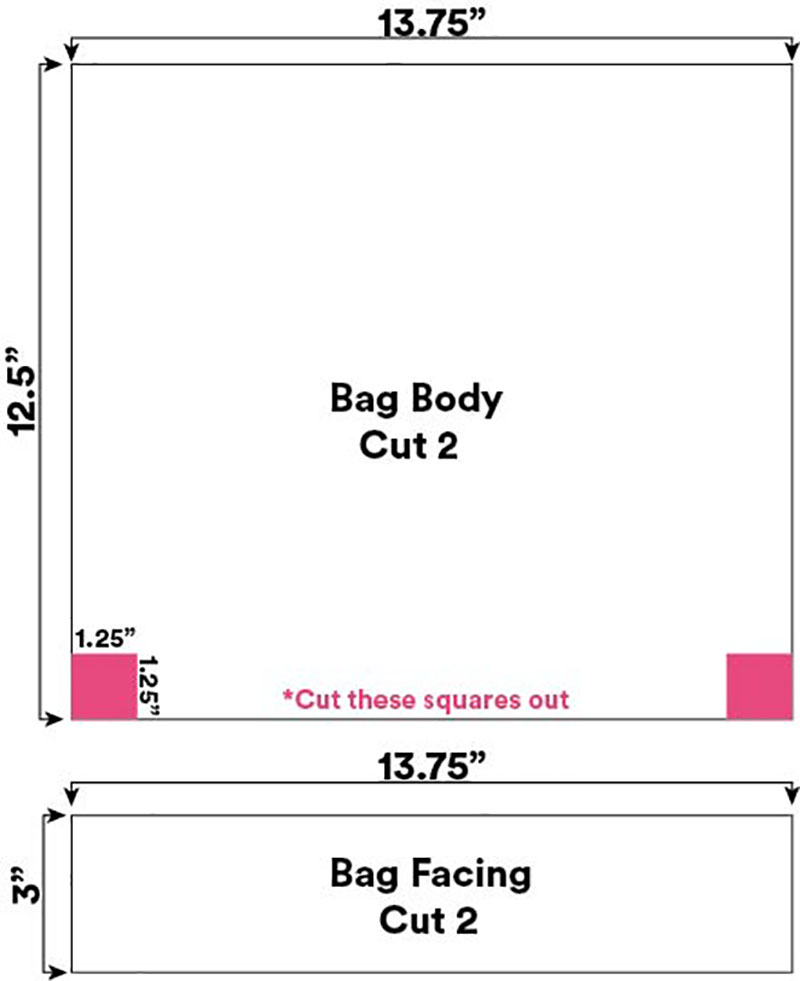
Create your pattern according to the measurements given (or draw right on your fabric with a removable pen or chalk).
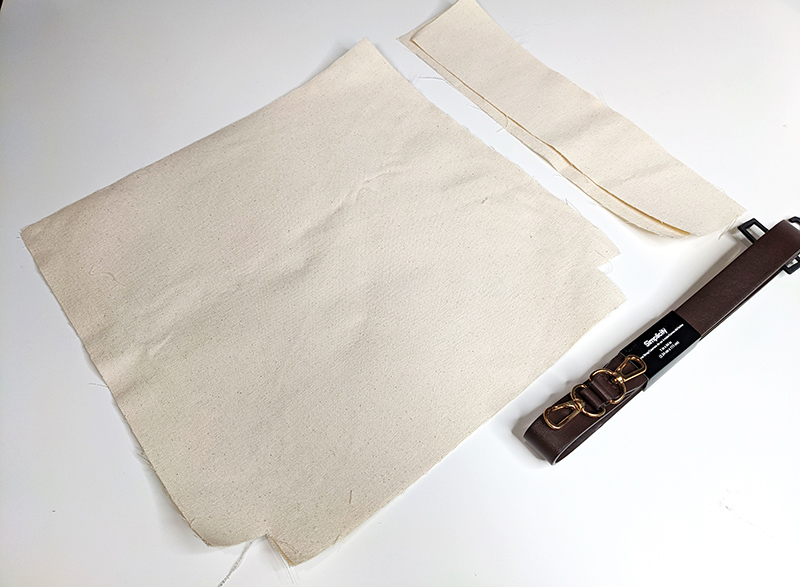
Cut out your bag pieces (2 main body, 2 facing)
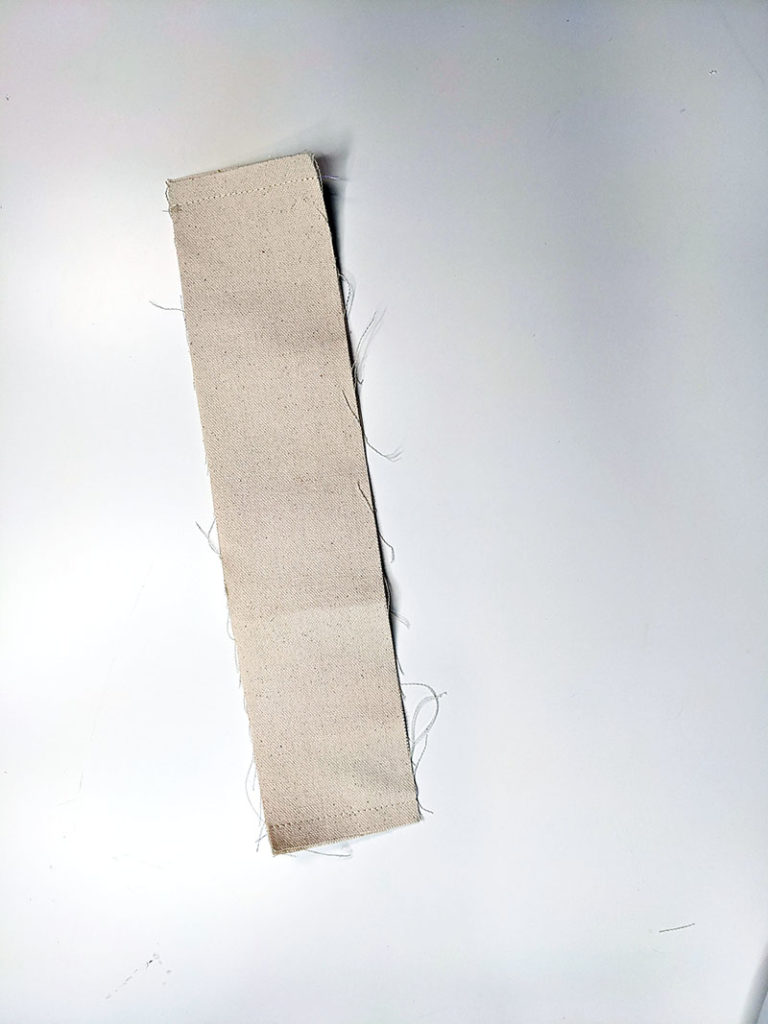
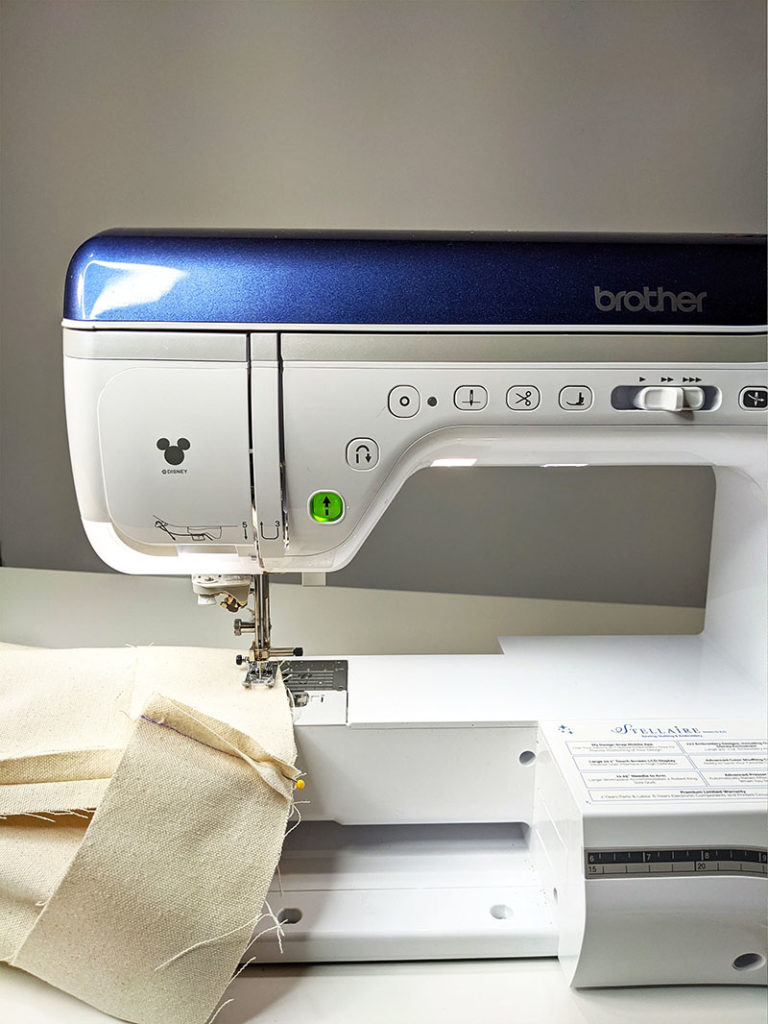
Starting the with the main body of the tote bag, with right sides facing, sew the side seams and the bottom of the bag.
Take the facing and sew down the sides. Make sure the right side of the fabric is facing each other.
With the wrong side of the bag facing out, attach the Facing to the top of the bag. The right side of the Facing should be facing the wrong side of the bag. (See image) Sew in place.
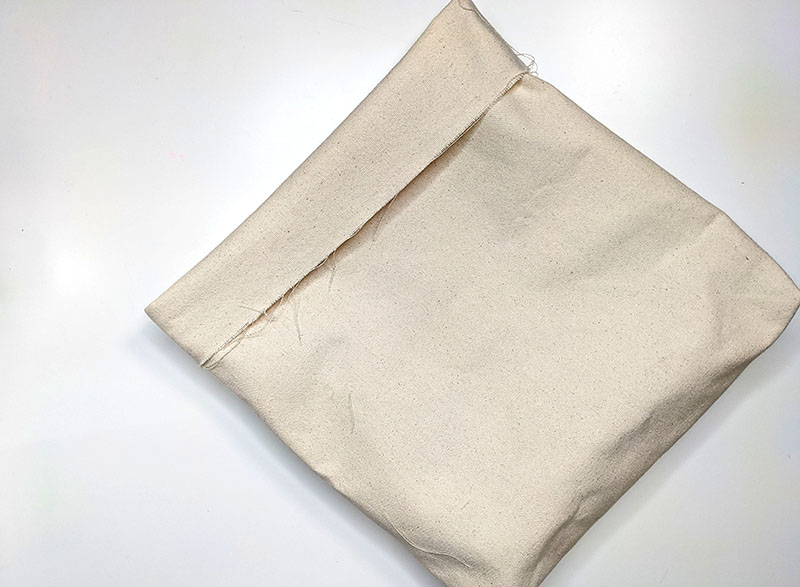
Turn your bag right side out and pull the facing to the outside. Press the seam down.
Fold the facing under about 1/2” and press. Pin and stitch in place.
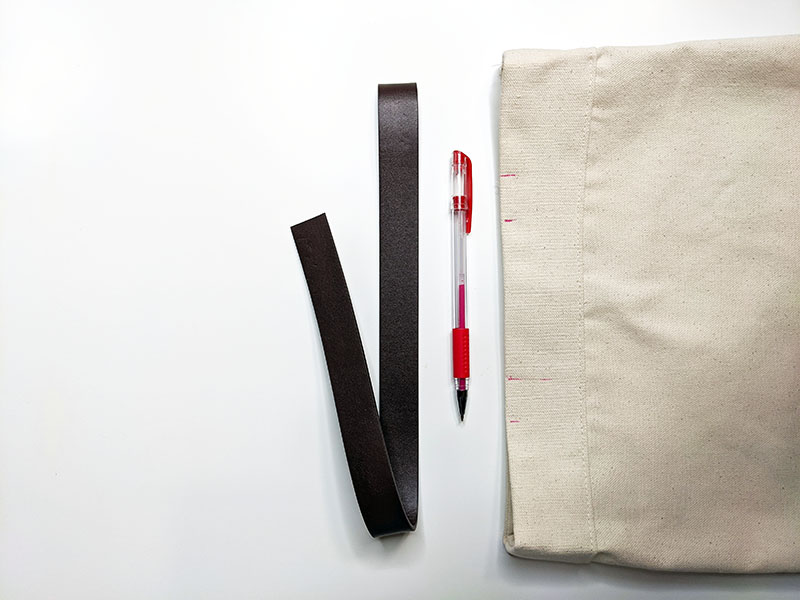
It’s time to attach the handles! Before we do that. Mark the placement of your handles with a fabric marking tool. Markings remain the exact same on the opposite side.
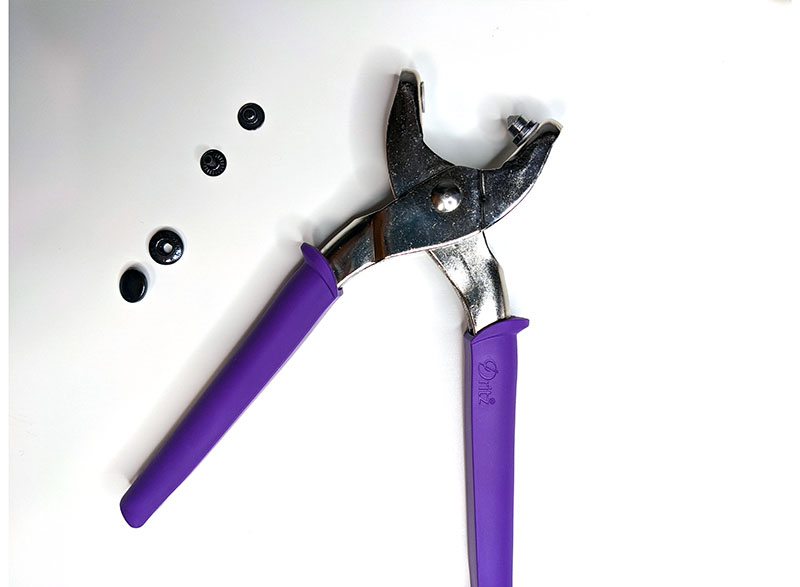
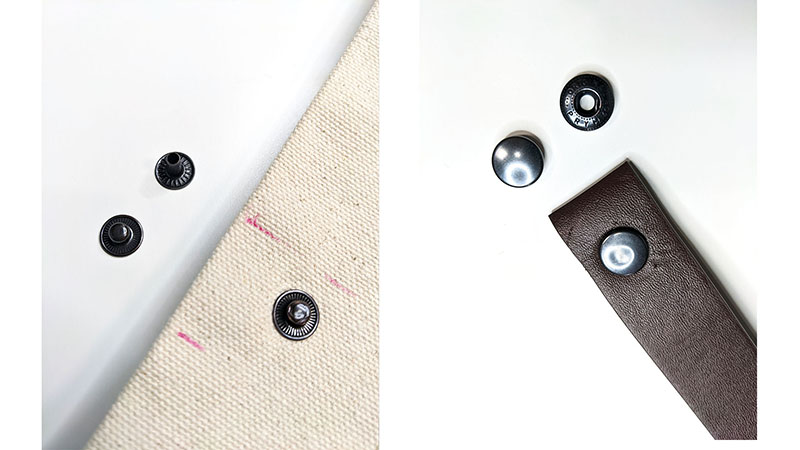
Let’s move on to the rivets. With the rivets, you want to make sure you gather the correct rivet pieces for the handles on your DIY bag. You’ll need a front and back for the canvas and front and back for the leather.
You’ll connect the rivets to the bag and strap according to the instructions on the back of the rivet packaging. When connecting, you’ll need the snap pliers.
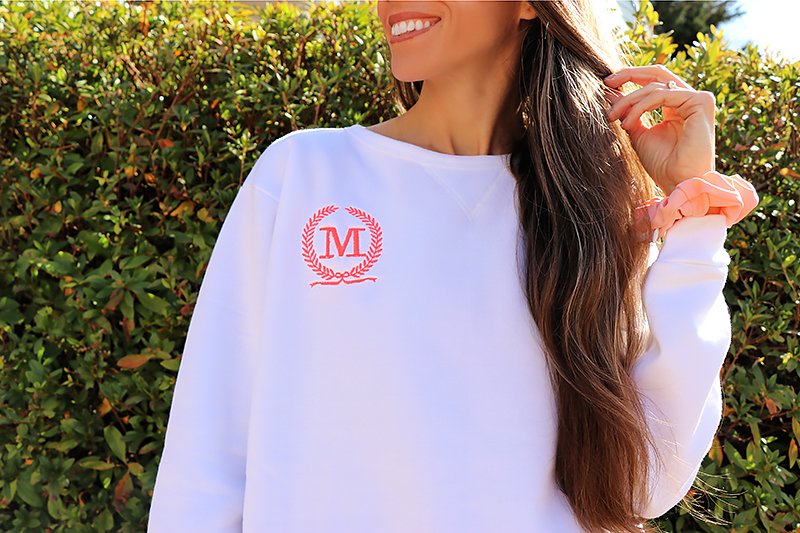
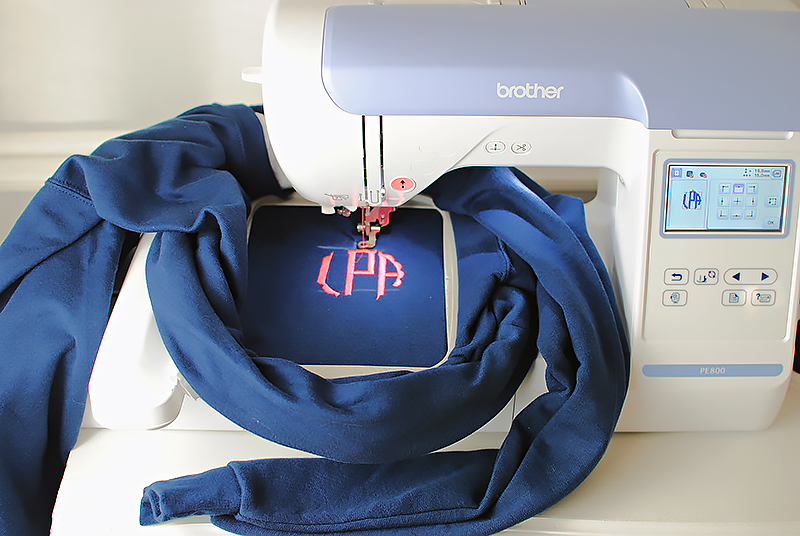
Take a plain sweatshirt to the next level of style with machine embroidery. From monograms to fun designs, you can customize this cozy wardrobe essential for yourself and others. These DIY monogrammed sweatshirts make great gifts for family and friends alike! Check out the tutorial below on how to embroider a sweatshirt with your Brother embroidery machine.
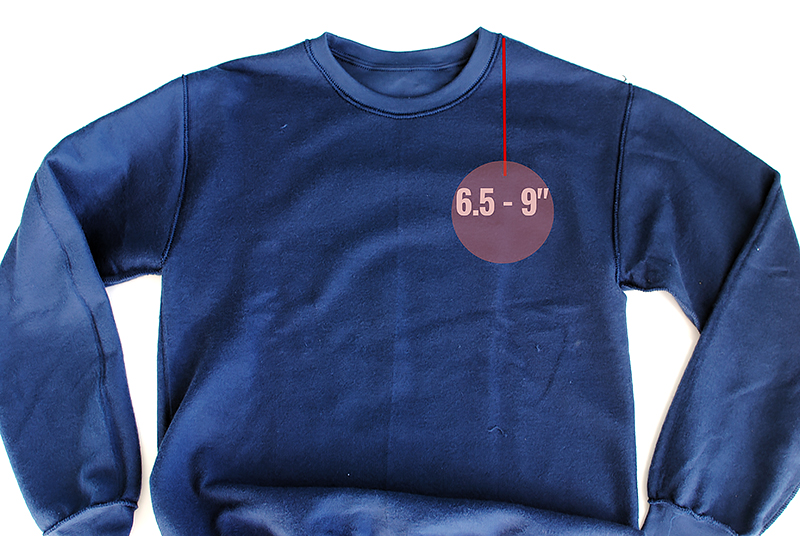
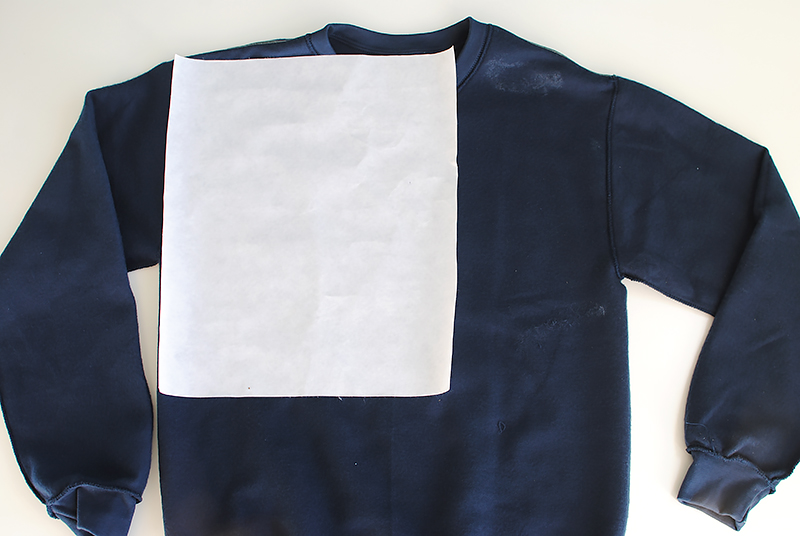
Lay out the sweatshirt and mark the location you want the monogram with a fabric marking tool. It’s a good idea to print out a template or create a sample stitch out to figure out your preferred placement. Traditionally, a monogram is embroidered 6.5”- 7” down the left shoulder seam. However, I did one on the right shoulder seam that came out great! I also like to place the monogram in the center front as well (typically 3” down from the center neckline line).
Once you find the location you want, mark the center, vertical, and horizontal locations (basically create a rectangle). I like to create a cross and center the design at the center of the cross where the lines intersect. Mark what works best for you.
Step 2
Flip inside out.
Use a Cut Away stabilizer that will cover the embroidery area and hoop size. Spray with a temporary spray adhesive and press onto the area that will be embroidered. I use Cut Away stabilizer on sweatshirts because they’re worn and washed often. This will help the embroidery last a long time compared to other stabilizers.
Step 3
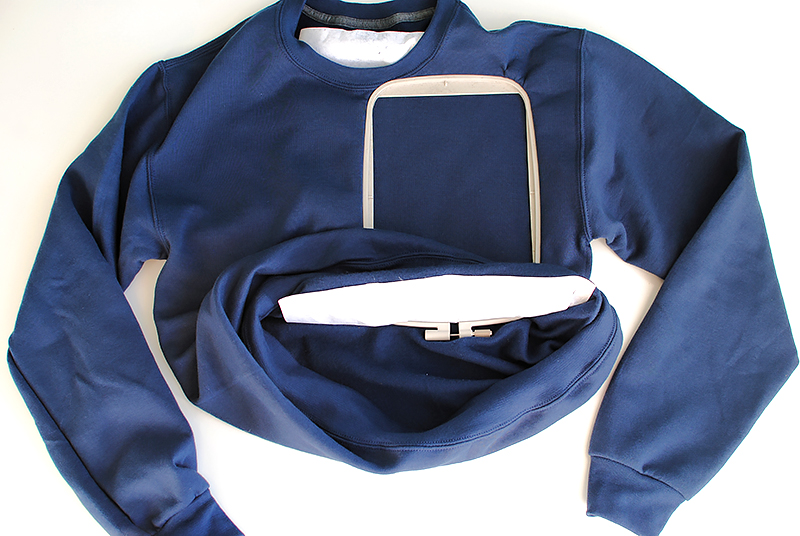
Flip right side out.
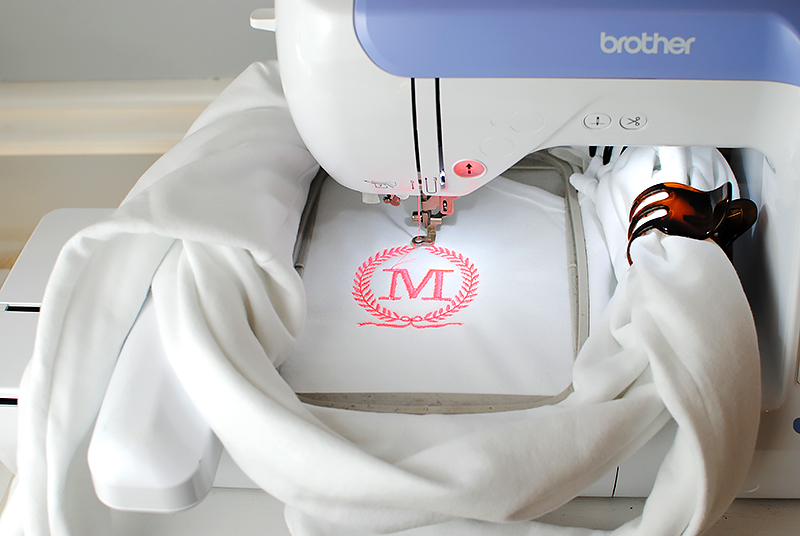
Place the outer hoop inside the sweatshirt and put the inner hoop on the top, making sure the design is centered in the hoop.
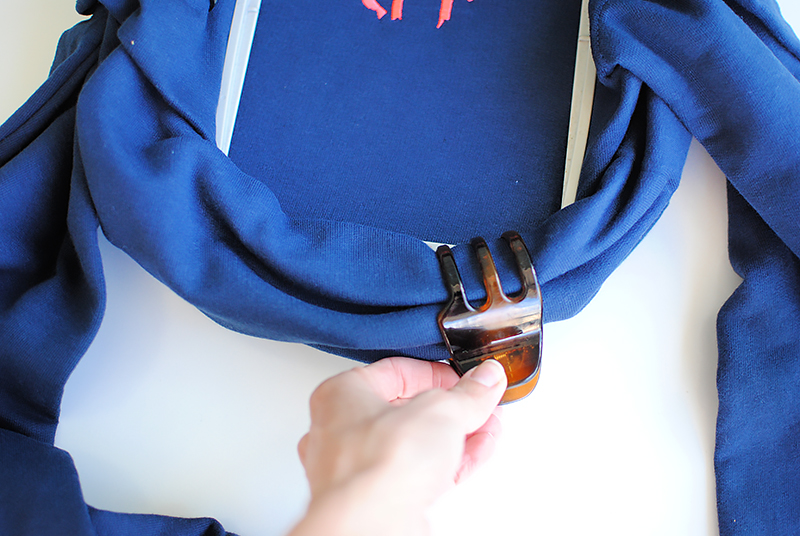
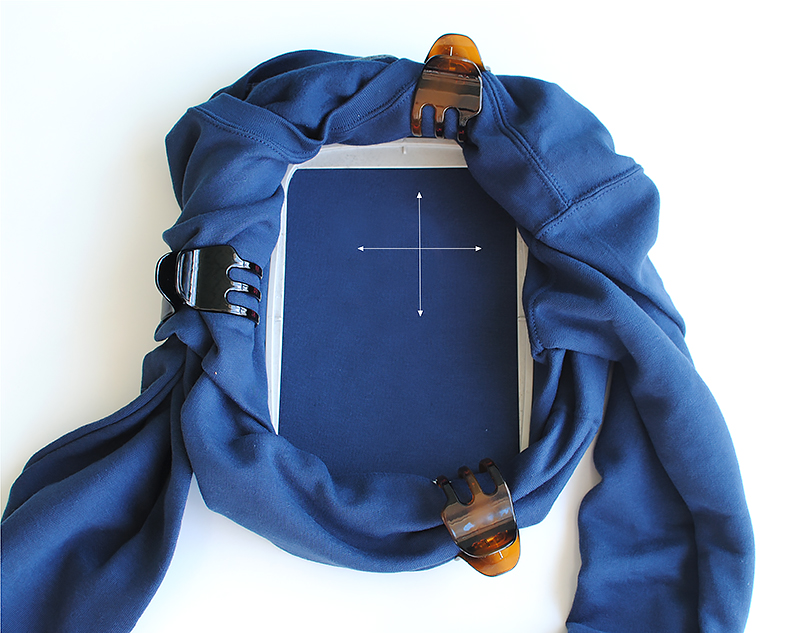
Step 4
Roll the excess material towards the outer hoop and away from the hoop area. You can use clips to keep the excess material in place (I use hair clips, an embroidery tip I got from a friend).
Step 5
Create your monogram. You can create your own or use the built-in ones that the Brother Machines offer. My designs measured about 3 x 3 “. You can use software to create your design and lettering, or just piece it together on the Brother Touch Screen. I have the Brother NV800E, which makes it easy to add and edit designs right on the screen.
Step 6
Embroider away!
Once your embroidery is complete, turn the shirt the wrong side out and cut away the stabilizer. I typically cut it about ¼’ away from the design. Over time and after multiple washes, the stabilizer will soften.
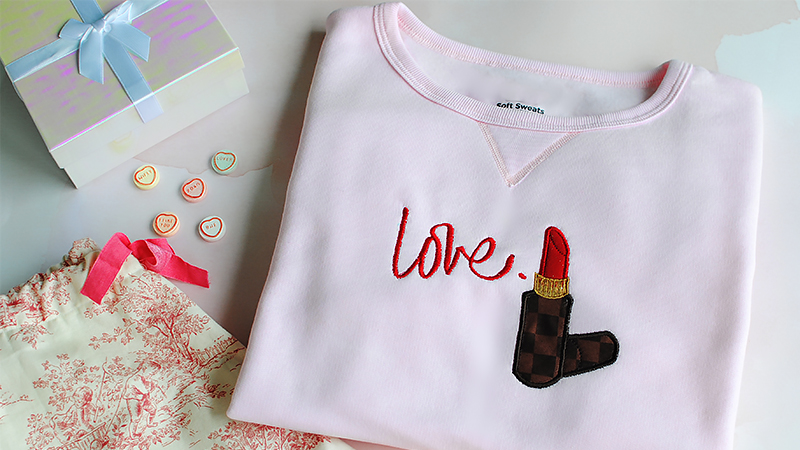
Other examples / Valentine theme (optional images)
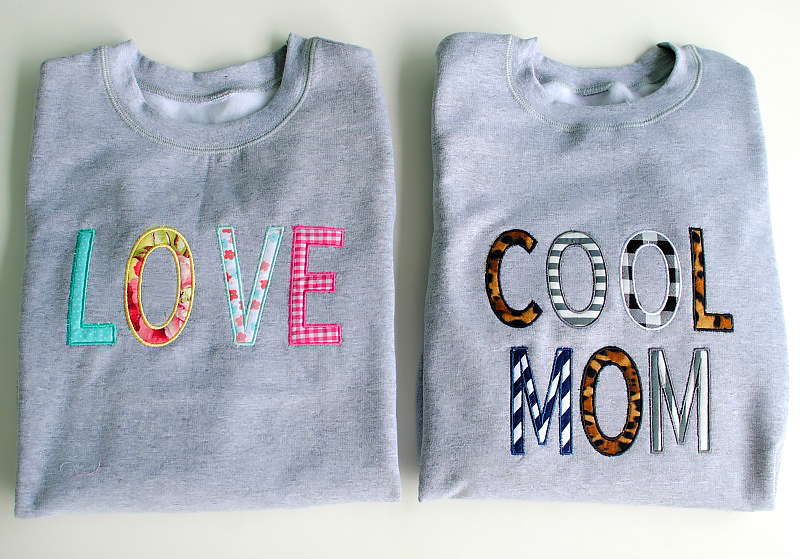
I hope this inspires you to give embroidery a try on your garments. It’s a great way to upcycle old t-shirts, sweatshirts, and denim jackets. Here are a couple other examples.
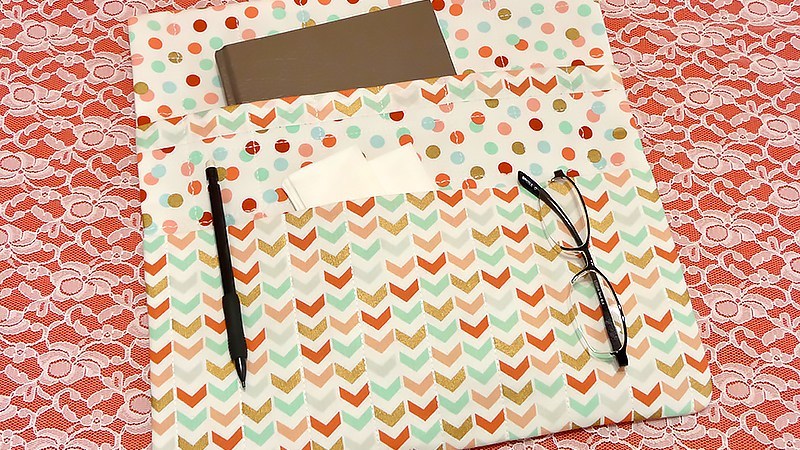
Create a beautiful custom bed caddy using your Brother sewing machine and a few Brother accessories. Quilt your own fabrics for a lightly padded finish that will match your décor and unique style. This handy craft will help organize bedside items you reach for on a regular basis. Pick some pretty fabrics, gather up your tools, and prepare to tackle this easy sewing project. You’ll learn more about the use of several optional accessory feet featured in these instructions. Are you ready? Let’s go sew!
Materials and Supplies:
Brother sewing machine with basic built-in stitches.
SA190 Roller Foot for attaching gripper material to bed caddy.
Additional accessory feet for this project, optional but very helpful:
Basic notions, including thread to match or blend with fabrics and a removable marker. I recommend a rotary cutter, mat, and ruler for cutting fabric pieces.
Materials for bed caddy, including fabric, thin fusible craft fleece, and gripper material:
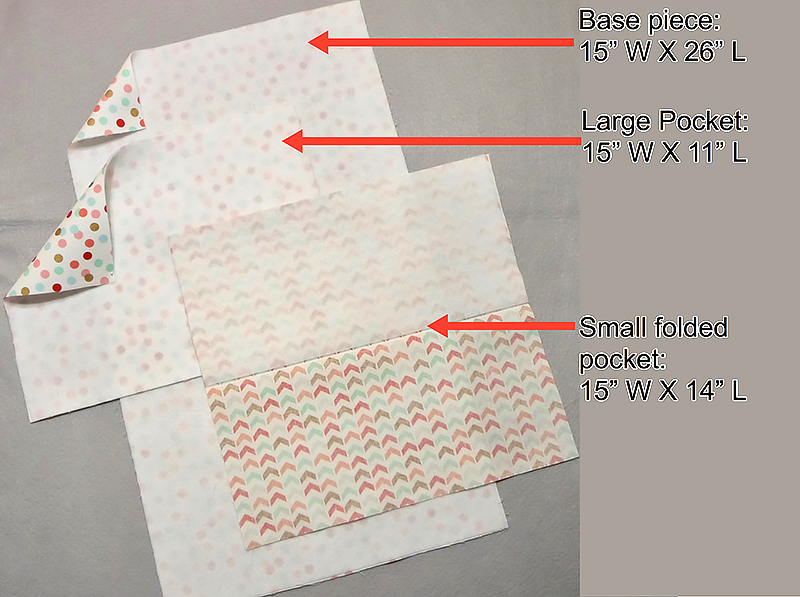
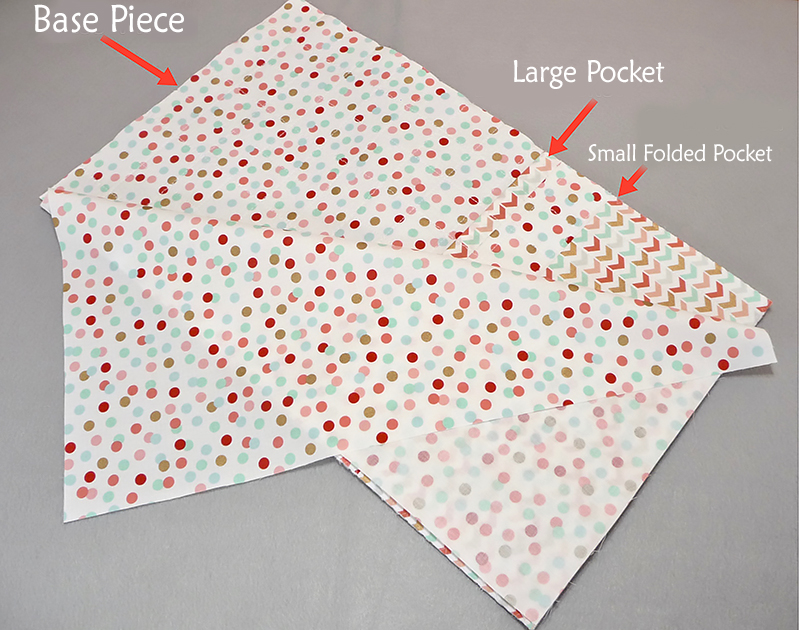
Cut one piece of quilt weight cotton measuring 15-inches wide X 26-inches long for base of bed caddy. Fuse thin craft fleece to wrong side.
Cut one piece of quilt weight cotton measuring 15-inches wide X 11-inches long for large pocket. Fuse thin craft fleece to wrong side.
Cut one piece of quilt weight cotton measuring 15-inches wide X 14-inches long for small folded pocket. Note: Fold pocket piece in half lengthwise and press to form a fold line. Next, fuse thin craft fleece measuring 15-inches wide X 7-inches long to wrong side, matching fleece with fold line and raw edges on half the piece.
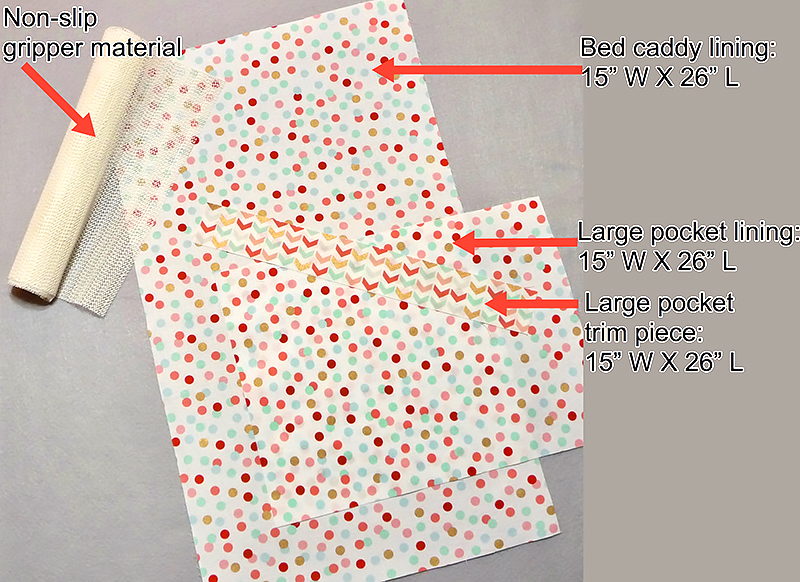
Cut one piece of quilt weight cotton measuring 15-inches wide X 26-inches long for bed caddy lining.
Cut one piece of quilt weight cotton measuring 15-inches wide X 11-inches long for large pocket lining.
Cut one piece of quilt weight cotton measuring 15-inches wide X 2-inches long for large pocket trim.
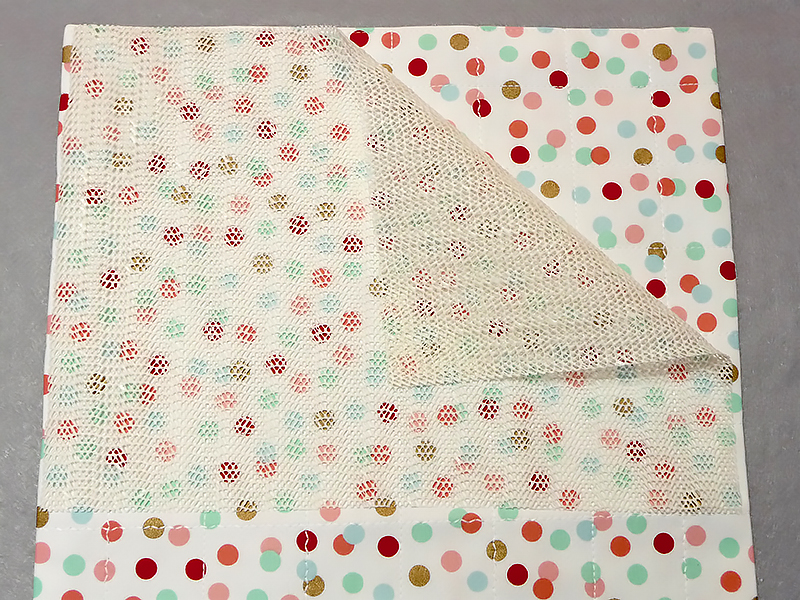
Cut one piece of non-slip “gripper” material measuring 13-inches wide X 9-inches long for top edge.
See all pieces in Figure #1a and Figure #1b.
Figure #1a
Figure #1b
Fabric tips: Choose two or more coordinating fabrics, mixing and matching as desired. You can eliminate the large pocket trim piece if you choose a third coordinating fabric. I used remnants left over from another project for this bed caddy. Since I only had two fabric prints to work with, I added the trim strip for extra contrast on the pocket.
Tips for using accessory feet listed with supplies:
SA190Roller Foot – The non-stick and roller capabilities on this foot are ideal for stitching “sticky” materials such as the gripper material on the top edge of the bed caddy. In this project you’ll see that I also used the roller foot to quilt single layers of fabric with thin fleece. Note that there are other feet better suited for quilting thicker layers.
SA160Stitch Guide Foot – Marked lines on this foot allow for consistent stitching of seamlines in a wide range of widths.
SA132Quilting Guide – The quilting guide fits snugly into the small hole found in the back of the presser foot holder so it can be used with any foot you choose. Simply slide the guide a measured distance from the needle and line up the guide with a previous line of stitching for consistent and evenly spaced lines of stitching.
Finished bed caddy measures approximately 14-inches wide X 25-inches long. Please read through all instructions before beginning this project.
Basic steps for creating bed caddy:
Add fusible fleece to caddy pieces.
Add trim, then quilt caddy base and pocket pieces.
Layer pieces and add lining.
Attach gripper material to top edge to finish. Note: This piece helps keep the caddy from moving when placed between the mattress and box springs.
1. Prepare large pocket if you are adding the contrast trim. Add contrast strip as follows:
Attach stitch guide foot. Layer 15-inch wide X 2-inch long strip along top edge of large pocket, with right sides together, placing it a scant 1-inch from top raw edge. See Figure #2a.
Figure #2a
Sew strip to top edge using a 1/2-inch seam allowance, following a specific line on the foot. See line spaced ½-inch from needle position in Figure #2b.
Figure #2b
Flip strip so right side faces up and press toward top edge.
2. Prepare to quilt pieces backed with fleece as follows:
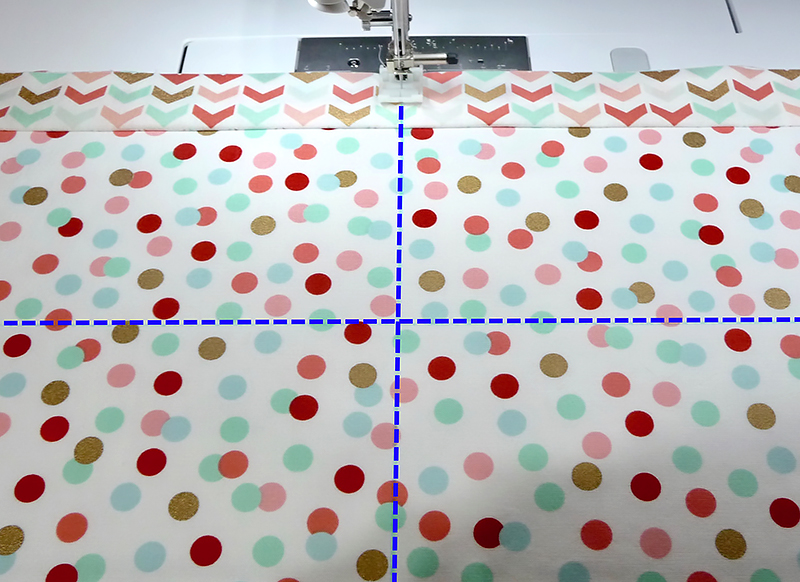
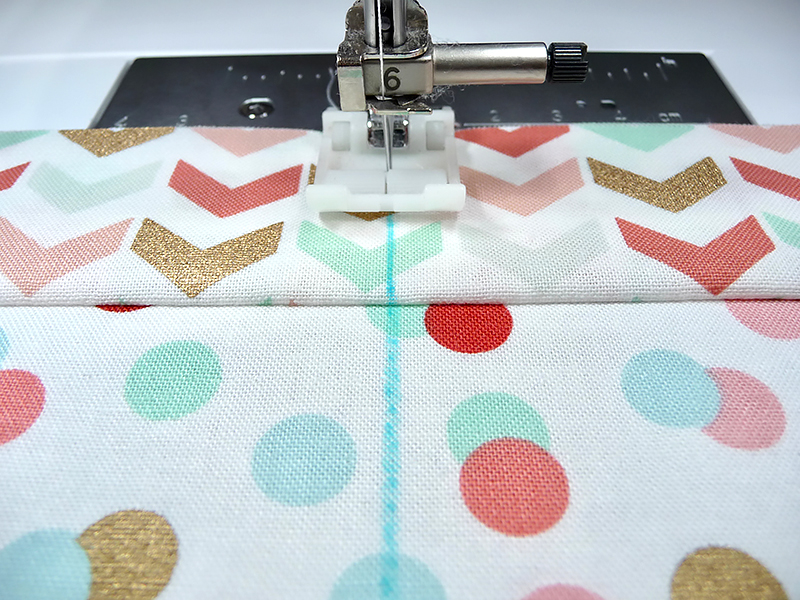
Mark starting lines along lengthwise and cross wise center on 15-inches wide X 26-inches long base piece and 15-inches wide X 11-inches long large pocket piece. Mark a lengthwise line on the center of folded pocket piece. Note: This smaller piece doesn’t require quilting in both directions. I used the fabric print to space lines on my small pocket. See example of marked lines on the large pocket piece in the enhanced photo in Figure #3.
Figure #3
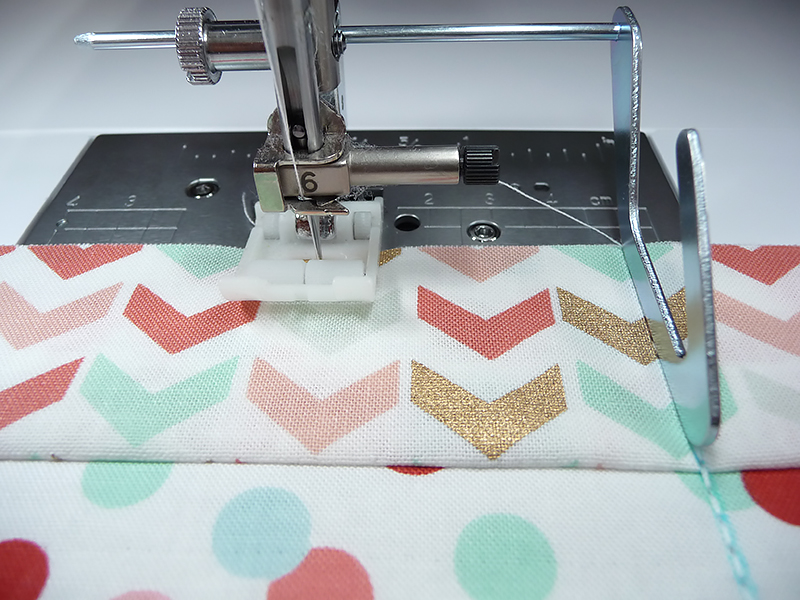
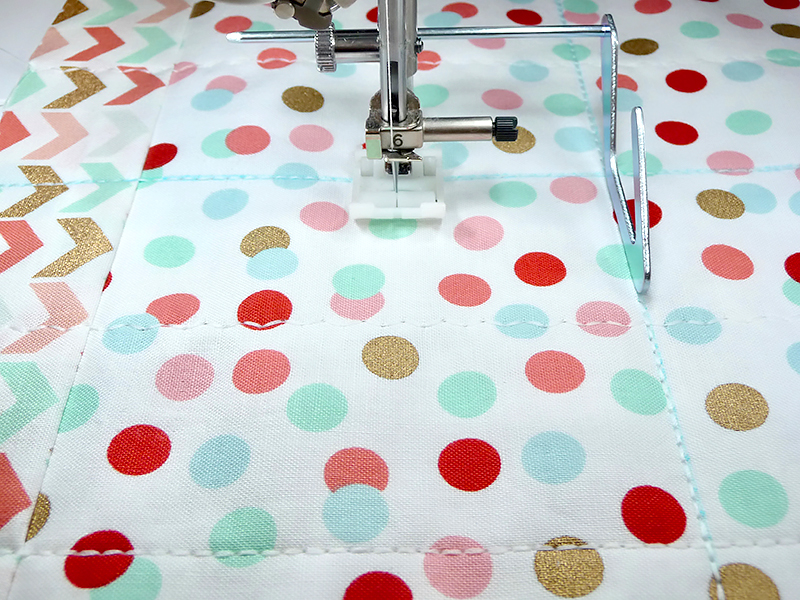
Attach the roller foot if you have it and quilt all pieces, stitching evenly spaced lengthwise and crosswise lines.
Tips for Quilting Stitches: Stitch the first center line and then use the quilt guide set for evenly spaced remaining lines to the left and right of the first center line. I like to stitch all my vertical lines first and then turn the fabric to stitch horizontal lines. Fusible fleece does not require closely spaced lines. I spaced mine 1 ½-inches apart. Straight stitches are traditionally used for this type of quilting. However, I chose the triple stretch straight stitch along with alternating lines of the rick-rack stitch. Stitch settings listed below:
Triple Stretch stitch: Center needle position, stitch length, 3.5mm.
Rick-Rack stitch: Width 1.5mm, length 4.0mm.
See examples of quilting in Figure #4a, Figure #4b, and Figure #4c.
Figure #4a
Figure #4b
Figure #4c
3. Layer large pocket with matching lining piece. See Figure #5.
Figure #5
Sew top edge using a ½-inch seam allowance. Press lining to back side.
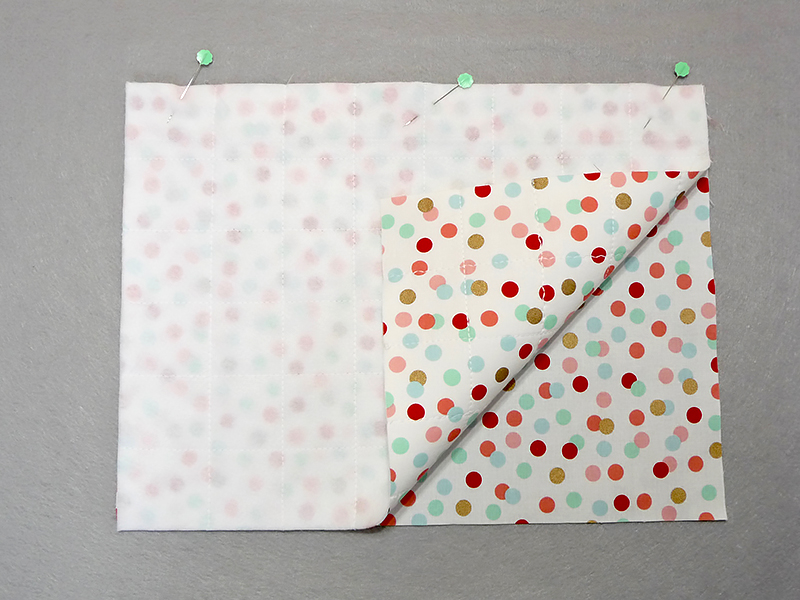
4. Layer bed caddy pieces as follows:
Bed caddy base piece, right side facing up.
Large pocket, right side facing up.
Folded pocket, right side facing up.
Bed caddy lining, wrong side facing up.
See layered pieces in Figure #6.
Figure #6
Sew layers together using a ½- seam allowance, leaving a 5-inch opening along the top edge for turning right side out. Tip: Use a small round object to mark off a slightly rounded stitching line for bottom corners. This gives a more attractive finish to the caddy and makes it easier to trim excess bulk.
Trim corners and lower rounded edges to reduce bulk. Turn caddy right side out, with lining on back side and quilted pieces positioned on the front side. Press carefully and close top by stitching close to edge.
5. Center gripper material along edge opposite pockets. See Figure #7.
Figure #7
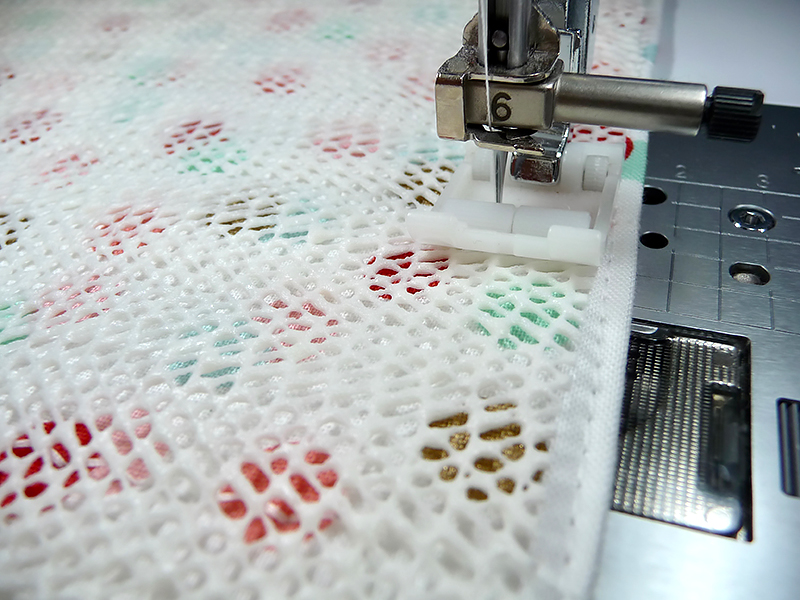
Sew to bed caddy using the non-stick roller foot. Tip: Make sure the entire foot is riding on the gripper fabric as you stitch. Sew slowly to keep material from shifting. See Figure #8.
Figure #8
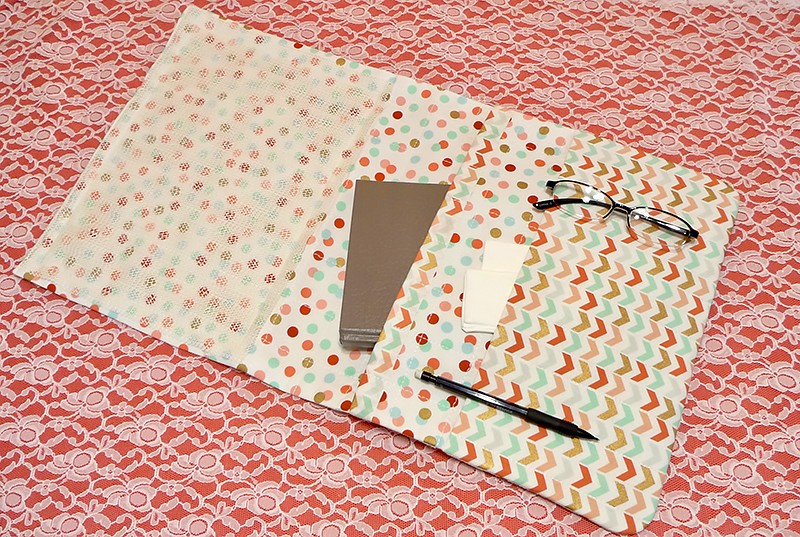
You are finished! See completed bed caddy in Figure #9.
This embroidery tutorial highlights the Brother monogramming foot, labeled with an “N.” The N foot is commonly found in the included accessories for many Brother machines. If you’re looking for a replacement, this foot would be listed as a part available from your Brother dealer.
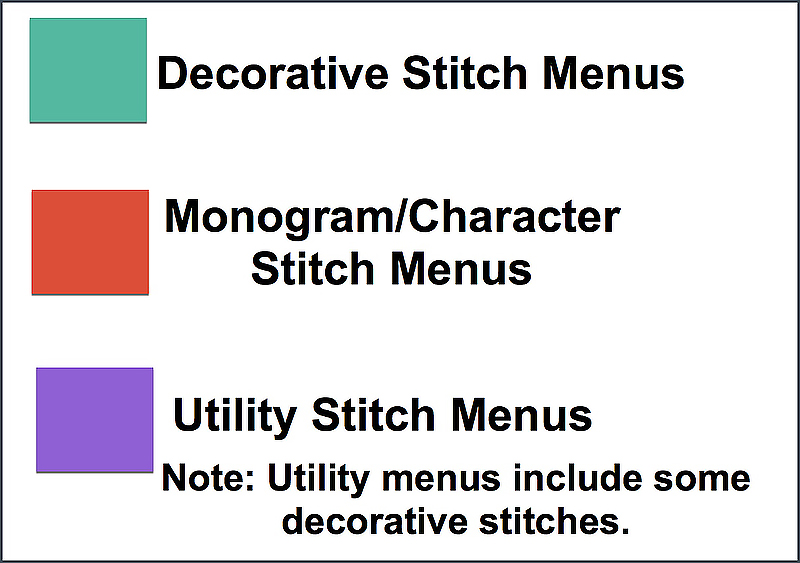
The monogramming foot is designed for decorative stitching and for sewing out lettering and characters, (commonly known as monogramming) patterns in your machine. While there are some utility stitches mixed into the decorative menu, foot N is primarily for decorative patterns and stitches that do not lay totally flat on the fabric. See examples of various stitches from different Brother machine models in Figure #1a, Figure #1b, and Figure #1c.
Figure #1a
Figure #1b
Figure #1c
Important Tips: Unless you are stitching stiff or firm fabric, you’ll likely have the best results when using foot J for utility stitches. If you select foot N in place of foot J, be sure to test your stitching on fabric scraps. Fabric should be well stabilized when stitching decorative and character stitches. Essentially, you are creating mini embroidery without a hoop. Be sure to test stitches on fabric scraps and add stabilizer as needed.
Below are features that make foot N ideal for stitching decorative patterns and characters.
The N foot is a genuine Brother Accessory, made from quality materials and designed to use with patterns included in the Decorative and Character/Monogram menus of your Brother embroidery machine.
This wide, snap on foot has a 7mm opening in the center.
The clear view in the center provides excellent visibility.
Designed with a deep groove on the bottom side, the monogramming foot slides easily over bulky decorative stitches.
Use the monogram foot for satin stitching with a dense zigzag, and your stitches will flow smoothly under the deep groove on the foot.
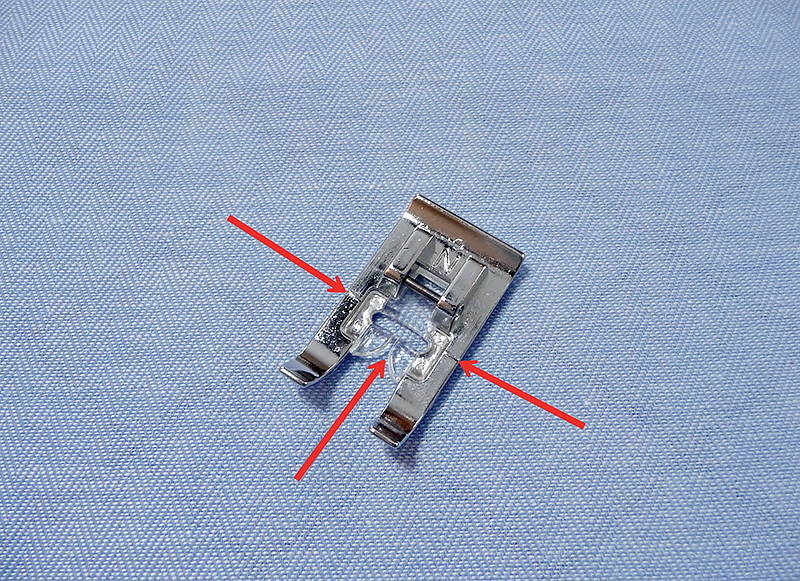
Dash lines on the foot show where stitching starts and can also be used as an alignment guide when pivoting a corner.
Notice the clear view in the center of the foot along with dash lines that show where the stitching starts. See Figure #2.
Figure #2
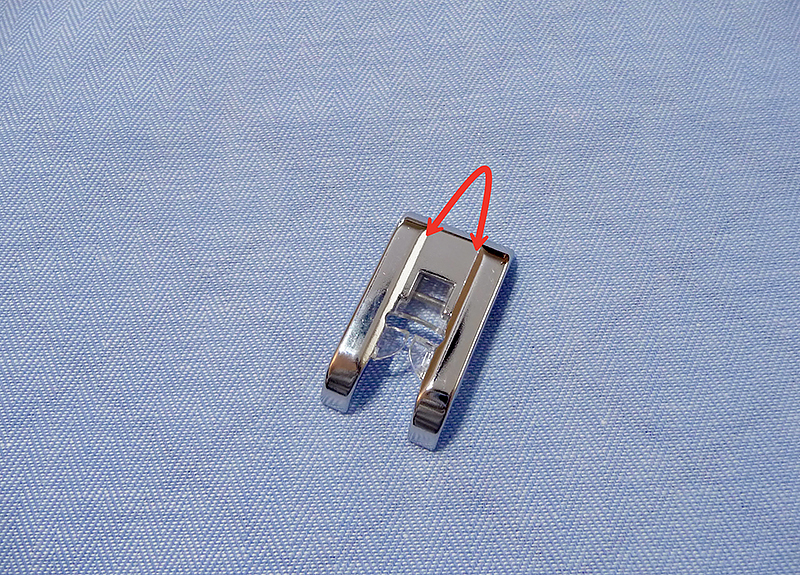
The deep groove extends from the front all the way to the back of the foot. See Figure #3.
Figure #3
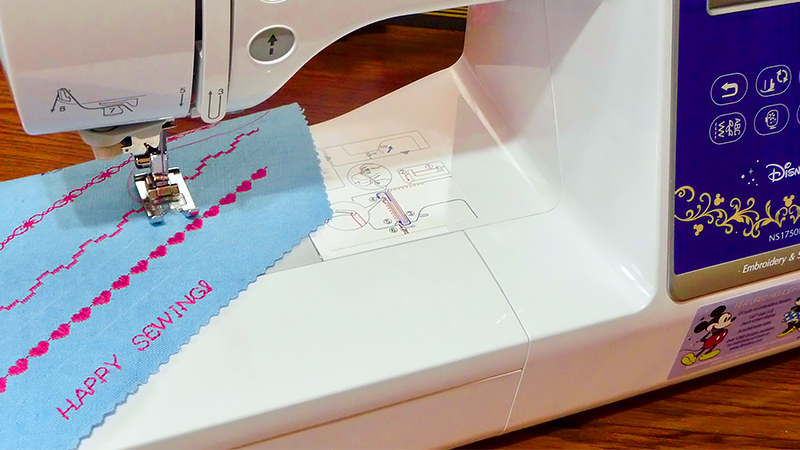
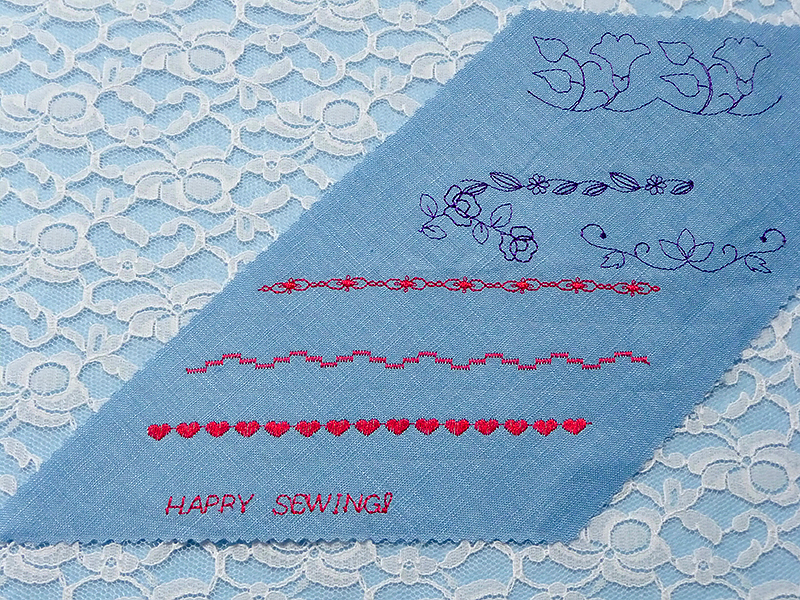
Decorative sewing stitches on some Brother models fit within the 7mm opening on the foot. On other Brother models, you’ll find multi-directional stitches where the feed dogs move from side to side as well as front to back, forming large decorative patterns. The oversized base of sewing foot N helps keep the fabric flat and secure while these large stitches form on the fabric. See examples of 7mm stitches in pink and large, and larger multi-directional decorative patterns in purple in Figure #4.
Figure #4
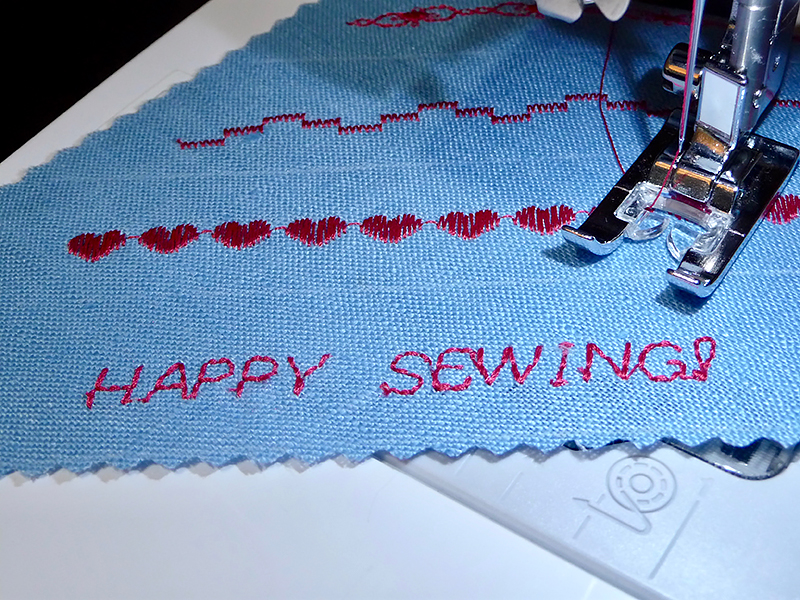
Now that you know more about your Brother N monogramming foot, experiment with the wide variety of decorative patterns and character stitches built-in to your machine. Have fun sewing with presser foot N! See Figure #5.
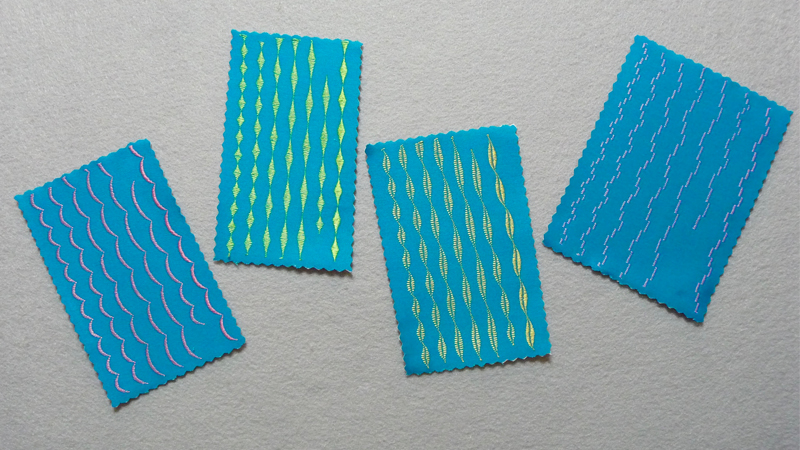
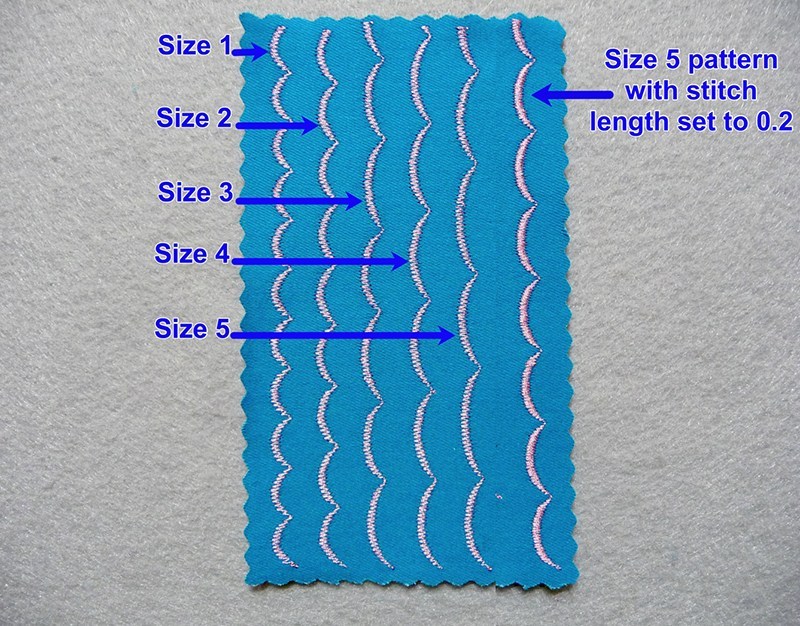
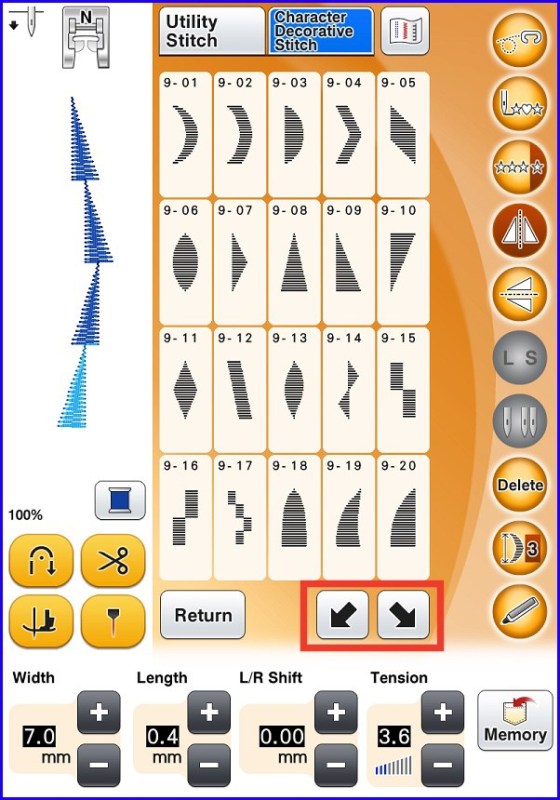
Elongation style stitches are much more fun than their rather technical name implies. The term elongation simply means that patterns in this category of decorative stitches can be re-sized in a range from 1 to 5. As they are re-sized, the pattern or shape of the stitch is maintained. Examples in the photo above show patterns stitched out in all the different sizes. Although the size varies, the density remains the same and the general shape of the stitch does as well. Depending on the size and the stitch selected, different sizes can produce interesting variations. In addition, changing the length of the stitch makes the pattern denser but also shortens the length of the pattern. One of my favorite tricks is to select a larger size pattern and then shorten the stitch length. This results in a fuller looking stitch that is a bit shorter than the original pattern. See examples of sizes below in Figure #1b:
Figure #1b
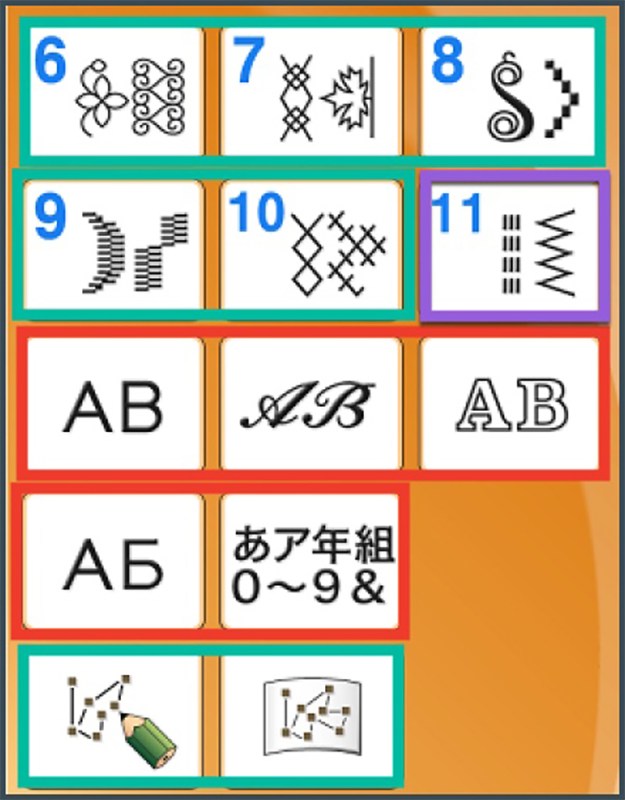
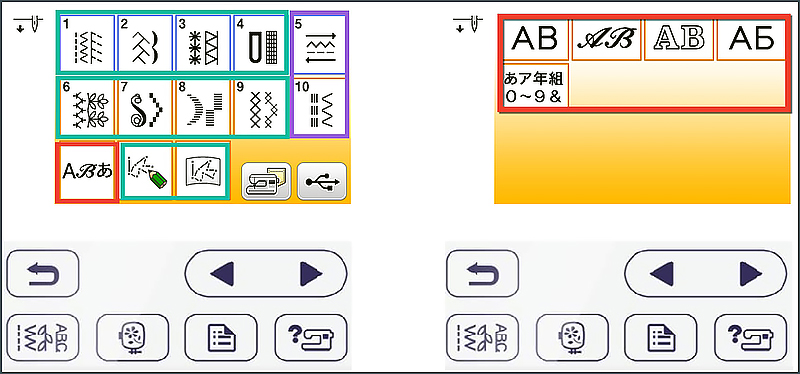
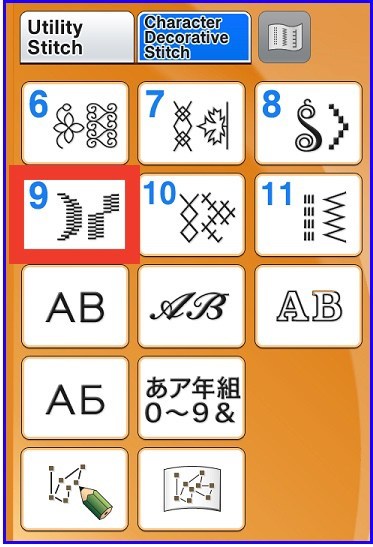
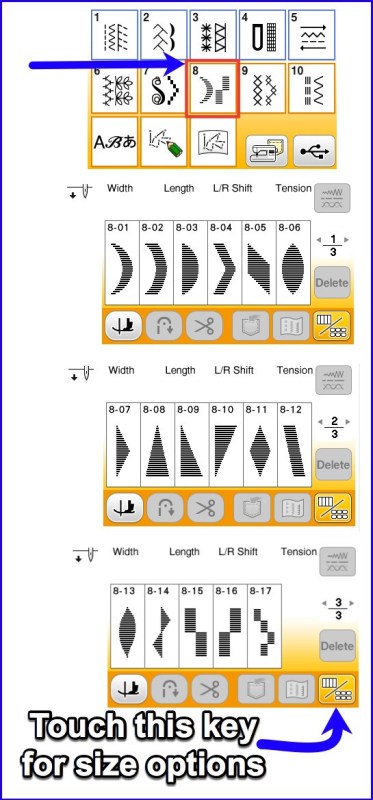
You’ll find these 7mm satin style elongation stitches built into many Brother machine models. They’re located in the Character/Decorative stitch menu of the machine. See examples of stitch menus below in Figure #2a and #2b:
Figure #2aFigure #2b
The size key allows for elongating the stitch in a range from 1 to 5.
Some machine models include an additional feature for creating step stitch patterns. This technique allows for moving stitch patterns left and right to sew wide patterns with multi-directional stitching. See Figure#3 below:
Figure #3
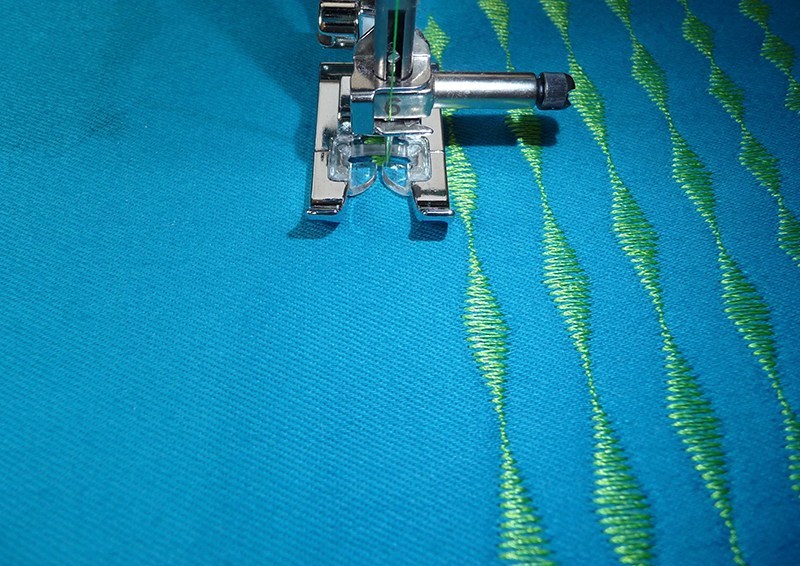
Remember to change to presser foot “N” when sewing these decorative stitches. This foot has a groove on the underside, so it flows easily across bulky satin stitches. See Figure #4.
Figure #4
It’s also important to be sure fabric is firm and well stabilized before sewing these decorative stitches. A layer of tear-away stabilizer is a good choice for many situations. Be sure to test stitches on scraps before sewing your actual project. Have fun experimenting with elongation stitches, trying different sizes, patterns, and combinations. Enjoy!