With Spring just around the corner, I thought I’d share how to sew a fabric Easter basket. These homemade Easter baskets aren’t just for Easter though – they make great gifts for all different occasions, holidays, and themes! I sew these DIY fabric baskets for everything from baby showers to teachers’ gifts and more. Add machine embroidery for a nice custom touch. Use these homemade fabric baskets for custom storage bins as well! Get the tutorial below on how to sew your very own fabric Easter basket.
Materials and Supplies:
- Brother sewing and embroidery machine. Note: Machine featured in this project is the Brother NV180D. You can use any machine with 4-inch hoop capability.
- Brother Embroidery Threads and Bobbin Thread for embroidering.
- SA5929 Brother Cut-Away stabilizer cut to fit hoop size.
- Temporary adhesive spray specifically for machine embroidery.
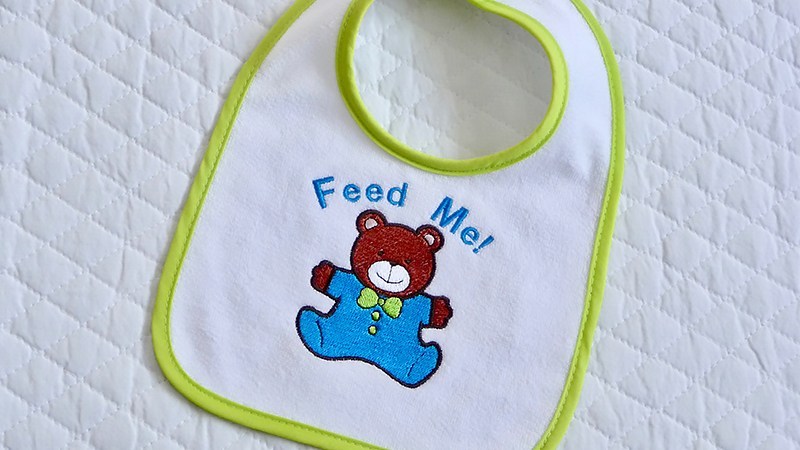
- Plain low nap baby bib, sized large enough for featured design.
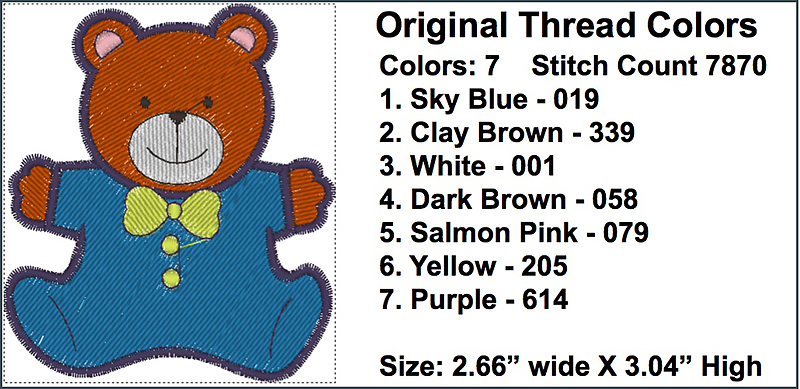
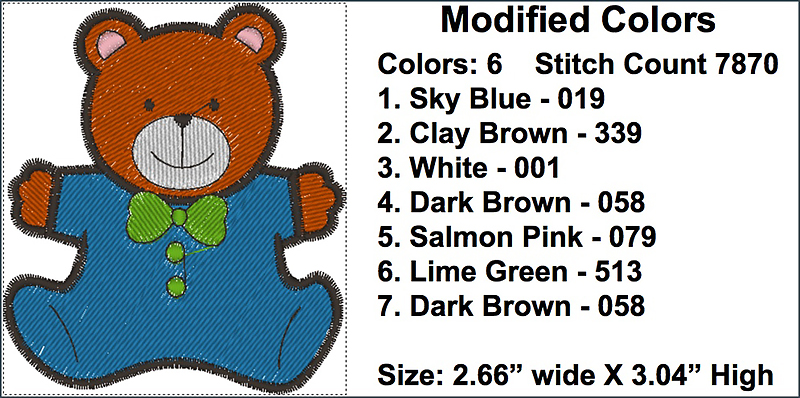
- Brother Free Design for March. See Figure #1a for original thread color and stitch information. See Figure #1b for modified colors.
Basic steps for creating embroidered baby bib:
- Prepare bib for embroidery and hoop with stabilizer.
- Create design using edit mode of sewing machine for changing size and configuration of lettering.
- Embroider design and remove stabilizer.
1. Transfer design to machine. Create a combination design with bear and lettering as follows:
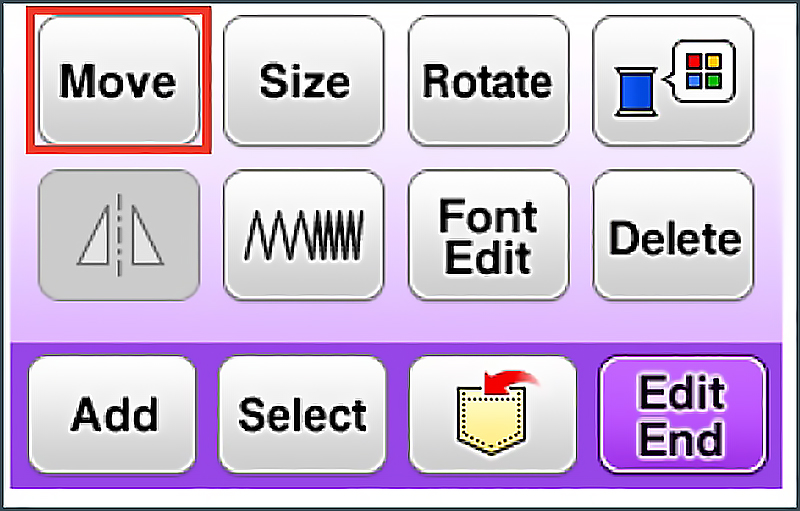
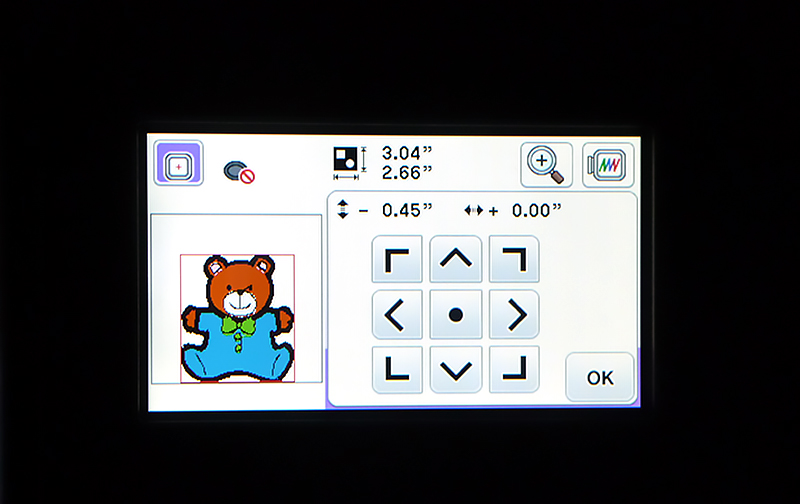
Select design, touch Set and then touch the Move key. Use arrow keys to move design to bottom of hoop and touch OK. See Figure #2a and Figure #2b.
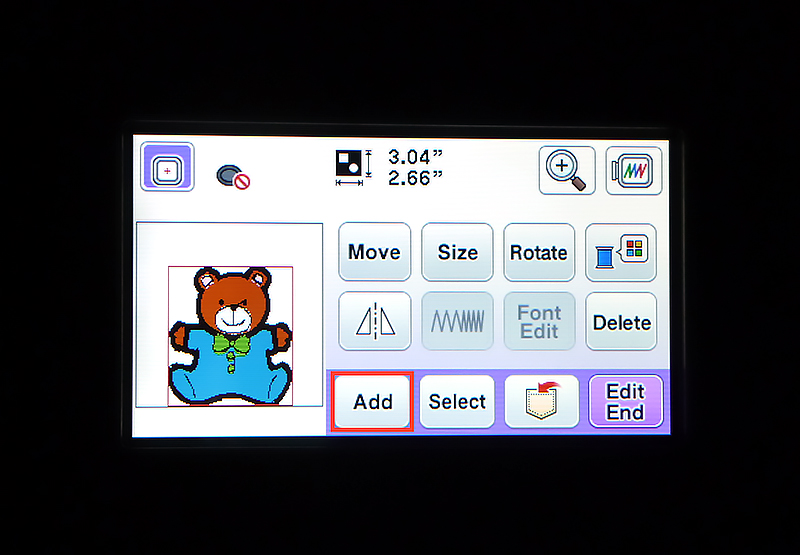
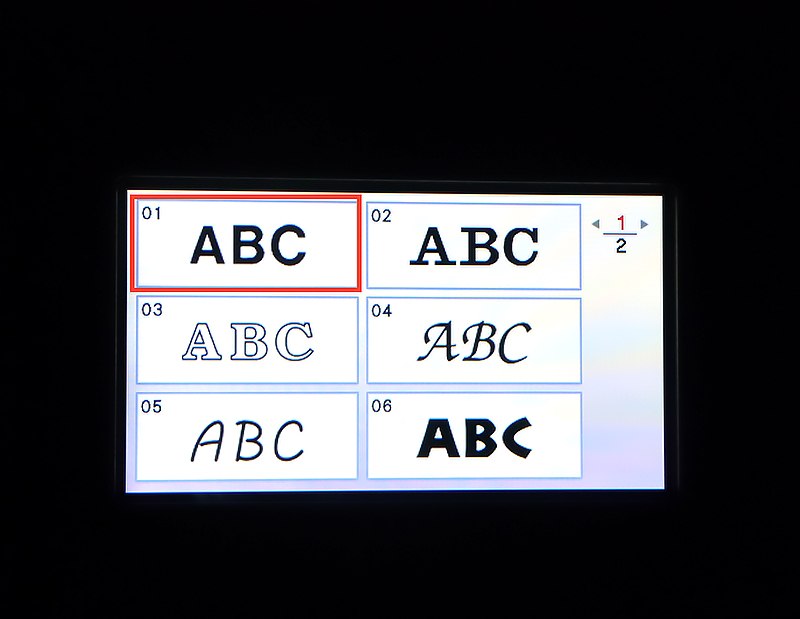
Touch Add and select a block style font from the font menu. See Figure #3a and Figure #3b. Tip: Block style fonts work better than fonts with thin columns on this low nap fabric.
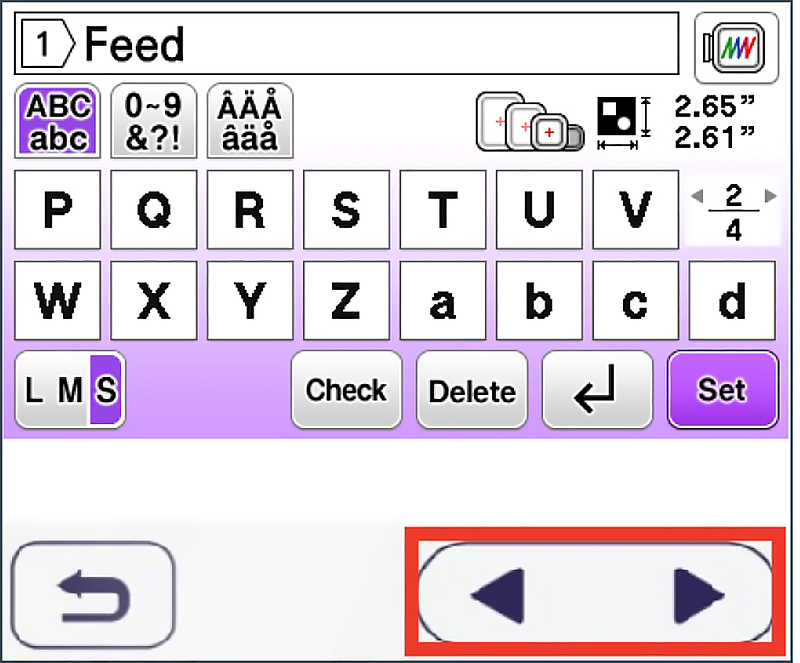
Program lettering using small font size, using arrows on machine to navigate through the lettering screens to select both upper and lower case letters. Add a space between the two words, and an exclamation point at the end. Tip: Be sure to select S for small, right after selecting the first letter. See Figure #4a, Figure #4b, Figure #4c, and Figure #4d.


Tip: I like to start with smaller, rather than larger lettering and then use the sizing feature to increase the lettering size to fit the hoop area. This is especially helpful when using the Array feature, as larger lettering will sometimes prevent you from using various array functions. Here is my formula: Start small, add the array, and then change sizing last.
Set your lettering, touch move key, and use arrow keys to move lettering above the bear head. Touch OK. See Figure #5.

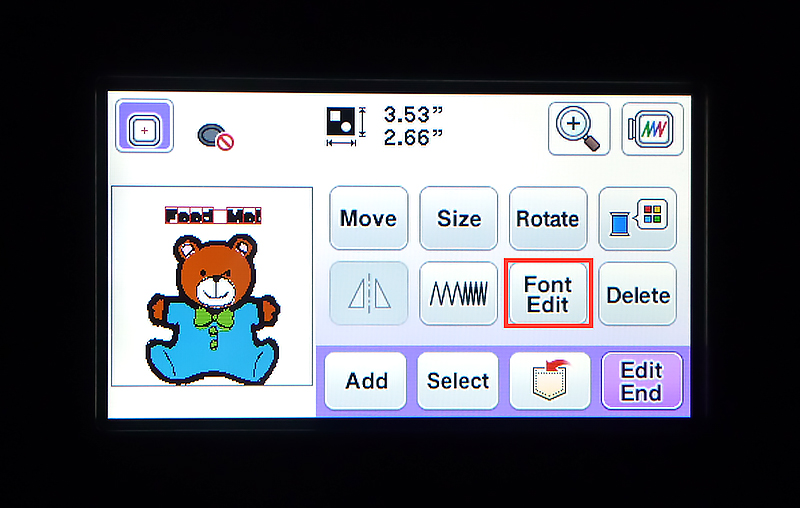
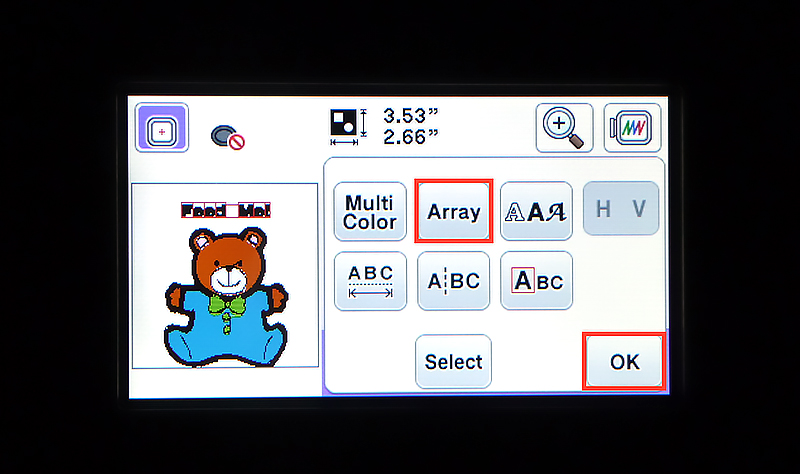
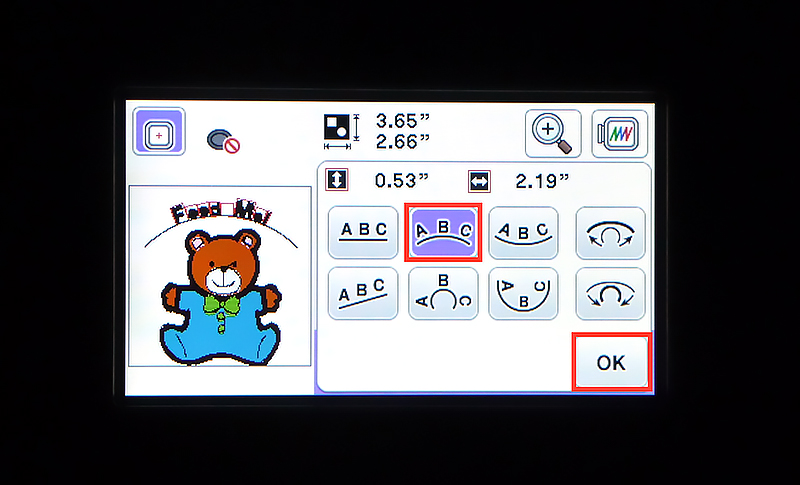
Touch font edit key. Touch array key. Curve lettering over bear head. Touch OK, then OK again to return to embroider edit screen. See Figure #6a, Figure #6b, and Figure #6c.
Tip: There are many more options for editing embroidery fonts. Watch for more in future tutorials!
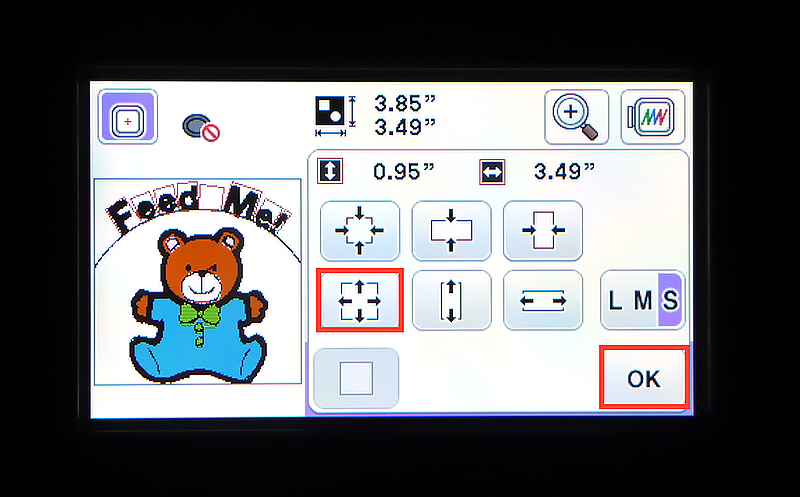
Touch size key and increase lettering until the machine stops at the maximum size. Touch OK. See Figure #7.
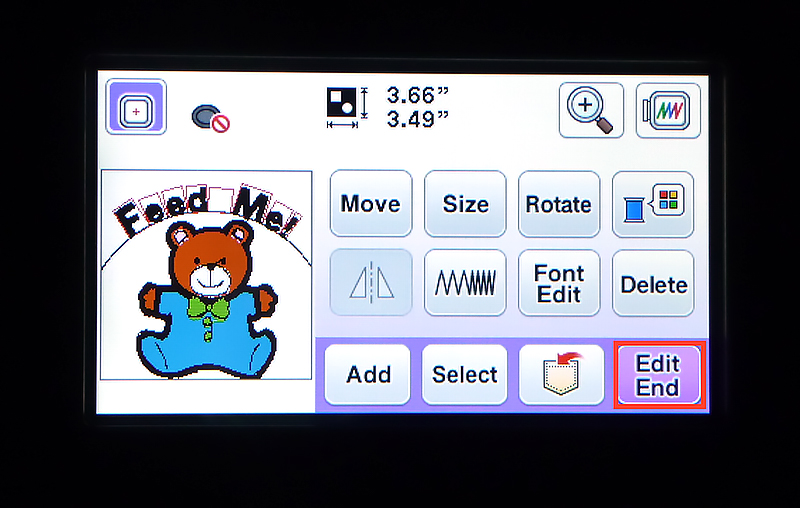
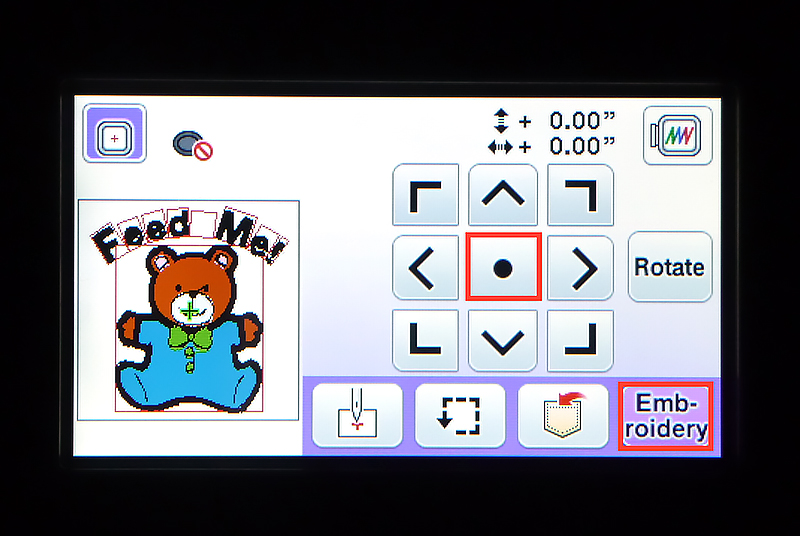
2. End editing. Center combination on the screen, then touch Embroidery. See Figure #8a and Figure #8b.
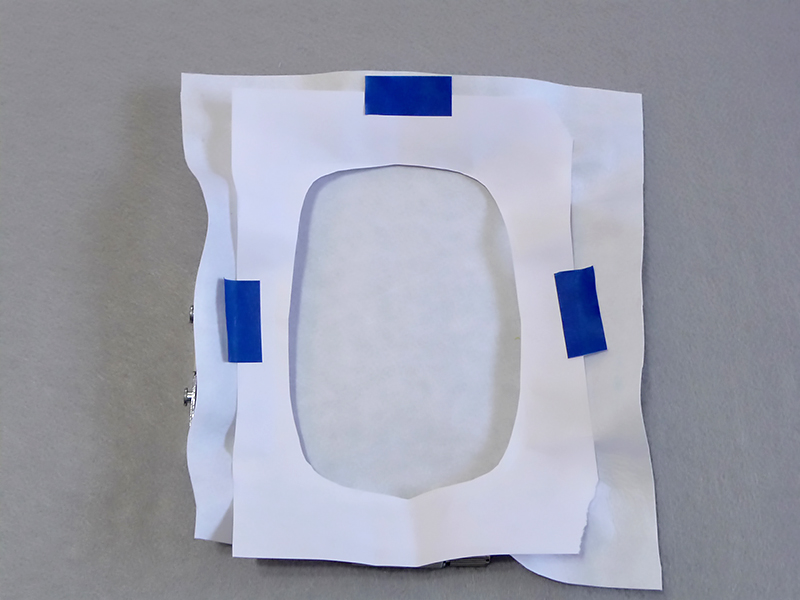
3. Hoop cut-away stabilizer and lightly spray with adhesive, following manufacturer’s directions on the can. Note: It is very important to avoid over spraying. Tip: To keep adhesive from getting on the hoop, I like to cut a window in a piece of scrap paper and tape it over the hoop to protect the edges. Spray over paper, then remove and discard. See Figure #9.
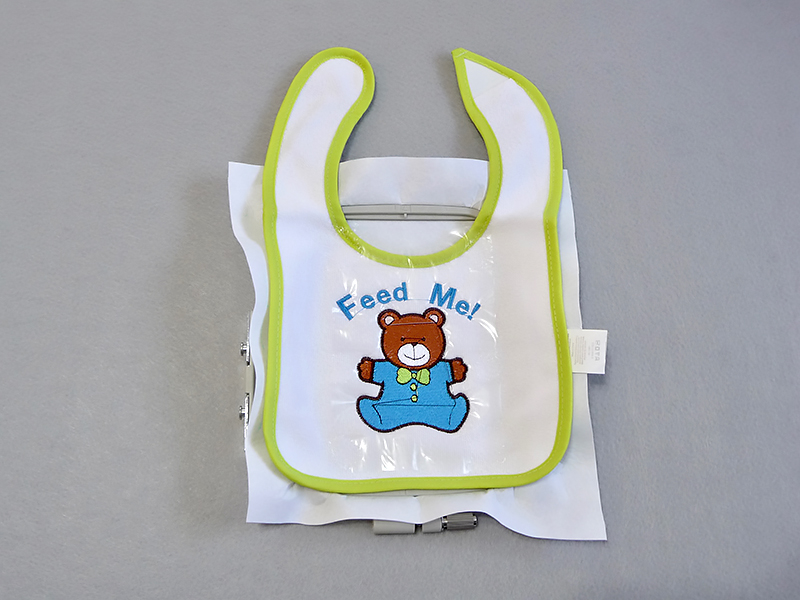
4. Center bib in hoop, securing it to the tacky surface. Place water-soluble over the bib to help tame the nap and keep the design from sinking in. Tip: Lightly dampen the outer edges of the stabilizer to make it tacky and it will adhere to your fabric. Embroidery design on bib. See Figure #10.
5. Remove from hoop and trim stabilizer, leaving a margin of ½ to 1-inch of stabilizer around the design. Tip: Bonding from temporary spray adhesive will usually disappear within 2 to 5 days. To dissipate earlier than that, iron the sprayed fabric with a warm dry iron. This type of adhesive does not wash out. You’ll want to make sure spray adhesive is gone before thoroughly washing out water-soluble as recommended on the package.
You are finished with embroidering your baby bib! Enjoy!
Options and ideas:
- Feel free to sew your own multi-layer bib. Embroider on the top piece then add a lining to hide stitches on the wrong side.
This article has been republished from Brother Sews USA.
The original article can be seen here: http://blog.brothersews.com/free-design-of-the-month/free-design-baby-bear-bib/