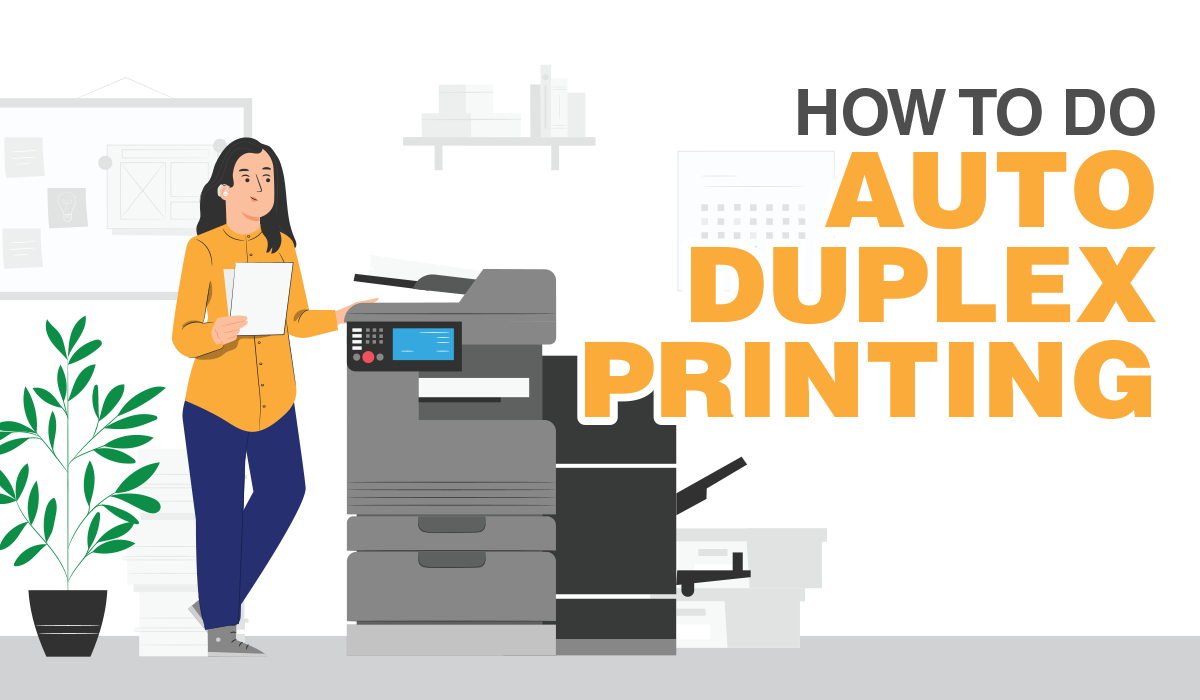
Confused About Auto Duplex Printing On Laser Printer? Here’s how
Clueless about auto duplex printing on laser printers? Don’t worry we’ve got you covered. Auto duplex printing is basically printing on two sides of the paper automatically. Yes, it means that you don’t have to flip the pages manually when you want two-sided printed pages.
But how do you do that? Is there a special switch that you need to flip? Read on to find out!
Manual VS Auto Duplex Laser Printer
Manual duplex printing can achieve the same result as automatic duplex printing — the only difference is that you will have to turn the page over yourself to print the other side.
On the other hand, in auto duplex printing, the printer does the flipping for you. This saves you time, money, effort, and paper!
An auto duplex laser printer helps you to enjoy higher print quality, faster print speeds, cleaner prints, lower print costs, and more efficient printing.
Check out some of Brother’s best Laser Duplex Printers
Here are some additional tips to enhance your printing efficiency:
Two Ways to Optimize Printing Speed
1. Use a Laser Printer
Compared to inkjet printers, laser printers usually print more quickly, regardless of whether your prints are in colour or monochrome (black and white).
2. Use Auto Duplex
As mentioned previously, auto duplex printing saves you the hassle of manually flipping the pages. Just press print, make yourself a cup of coffee, and come back with double-sided prints!
How do you set up auto duplex printing?
How To Do Auto Duplex Printing
Setting up duplex printing can change your printing routine and reduce costs. All you have to do is to follow the steps below:
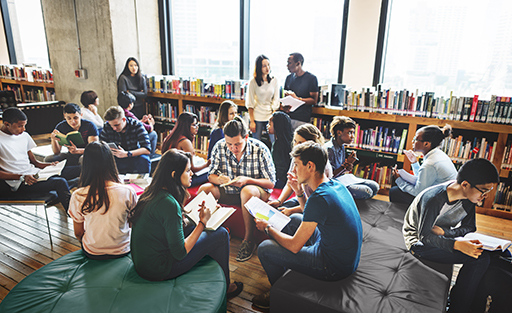
Need Affordable Printers? Here Are The Best Printers For Students!
Are you a student who needs an affordable printer for your printing needs?
Tired of paying for expensive prints every time a school project is due?
Having to wait in the long queue at the school’s printing shop during submission deadlines?
Perhaps you are a parent who grimaces at the struggle of your children, and wishes to make their lives easier.
Students (and parents) rejoice! In this article, you will learn how you can save money on printing by investing in the right affordable home printers perfectly suited for your needs.
Why Do Students Need Affordable Printers
But first, let us address the elephant in the room — do children, teenagers and youths need printers?
The short answer is a resounding yes! Here are four reasons why students need low-priced printers at home.
Printing of School Projects and Assignments
With project-based learning and school projects being the norm these days, students need to print reports, essays, photos, and other assignments.
These may sometimes include colour printouts of charts and graphs, or captioned photos depicting different locations that they’ve been. It is also common for students to print out lesson plans and notes from their teachers.
Tertiary level students in universities may also need a printer to proof-read long essays or churn out copies of their research reports.
Printing of Personal Fun Projects
Beyond school projects, having an affordable printer also allows your child to stretch their imagination with fun personal projects.
They could design and print out a photo book documenting your last family vacation. Create a sign-board just for their room. Or write a fictitious story involving space aliens and cowboys!
A home printer also allows you to print out family photos — a perfect way to decorate your home during these times.
Expensive Shop Printing Costs
Beyond the above reasons, printing can also be increasingly more expensive at print shops with rising labour and rental costs.
While professional printers may be suited for large volume commercial prints, small-scale printing costs for home users are likely to be high. This is especially so for high resolution colour printouts for images such as photos, posters, or other illustrations.
Inconvenience of Printing in School or at a Shop
Faced with mounting pressures at school, students who need urgent print-outs of their assignments may find it frustrating to look for an available print shop.
Often, queues at such printing shops may form — especially close to project deadlines!
Besides battling other students to get your job printed first, you may also have to contend with occasions where the shop closes, like weekends, public holidays, or non-retail hours.
What To Look For in an Affordable Student Printer
Getting an affordable printer will help you to solve your student printing woes. You won’t need to go to a library or an internet cafe to print out your work, or rip your hair out when your regular print shop closes.
Before you run out to get any affordable printers you can find, consider these factors when you choose a printer that is best suited for a student.
Print Quality of Printer
Low cost shouldn’t equate with low quality. While searching for the best economically-priced printer, you’ll need to ensure that your printer doesn’t skimp on print quality.
Check that your value-for-money printer can print out various documents with perfect clarity. It would be such a shame if your hard work came out with a bunch of blurs, lines and smudges!
Space Needed for Printer
Next, consider the space you have for your printer. You wouldn’t want a printer that takes up too much space, given the constraints of your room.
Try to find one that is compact yet packed with the features that you need for your school and personal printing needs.
Cost of Printer — Think Long-Term Costs
Lastly, you’ll need to consider the price of the printer itself, as well as its running costs.
Often, students and their parents opt for the cheapest printer available in the market without considering the ongoing cost of its consumables. Such costs may add up — especially when the volume of school work that needs to be printed goes up.
There are four running cost components that you should consider:
Printer Ink or Toner Cost
Printer Paper Cost
Printer Electricity Consumption
Printer Maintenance or Repair Cost
Printer Ink or Toner Price
The printer ink or toner is one of the biggest running costs when it comes to owning a printer. You wouldn’t want to get a cheap printer that has a huge cost for its ink or toner.
You may want to consider if the majority of your print jobs are to be in black and white or colored. This will help to determine your budget for the cartridges — yes, colour cartridges are more expensive.
Do also be careful of using third party ink or toners — those may not be suitable for your machine and may damage it in the long-term.
It is wise to find a balance between your cost-per-page and the upfront printer cost.
Once you have these costs figured out, it would be easier to see if a printer will burn a hole in your pocket in the long term.
Pro Tip: If you’re looking to get an inkjet printer, you should use it at least weekly to maximize its cartridge use. Idle printers can dry up cartridges or result in clogged print heads.
If you are not printing constantly, and have longer idle time in between prints, it is better to get a laser printer. While the upfront costs of Laser printers may be higher than inkjet printers, toner replacement wouldn’t be as often. Besides, laser printer toners are dry powders which wouldn’t dry up with time.
Printer Paper Price
The next cost to consider are your paper costs. There are different types of printing media and they all have different prices.
If you need to print art pieces on a certain print medium, its costs and compatibility may vary from printer to printer. Getting these special papers from the same printer brand ensures that your printouts will be of a premium quality — it also helps you to avoid printer jams and other mishaps.
If you are just printing regular documents, sticking to regular A4 plain paper shouldn’t be much of a problem. A cost saving tip is to buy your printing paper in bulk or during a sale — it is much cheaper than buying them individually.
Printer Electricity Consumption
This next cost might seem negligible to some, but with any electrical appliances, the electricity consumption costs of your printer do add up over time.
Where possible, look for printers that have a deep sleep mode or energy saving functions. This might not seem like an important cost to consider in the beginning — however, in the long run, it will save you a considerable amount.
Printer Maintenance and Lifespan
What’s the point of buying a printer which spoils the next year? Fixing it or buying a new one altogether can be both troublesome and costly.
To prevent this, ensure that you buy a reliable printer with a good warranty. Often, this is a good sign that its maintenance costs will be manageable.
Do also look out for printers from established trustworthy brands that provide reliable customer service. This can help you to reduce your printer maintenance costs, and minimise the need for you to replace your student friendly printer every few years.
Where To Buy The Best Printers for Students
If you are looking to buy the best affordable printer for students, here are a few printers from Brother that can meet a student’s needs for affordability, high print quality, low consumables prices, and compact in size.
Looking for a Nifty Photo Printer? We’ve Got You Covered
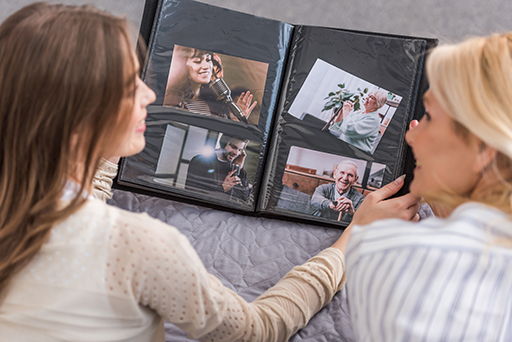
Picture this — You’ve taken tons of photos of your kids, your family home, and even your two cats. You’ve shared them on social media, and occasionally, get to relive those special moments as you scroll through the memories that your smartphone throws up.
Wouldn’t it be nice to hold physical prints of those precious photos in your hand? Or to frame your priceless captures to be hung on that empty wall in the hallway?
In today’s Internet, smartphone and wireless-powered age, making physical photo prints can be as easy as snapping your fingers. You can send photos directly to your home printer (no computer or wires needed), or better still, print photos on a portable printer with a few taps on your phone.
Thinking about investing in a portable photo printer? Photo printers in the Philippines come in all shapes, sizes, and specifications. How do you buy the right photo printer for your home or office? What kind of inks do you need to consider? More importantly, what features should you consider?
In this article, you’ll learn all about the different types of photo-friendly portable printers, how to choose a portable printer, as well as the range of printers small and lightweight enough to be easily transported yet robust enough to handle your everyday printing needs.
Types of Portable Printers
Portable printers come in three main flavours:
Inkjet Printers: These are the most common portable printers, and are commonly used for home printing of photos and other image-based documents.
Dye-sublimation Printers: While dye-sublimation printers in commercial settings tend to be larger in footprint, there are a few such printers designed for portability and accurate photography reproduction.
Pocket Photo Printers: These are specifically made for printing photographs, and are often carried around for events like weddings, parties and other occasions where “instant” photos are needed.
If you need to print out documents as well as photos, an inkjet printer is likely to be your best bet.
Dye-sublimation printers, on the other hand, are more specialised printers. Used to produce high-quality photo prints, they are ideal for professional photographers. The downside is that such printers are expensive and are not suitable for printing text documents.
Meanwhile, pocket photo printers are more suited for once-off uses — such printers are unable to handle a large variety of printing jobs.
Now size can be misleading — you might think that the smaller the printer, the cheaper it is. This simply isn’t the case. On the contrary, portable printers that have an extremely small footprint may cost more than larger multi-purpose printers.
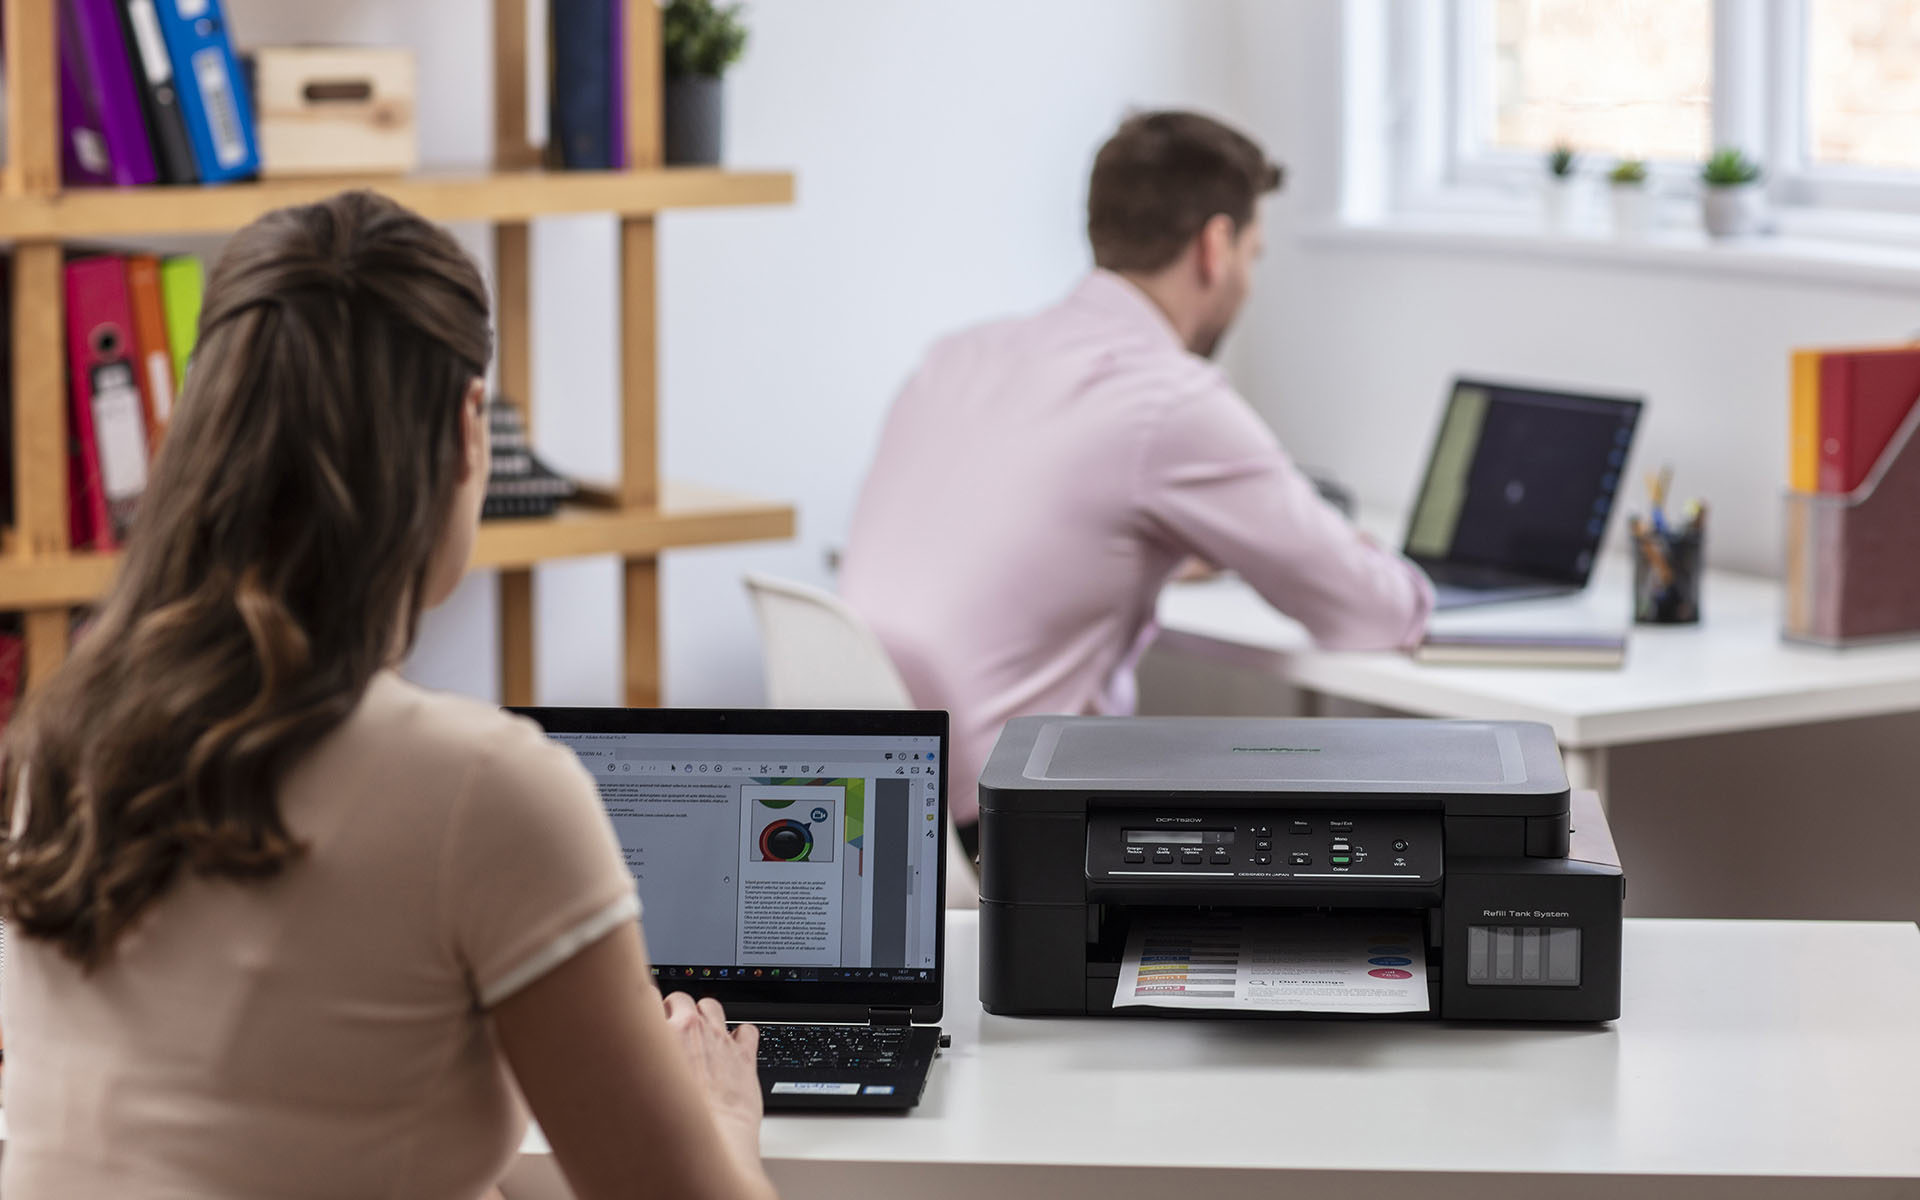
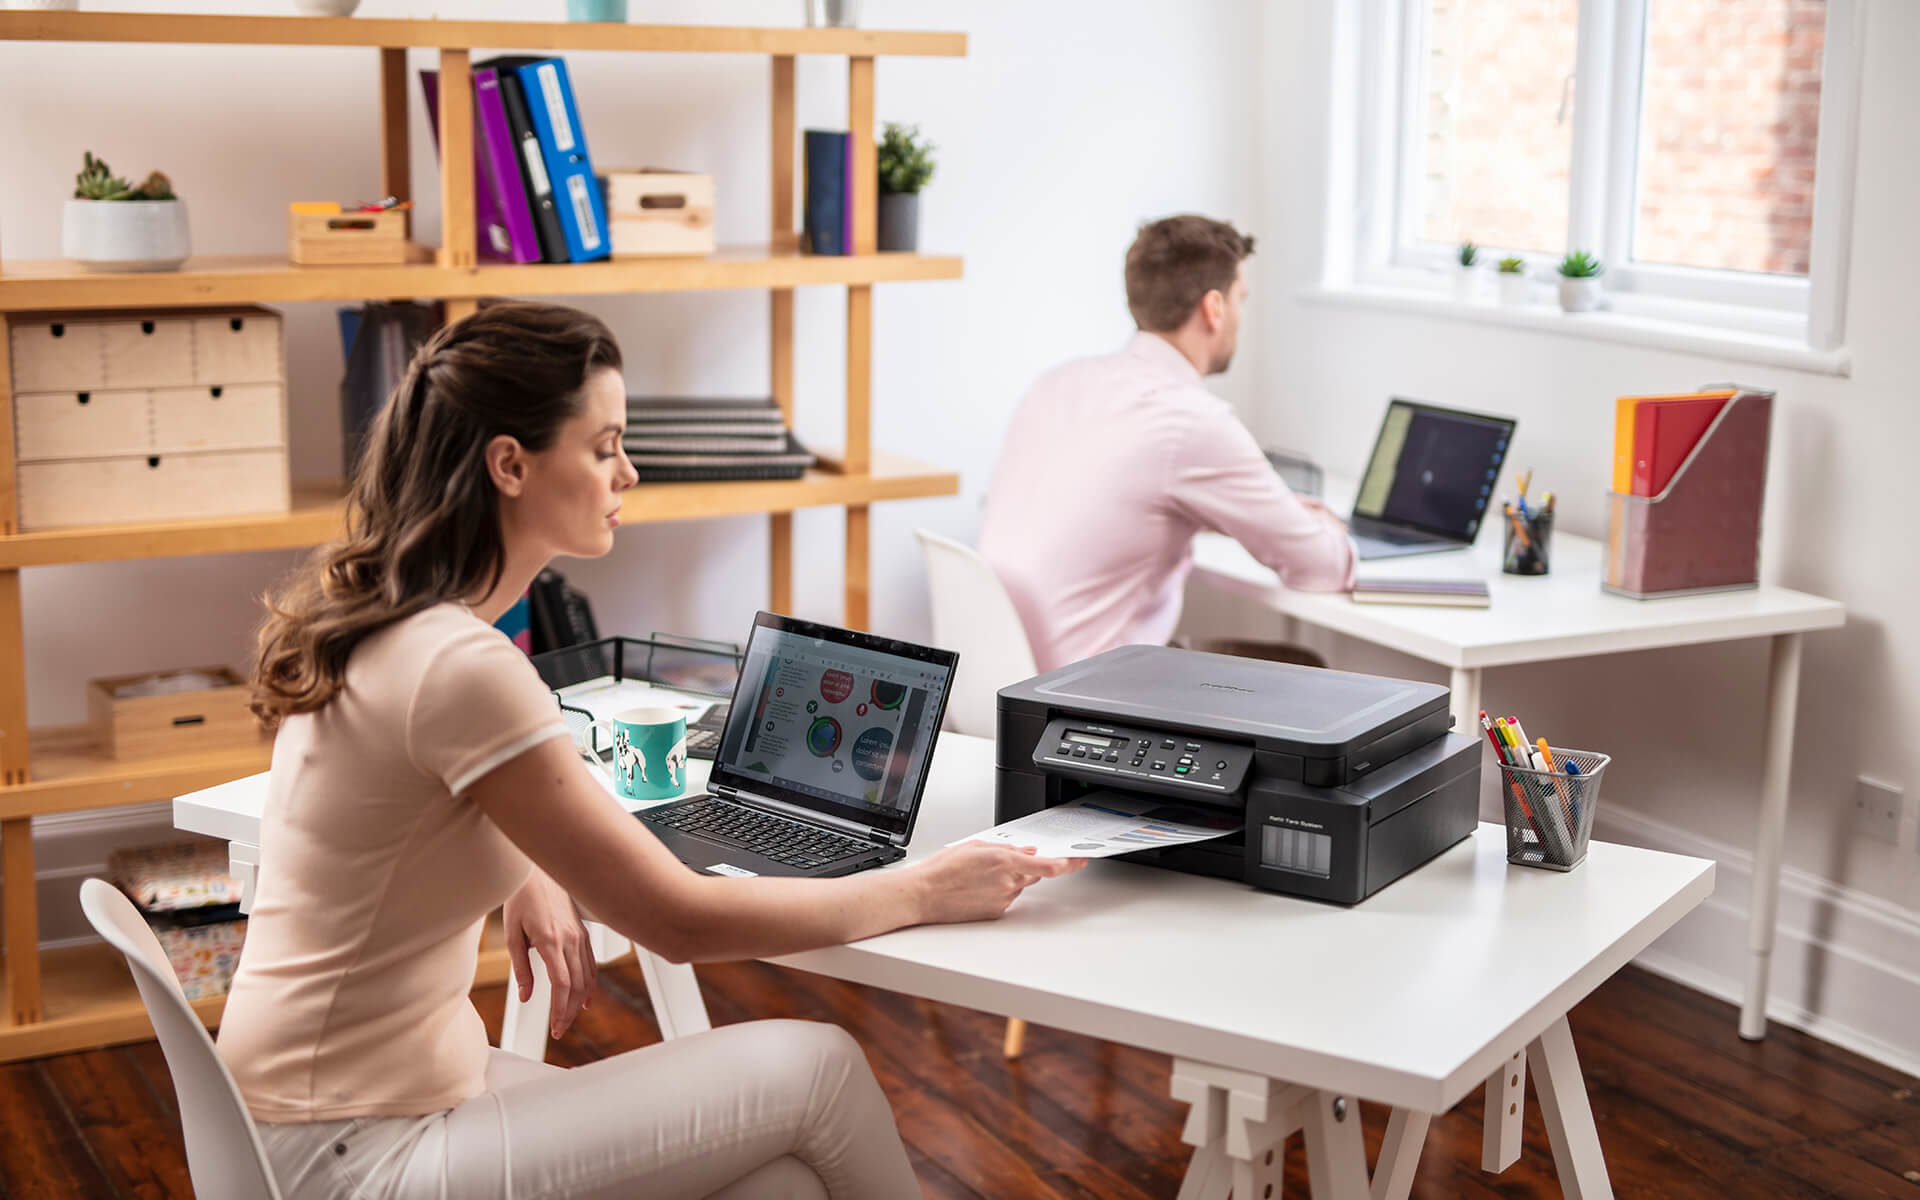
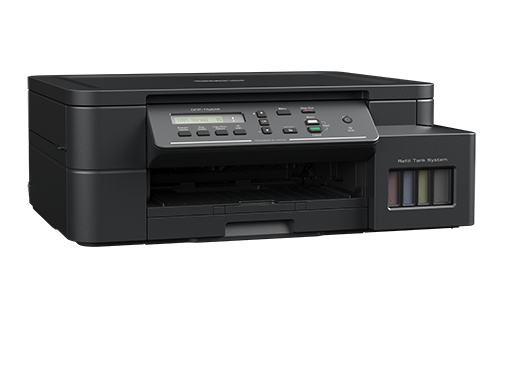
Brother DCP-T520W is one of Brother’s most popular ink tank printers, suited for printing high-quality and long-lasting photos, while also capable of handling document printing jobs.
This refillable ink tank printer features a transparent cover that allows for easy front access to the embedded ink tank and handles a variety of print jobs speedily and efficiently. With a document print speed of up to 17/9.5 inch per min (ipm), this nifty printer will empower you to print more in less time. It also works with Brother’s Ultra High Yield Ink bottles, which roughly translates to 7,500 pages in black and 5,000 pages in colour!
Considering a pocket photo printer?
The Kodak Photo Printer Mini is a pocket-sized printer that can print wallet-sized photos from iOS or Android devices.
At just 0.9 by 3 by 6 inches, the Mini’s star quality is definitely its portability. You can easily slip it into a handbag or even a large pocket, making it a useful companion for parties or events where you want to snap photos and give out to friends.
How Does Portable Printing Work?
Most portable printers in the market today come with Wi-Fi and Bluetooth technology to enable seamless communication with your laptop, smartphone or tablet.
Some of these are also battery-powered, which allows for even more freedom in printing documents, photos and other materials when you are on-the-go.
In short, portable mobile printing no longer requires you to lug heavy printer cables to connect from your device to a printer. What a relief!
What To Look Out For in a Portable Printer
In this section, you will learn all about the key features and functionalities of portable printers, as well as what you should consider prior to buying a portable photo printer.
Size/Portability of Portable Printers
Portability is one of the biggest decision-making factors when choosing a portable printer. While they may be easier to carry, smaller printers usually result in a trade-off in print quality. Hence, you have to balance the need for easy transportation with your ideal print quality output.
While small pocket-sized printer options do exist, you will experience some limitations in your print sizes. In the long run, you may get more bang for your buck by investing in a compact desk printer that can handle document printing while printing consistently high-quality photos.
Print Resolution of Portable Printers
Most photo printers — be they inkjets, sublimation-dye, or pocket-sized — offer good resolution, providing better-quality prints relative to traditional printers. A photo printer with a resolution of 1,200 x 3,600 dpi or even higher would suffice for crisp-looking photos and images.
Inkless vs. Ink Cartridges
Another important consideration is the type of cartridges or ink used.
Today, most printers use Zero Ink (or Zink for short), which involves embedded dyes in the photo paper itself. Zink saves money in the long-run but has trade-offs in print resolution or the ability to reproduce a rich black colour.
A traditional inkjet printer, on the other hand, shoots microscopic dots of ink to produce an image or a printed page. Only the necessary ink for the image is used, and the remaining ink in the cartridge can be used for subsequent prints.
For Brother printers that work with ultra high-yield ink bottles, you can enjoy printing up to 7,500 pages in black and 5,000 pages in colour on a single round of cartridges!
A dye sublimation printer works by heating a special ribbon containing solid inks. The ink sublimates (becomes a gas without liquefying first), laying down varying amounts of the three primary colours onto the paper. The gas then solidifies on the page, resulting in full-colour images.
The dye sublimation process tends to result in lower efficiency in terms of ink: the printer transfers only a portion of the ribbon’s colour panels onto the page. The ink that remains on the panel cannot be reused.
Paper used in Portable Printing
Inkjet printers work with copier paper, envelopes, labels and other forms of office media. They offer greater flexibility as inkjet printers can accommodate specialty paper with matte or glossy finishes for photo printing.
Dye sublimation printers, on the other hand, require specially-coated paper. Beyond postcards and photo prints, dye sublimation printers can also be used to print novelty items such as T-shirts and tote bags. All these are fine and dandy at the beginning but your printing costs can chalk up quite easily.
Print Speed of Portable Printers
If you require high-volume printing, look out for print speeds shorter than 10-15 seconds per print when you choose your portable printer.
The longer the print time, the slower your workflow will be.
Wireless or Mobile Connectivity
There are several ways to connect to a printer. Some printers offer direct connections to your computer, laptop or mobile device using a USB port, while also supporting Bluetooth or Wi-Fi.
Most printers will also support both Android and iOS devices. Remember to consider the devices you would be using with your portable printer, and double-check the compatibility before making a purchase.
Price of Portable Printers
How much do portable printers cost? Well, it varies. Most portable printers are priced between S$130-S$300. Do remember though that this price only covers the printer and the initial round of ink, and excludes the costs of consumables such as paper (or other media) and ink, as well as their power consumption.
Be sure to include the longer-term costs of these consumables in your budgetary considerations.
How to Print Photos From Your Phone
There are various ways to print photos directly from your smartphone.
Apple Airprint
For iPhone users, Apple Airprint is the easiest, most fuss-free way to print from your device to any wireless printer that is on the same wireless network. You do not even need to download and install additional software (drivers).
Here is a step-by-step guide:
Make sure your phone and your printer are on the same Wi-Fi network
Open the Photos or Gallery app
Select the photo you wish to print and tap the Share icon
Scroll down the options and select ‘Print’
Tap on Select Printer
Select your printer from the list
Change the paper size, if necessary, specify the number of copies), and send your print job off!
Major printer makers—such as Brother, Canon, and HP—cover iOS devices and are compatible with AirPrint.
For Android users, you can utilise a range of wireless apps for direct printing from most printer vendors. There are also printing apps, such as Mopria Print, that you can download and use.
Brother iPrint&Scan
Whether you are team iOS or team Android, Brother’s iPrint&Scan app allows you to print or scan effortlessly from your smartphone, tablet, or notebook – without the hassle of wires.
The app also comes with a range of advanced features such as document editing, faxing, and machine status updates.
iPrint&Scan is also compatible with AirPrint, Mopria, and Windows Mobile Print.
Conclusion
Now that you know how to choose a photo printer, and are acquainted with the key essentials that make a good portable photo printer, what will your choice be?
A pocket photo printer for fun and spontaneous moments or a practical desktop inkjet printer that can meet your other printing needs as well as churn out good quality photos before you can even say “Cheese”?
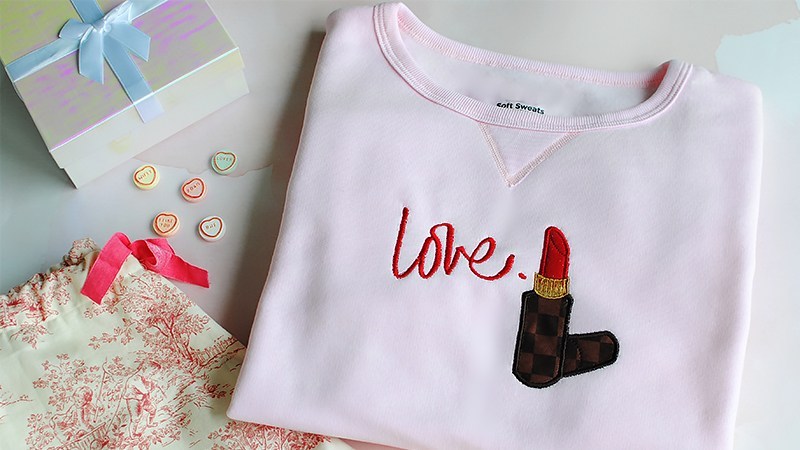
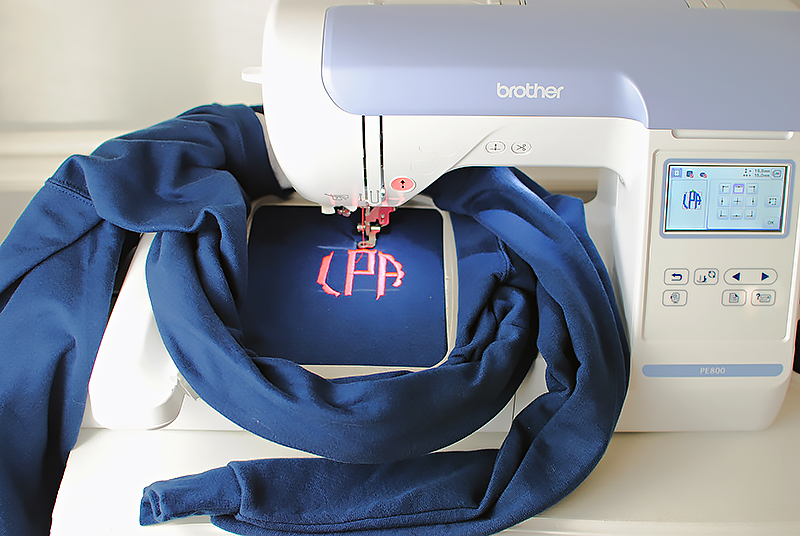
Take a plain sweatshirt to the next level of style with machine embroidery. From monograms to fun designs, you can customize this cozy wardrobe essential for yourself and others. These DIY monogrammed sweatshirts make great gifts for family and friends alike! Check out the tutorial below on how to embroider a sweatshirt with your Brother embroidery machine.
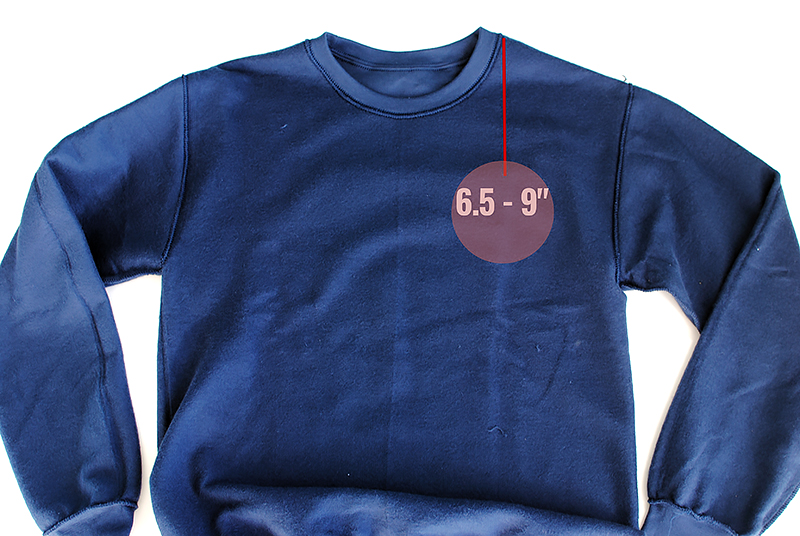
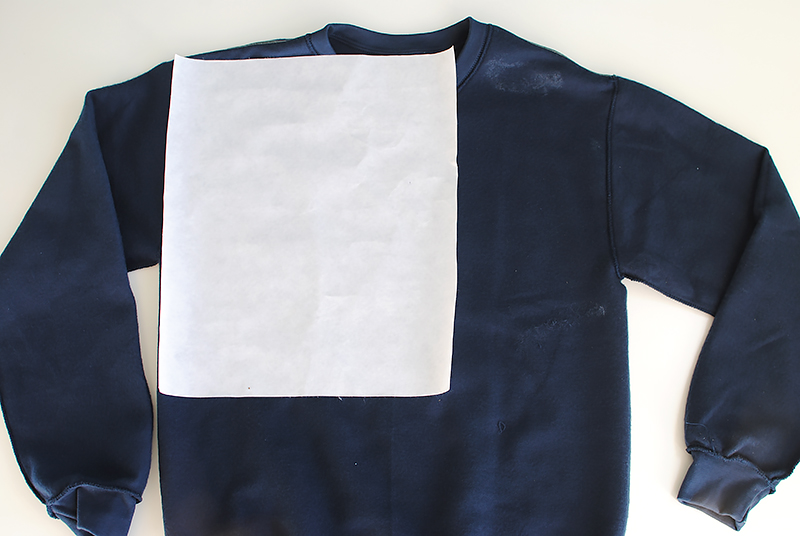
Lay out the sweatshirt and mark the location you want the monogram with a fabric marking tool. It’s a good idea to print out a template or create a sample stitch out to figure out your preferred placement. Traditionally, a monogram is embroidered 6.5”- 7” down the left shoulder seam. However, I did one on the right shoulder seam that came out great! I also like to place the monogram in the center front as well (typically 3” down from the center neckline line).
Once you find the location you want, mark the center, vertical, and horizontal locations (basically create a rectangle). I like to create a cross and center the design at the center of the cross where the lines intersect. Mark what works best for you.
Step 2
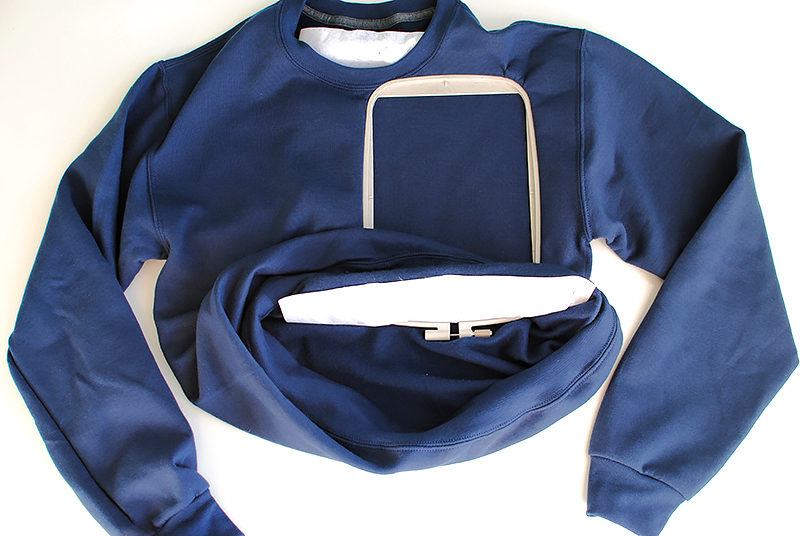
Flip inside out.
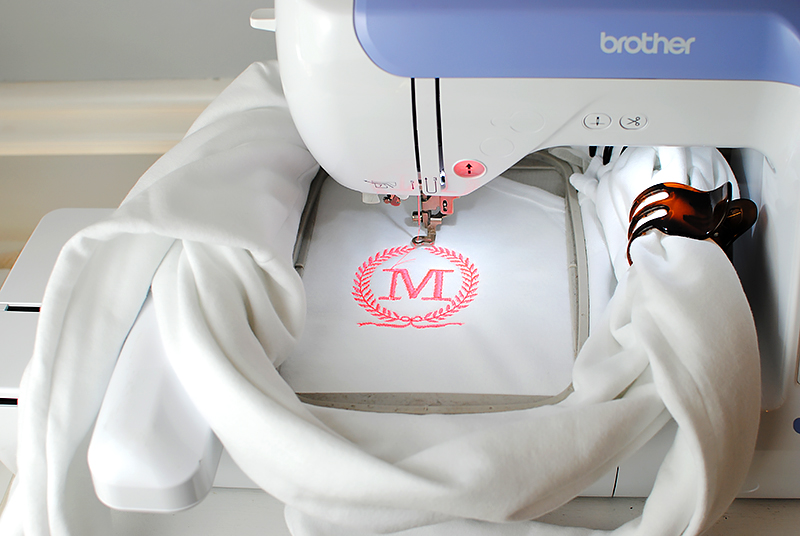
Use a Cut Away stabilizer that will cover the embroidery area and hoop size. Spray with a temporary spray adhesive and press onto the area that will be embroidered. I use Cut Away stabilizer on sweatshirts because they’re worn and washed often. This will help the embroidery last a long time compared to other stabilizers.
Step 3
Flip right side out.
Place the outer hoop inside the sweatshirt and put the inner hoop on the top, making sure the design is centered in the hoop.
Step 4
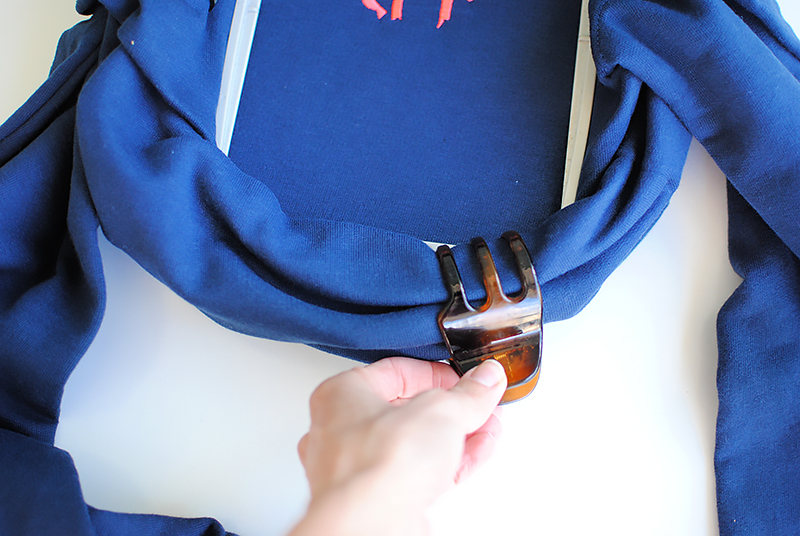
Roll the excess material towards the outer hoop and away from the hoop area. You can use clips to keep the excess material in place (I use hair clips, an embroidery tip I got from a friend).
Step 5
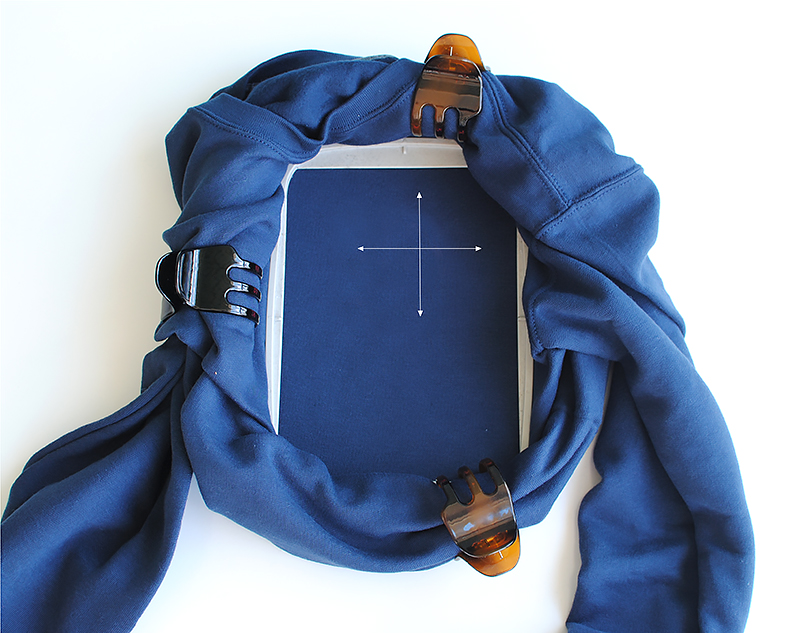
Create your monogram. You can create your own or use the built-in ones that the Brother Machines offer. My designs measured about 3 x 3 “. You can use software to create your design and lettering, or just piece it together on the Brother Touch Screen. I have the Brother PE800, which makes it easy to add and edit designs right on the screen.
Step 6
Embroider away!
Once your embroidery is complete, turn the shirt the wrong side out and cut away the stabilizer. I typically cut it about ¼’ away from the design. Over time and after multiple washes, the stabilizer will soften.
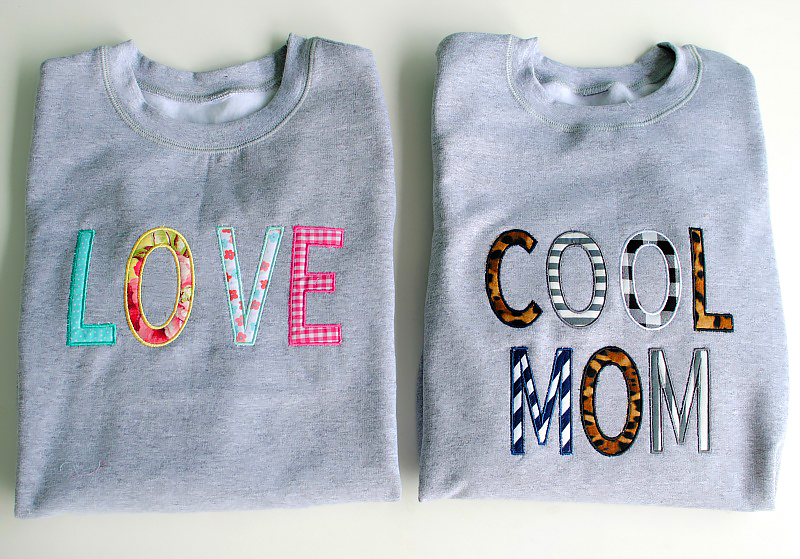
Other examples / Valentine theme (optional images)
I hope this inspires you to give embroidery a try on your garments. It’s a great way to upcycle old t-shirts, sweatshirts, and denim jackets. Here are a couple other examples.