How To Choose the Right Printer (Flowchart)

buying printer flowchart

Looking For The Right Printer? This Flowchart Will Help

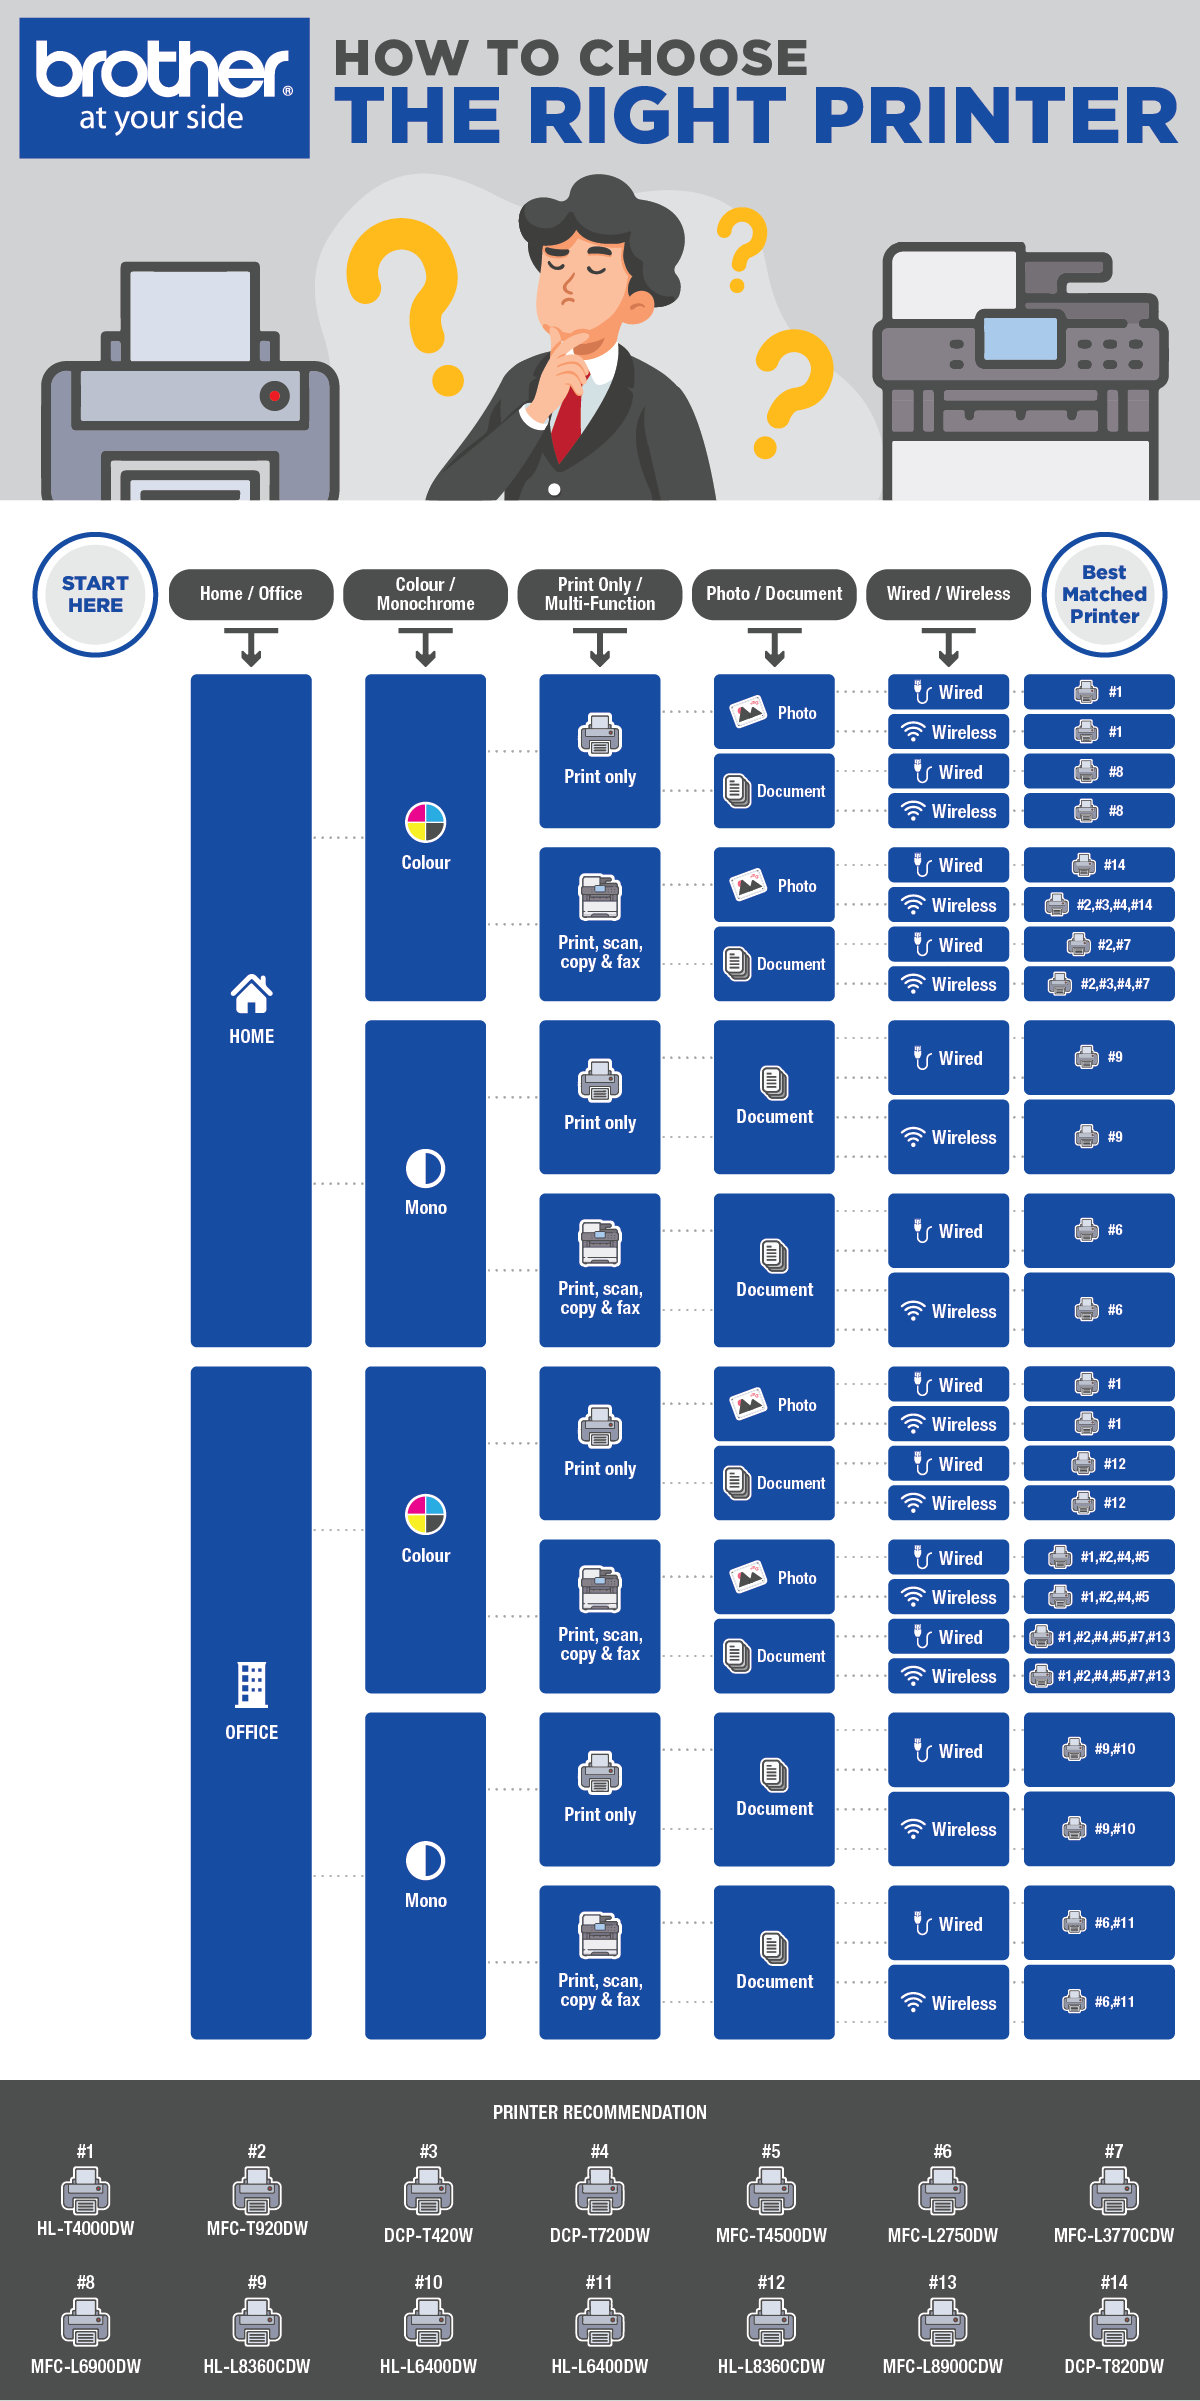
Which printer should you buy—inkjet or laser printer? How do you select the most suitable printer for your home or office?

With so many different brands, functions and types of printers out there, this seemingly easy task can suddenly seem astronomical by proportion!

Do you need your printer to have wireless connectivity? Do you only need the print function or an all-in-one multifunction printer? Which printer can handle all your printing needs?

To save you the headache, we have put together a useful flowchart to help you figure out which is the best printer for you.

Follow your desired attributes path and find your best matched printer!

How infographic looks like:

Buying-Printer-Flowchart

The Biggest Printer Problems And Their Solutions

Printer problems and solution

Frustrated With The Never Ending Printer Problems? Here Are Some Solutions

Are you struggling with your home or office printers? Wonder why your wifi printer does not work properly? Frustrated with printing errors from your duplex printer?

These problems can be a huge headache to those who simply want their printing work done. 

Help is here! In this article, we have put together a list of the most common printer problems and their solutions.

  1. Slow Printing with Wifi Printers
  2. Home / Office Printer Not Printing
  3. Duplex Printer Printing Error
  4. Extra Printed Blank Sheet of Paper
  5. Paper Jams
  6. Unclear Printed Texts
  7. Poor Quality Inkjet Printed Photos
  8. Poor Black and White Print Quality
  9. Thick Ink on Inkjet Prints
  10. Unreliable Error Messages

Take a deep breath, calm yourself down, and try these solutions before you call your printer repair man!

1. Slow Printing with Wifi Printers

In today’s fast-paced world, a slow printer can be exasperating when you have a sizable number of pages to print.

The common reasons for slow printing are due to large photo sizes and large presentation files. You can either lower the quality of the output or simply send a part of the document at a time to speed things up.

If you are printing wirelessly, do check that the distance between your printer and your router isn’t too far—poor wireless connection could be a possible cause for slow printing. A simple solution would be to place your wireless printer as close to the router as possible, since wifi speed slows down with distance.

Do also check your print settings. Higher quality prints do take more time to print. If an average print quality (eg. for a text document) is good enough, consider switching your printouts to draft mode or the lowest quality setting your printer has to speed up your printing process.

2. Home / Office Printer not Printing

Are you staring at a printer that is just not printing? Well, you are not going crazy, there’s probably a reason for it. Before you start kicking your printer, consider checking if the paper tray is empty—yes, we’ve all made that silly mistake!

OK, there is paper in your tray. So what could have gone wrong?

Consider checking the connection of your printer. There may be multiple printers in the office and you may not have connected to the right printer.

There is a chance that you have accidentally sent the print job to another printer—be sure to double check just in case you are printing confidential documents!

If your printer is still not working, then your print driver may be corrupted. You need to upload the latest version for your model and reinstall it on your computer. Should that still fail, it is best to call your local printer technician.

3. Duplex Printer Printing Error

Having a duplex printer should save you the hassle of flipping each printout manually. But what’s the point of having this functionality if your printer prints the back page upside down?

Fret not, there’s an easy solution to this. All you have to do is select Print on Both Sides, and opt to Flip on Long Edge. Your print jobs should be in the correct orientation now.

But what if you encounter disorderly pages, where the last page is at the top of the document?

There is a way around this incorrect manual sorting—simply print your pages in reverse. This can be found in the Advanced Settings box. You should only select this if your documents are to be put in order once the printing is complete.

4. Extra Printed Blank Sheet of Paper

“Why is there an extra sheet of blank paper after my prints?”  

No, your printer isn’t intentionally wasting paper. Rather, this extra sheet of paper probably came about due to your print settings. This is typically used in offices with multiple users and high print volumes, to separate print jobs from different users and avoid documents from being mixed-up.

If your printer is only for your personal home use, you can change the settings using your printer preferences. You should be able to deselect the option for separator pages from there.
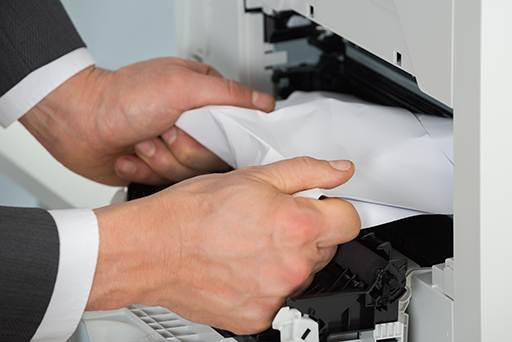
5. Paper Jams

Printer paper jam problems
Close-up Of Businessman Hand Removing Paper Stuck In Printer At Office

Close-up Of Businessman Hand Removing Paper Stuck In Printer At Office

Paper jams are one of the most common issues people have with their home or office printers. This can happen due to static electricity (which causes pieces of paper to stick to each other) or when your printer tray is overloaded with too much paper.

A quick tip is to square off the stack of paper before placing it into the tray, ensuring that the pages line up and are flushed with the tray guides. Remember not to overfill the tray!

Jams may also occur when the print media used is not compatible with the printer. There are certain types of print media that are way thicker or bigger than the normal A4 Paper which is commonly used in most printers. Be sure to check that your printer is able to handle such media types and change your PC settings to match the print media.

6. Unclear Printed Texts

This problem may be caused by multiple reasons. Thus, you should go down this list to consider which option is the most likely possibility.

First, consider if you are using the draft mode or low print quality setting. Such settings may cause your printed texts to become unclear. By switching to a higher quality print, you will get clearer texts. However, be prepared to forgo your print speed—some printers are not able to simultaneously handle fast and high quality prints.

If you are using a laser printer, there is a high chance that the toner has settled, resulting in blurry texts. All you have to do is to remove the cartridge(s) and shake it gently from side to side to release any residual toner clinging onto the side of the cartridge. This works 90% of the time, but remember that the toner will eventually run out and needs to be replaced.

Finally, if you are using an inkjet printer, check if your unclear prints are due to a dirty nozzle or misaligned print head. Thankfully, you don’t have to deal with this manually (though you can if you wish).

Simply launch your printer’s maintenance menu and select “Clean Ink Cartridges”, “Clean Heads”, “Deep Cleaning” or a similar function. Cleaning the printhead will help improve the quality of the printout. As it uses a fair amount of ink you should only do it if you notice that the print quality is particularly bad.

7. Poor Quality Inkjet Printed Photos

Poor quality inkjet prints would commonly be due to a misaligned print head, dirty nozzles or empty ink cartridges. You can troubleshoot this by following the steps described in the previous point above.

The type of print media used may also affect the quality of your prints—especially if you intend to print photographs or posters in high definition colour. Make sure that you use the right photo paper. Often, third party photo papers are unable to reproduce your prints with the same resolution as the original photo papers from your brand.

Don’t forget to check that you have chosen the right paper type in your print settings and that it is set for photo printing.

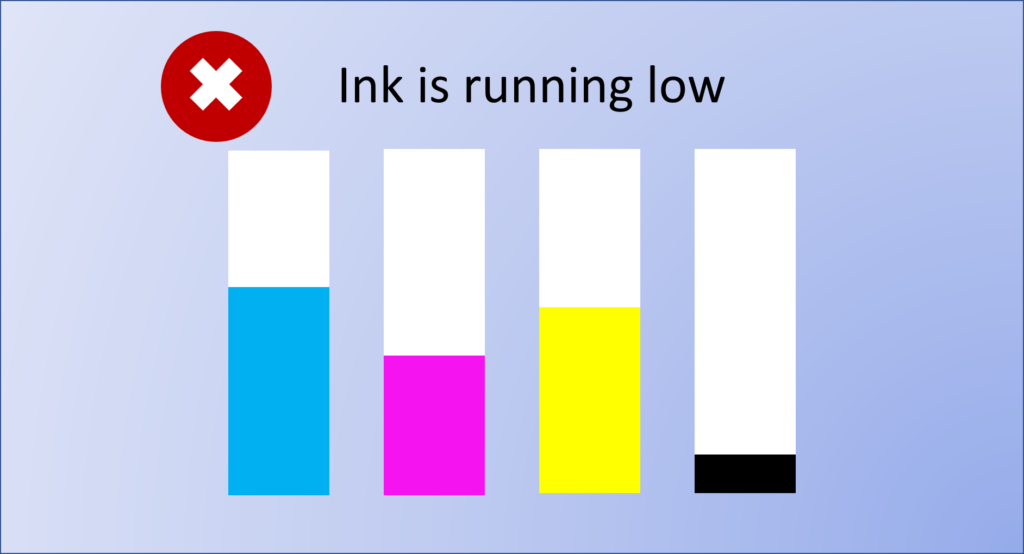
It is also possible that your printer is low on one colour, causing discolourations. To achieve vibrant print reproductions of photos in the right hues, you need to ensure that inks in all the different colours are available—having one colour less can make a huge difference to your print quality.

8. Poor Black and White Print Quality

Do you turn off the colour when printing black and white documents? This is probably the cause of poor prints, especially for black and white images.

The colours give your documents smoother gradations and richer tones compared to solely using black. Thus, if you are printing a high quality black and white document, consider turning on the colour option for the best results.

9. Thick Ink on Inkjet Prints

Do your prints have a thick band of ink clustered around certain sections? This happens when your printer is unable to print at a certain resolution, usually on an uncoated paper. When it encounters this issue, it will try to adjust for the higher resolution by using more ink, causing the thick patch of ink (also known as banding) to appear.

To solve this problem, simply opt for a lower print resolution on your printer.

10. Unreliable Error Messages

Wonder why error messages like “low toner” or “ink error” appear when you’ve just replaced your toner or printer cartridge? Unless your new cartridges are faulty or broken, resetting your computer and printer usually fixes this problem. Do follow the instructions of your printer model to reset it properly.

Conclusion

Printer problems like slow printing, poor quality printouts, and paper jams can pose a huge inconvenience, especially when you need to get your work done. Hopefully, these solutions to the most common printer problems can help you to quickly get back on track. Should all of them fail—and we certainly hope that they wouldn’t—you should probably contact your local printer operator for immediate help!

How to Choose The Best Scanner for Your Home Office

man scanning document

Looking for the best scanner for your home business or small office use? What scanner features do you need and which model should you consider?

From scanning documents, photos, business receipts, name cards, professional certificates, and testimonials, to newspaper articles, magazine ads, or school reports, the sky’s the limit when it comes to things you can scan! And there are multiple scanners available on the market equipped to handle your everyday tasks.

But the question remains… What features in a printer scanner are most important for a home-based business like yours?

In this article, we touch on the top questions to think about when buying a scanner. We’ll also cover the different kinds of scanners you can choose as well as their unique features.

What is a Scanner?

A scanner is an input device that works by using light and optics to convert an image or text on paper into a digital format for computer editing, displaying or archiving purposes.Often, these images need to be of a fairly high resolution in order to be useful.

1. What Do You Need Your Scanner for?

When it comes to choosing the right scanner, it really boils down to your home business’ needs and preferences. Photos and documents are the most common things that you’ll need to scan, along with receipts, articles, business cards, or film.

If you need to scan things very often or have multiple pages to scan at one go, you will likely be looking at document scanners (also known as sheetfed scanners)—most of these scanners are designed to be high-volume workhorses. We will cover the different scanner types in more detail below.

2. What Types of Scanners Are Out There?

The range of scanners available are fairly wide—have a look at the options below to see which suits you best.

Flatbed scanner

For photos or bound material (e.g. a periodical or report), a flatbed scanner works best. These scanners come with a large glass surface on which you can place the item to be scanned. They also tend to be more flexible, allowing you to scan pages from books, magazines or easily damaged items like old photos.

Sheet-fed scanner/Document scanner

Unlike a flatbed scanner, a sheet-fed scanner scans only document pages and cannot be used to scan thicker items such as books. Most sheet-fed scanners have two-sided scanning capabilities and an Automatic Document Feeder (ADF), which give these lean mean scanning machines high processing speeds and efficiency.

Image scanner

If you are in the business of archiving and are specifically looking to scan images and photographs, your most obvious choice is to opt for a specialised photo scanner. Such scanners tend to provide photo-friendly features, boasting of a high resolution and the ability to scan transparencies or negatives in addition to photographs. Some even come with their own editing software to help retouch image-based scans and remove dust and scratches.

3. What Scanning Software Will You Use?

Most scanners come with basic scanning software, for example, Brother scanners which can be easily operated via the iPrint&Scan app which is free to download.

Depending on your scanning needs, the features which you may need in your home business scanner may include:

  • Photo editing: to allow scanned images to be manipulated
  • Optical Character Recognition (OCR): to translate scanned text into editable text
  • Text indexing: to process scanned text to be searched and sorted
  • Searchable PDF documents: to create PDFs that can be searched

For a reliable and compact home scanner, check out Brother ADS-1200 Scanner. This document scanner simplifies your everyday scanning tasks. Scanning up to 25 sheets per minute, documents will automatically be scanned as soon as you insert it into the ADS-1200. Frequently used scan-to destinations can also be set up as one-touch shortcuts on the touchscreen.

hand of businessman scanning a document

4. How Will You Connect To The Scanner?

Need to access a scanned document or image in a jiffy? Do consider the different connectivity options for your scanner. 

While some scanners may only work with computers, others can be accessed through mobile devices like smartphones or tablets. These connectivity options may affect how quickly the scanner can scan to your device.

A standard USB cable will usually suffice if you’re connecting the scanner to a single computer. However, if you’re looking for a scanner that multiple people can access and use, do ensure that it has Wi-Fi capabilities so it can be connected to your wireless computer network.

5. What Resolution and Colour Depth Do You Need?

Unless you are a graphic designer, you probably don’t need a scanner with the highest dots per square inch (dpi)—but let’s be honest, a good scan resolution is always nice-to-have! That said, a dpi of 600-1200 is usually enough for most home-based businesses.

What about bit depth? Also known as colour depth, the bit depth is the number of bits used to determine the colour of a single pixel—the more bits available, the better the colour reproduction of your scanner. For standard colour scanning, a significant depth ranging from 24-36 should be sufficient.

Conclusion

Deciding on the best scanner for your home or office use will depend on your business’ specific scanning needs. Keep an eye out for the features that matter most to you and you should be on the right track.

Quilted Bed Caddy

Create a beautiful custom bed caddy using your Brother sewing machine and a few Brother accessories. Quilt your own fabrics for a lightly padded finish that will match your décor and unique style. This handy craft will help organize bedside items you reach for on a regular basis. Pick some pretty fabrics, gather up your tools, and prepare to tackle this easy sewing project. You’ll learn more about the use of several optional accessory feet featured in these instructions. Are you ready? Let’s go sew!

Materials and Supplies:

  • Brother sewing machine with basic built-in stitches.
  • SA190 Roller Foot for attaching gripper material to bed caddy.
  • Additional accessory feet for this project, optional but very helpful:
  • SA184 Edge Joining Foot
  • SA160 Stitch Guide Foot
  • SA132 Quilting Guide
  • Basic notions, including thread to match or blend with fabrics and a removable marker. I recommend a rotary cutter, mat, and ruler for cutting fabric pieces.
  • Materials for bed caddy, including fabric, thin fusible craft fleece, and gripper material:
    • Cut one piece of quilt weight cotton measuring 15-inches wide X 26-inches long for base of bed caddy. Fuse thin craft fleece to wrong side.
    • Cut one piece of quilt weight cotton measuring 15-inches wide X 11-inches long for large pocket. Fuse thin craft fleece to wrong side.
    • Cut one piece of quilt weight cotton measuring 15-inches wide X 14-inches long for small folded pocketNote: Fold pocket piece in half lengthwise and press to form a fold line. Next, fuse thin craft fleece measuring 15-inches wide X 7-inches long to wrong side, matching fleece with fold line and raw edges on half the piece.
    • Cut one piece of quilt weight cotton measuring 15-inches wide X 26-inches long for bed caddy lining.
    • Cut one piece of quilt weight cotton measuring 15-inches wide X 11-inches long for large pocket lining.
    • Cut one piece of quilt weight cotton measuring 15-inches wide X 2-inches long for large pocket trim.
    • Cut one piece of non-slip “gripper” material measuring 13-inches wide X 9-inches long for top edge.

See all pieces in Figure #1a and Figure #1b.

Figure #1a
Figure #1b

Fabric tips: Choose two or more coordinating fabrics, mixing and matching as desired. You can eliminate the large pocket trim piece if you choose a third coordinating fabric. I used remnants left over from another project for this bed caddy. Since I only had two fabric prints to work with, I added the trim strip for extra contrast on the pocket.

Tips for using accessory feet listed with supplies:

  • SA190 Roller Foot – The non-stick and roller capabilities on this foot are ideal for stitching “sticky” materials such as the gripper material on the top edge of the bed caddy. In this project you’ll see that I also used the roller foot to quilt single layers of fabric with thin fleece. Note that there are other feet better suited for quilting thicker layers.
  • SA160 Stitch Guide Foot – Marked lines on this foot allow for consistent stitching of seamlines in a wide range of widths.
  • SA132 Quilting Guide – The quilting guide fits snugly into the small hole found in the back of the presser foot holder so it can be used with any foot you choose. Simply slide the guide a measured distance from the needle and line up the guide with a previous line of stitching for consistent and evenly spaced lines of stitching.

Finished bed caddy measures approximately 14-inches wide X 25-inches long. Please read through all instructions before beginning this project.

Basic steps for creating bed caddy:

  • Add fusible fleece to caddy pieces.
  • Add trim, then quilt caddy base and pocket pieces.
  • Layer pieces and add lining.
  • Attach gripper material to top edge to finish. Note: This piece helps keep the caddy from moving when placed between the mattress and box springs.

1. Prepare large pocket if you are adding the contrast trim. Add contrast strip as follows:

  • Attach stitch guide foot. Layer 15-inch wide X 2-inch long strip along top edge of large pocket, with right sides together, placing it a scant 1-inch from top raw edge. See Figure #2a.
Figure #2a
  • Sew strip to top edge using a 1/2-inch seam allowance, following a specific line on the foot. See line spaced ½-inch from needle position in Figure #2b.
Figure #2b
  • Flip strip so right side faces up and press toward top edge.

2. Prepare to quilt pieces backed with fleece as follows:

Mark starting lines along lengthwise and cross wise center on 15-inches wide X 26-inches long base piece and 15-inches wide X 11-inches long large pocket piece. Mark a lengthwise line on the center of folded pocket piece. Note: This smaller piece doesn’t require quilting in both directions. I used the fabric print to space lines on my small pocket. See example of marked lines on the large pocket piece in the enhanced photo in Figure #3.

Figure #3

Attach the roller foot if you have it and quilt all pieces, stitching evenly spaced lengthwise and crosswise lines.

Tips for Quilting Stitches: Stitch the first center line and then use the quilt guide set for evenly spaced remaining lines to the left and right of the first center line. I like to stitch all my vertical lines first and then turn the fabric to stitch horizontal lines. Fusible fleece does not require closely spaced lines. I spaced mine 1 ½-inches apart. Straight stitches are traditionally used for this type of quilting. However, I chose the triple stretch straight stitch along with alternating lines of the rick-rack stitch. Stitch settings listed below:

Triple Stretch stitch: Center needle position, stitch length, 3.5mm.

Rick-Rack stitch: Width 1.5mm, length 4.0mm.

See examples of quilting in Figure #4a, Figure #4b, and Figure #4c.

Figure #4a
Figure #4b
Figure #4c

3. Layer large pocket with matching lining piece. See Figure #5.

Figure #5

Sew top edge using a ½-inch seam allowance. Press lining to back side.

4. Layer bed caddy pieces as follows:

  • Bed caddy base piece, right side facing up.
  • Large pocket, right side facing up.
  • Folded pocket, right side facing up.
  • Bed caddy lining, wrong side facing up.

See layered pieces in Figure #6.

Figure #6

Sew layers together using a ½- seam allowance, leaving a 5-inch opening along the top edge for turning right side out. Tip: Use a small round object to mark off a slightly rounded stitching line for bottom corners. This gives a more attractive finish to the caddy and makes it easier to trim excess bulk.

Trim corners and lower rounded edges to reduce bulk. Turn caddy right side out, with lining on back side and quilted pieces positioned on the front side. Press carefully and close top by stitching close to edge.

 5. Center gripper material along edge opposite pockets. See Figure #7.

Figure #7

Sew to bed caddy using the non-stick roller foot. Tip: Make sure the entire foot is riding on the gripper fabric as you stitch. Sew slowly to keep material from shifting. See Figure #8.

Figure #8

You are finished! See completed bed caddy in Figure #9.

Figure #9

This article has been republished from Brother Sews USA.
The original article can be seen here: http://blog.brothersews.com/home-decor/quilted-bed-caddy/