Accessory Spotlight: N Foot

This embroidery tutorial highlights the Brother monogramming foot, labeled with an “N.” The N foot is commonly found in the included accessories for many Brother machines. If you’re looking for a replacement, this foot would be listed as a part available from your Brother dealer.

The monogramming foot is designed for decorative stitching and for sewing out lettering and characters, (commonly known as monogramming) patterns in your machine. While there are some utility stitches mixed into the decorative menu, foot N is primarily for decorative patterns and stitches that do not lay totally flat on the fabric. See examples of various stitches from different Brother machine models in Figure #1a, Figure #1b, and Figure #1c.

Figure #1a
Figure #1b
Figure #1c

Important Tips: Unless you are stitching stiff or firm fabric, you’ll likely have the best results when using foot J for utility stitches. If you select foot N in place of foot J, be sure to test your stitching on fabric scraps. Fabric should be well stabilized when stitching decorative and character stitches. Essentially, you are creating mini embroidery without a hoop. Be sure to test stitches on fabric scraps and add stabilizer as needed.

Below are features that make foot N ideal for stitching decorative patterns and characters.

  • The N foot is a genuine Brother Accessory, made from quality materials and designed to use with patterns included in the Decorative and Character/Monogram menus of your Brother embroidery machine.
  • This wide, snap on foot has a 7mm opening in the center.
  • The clear view in the center provides excellent visibility.
  • Designed with a deep groove on the bottom side, the monogramming foot slides easily over bulky decorative stitches.
  • Use the monogram foot for satin stitching with a dense zigzag, and your stitches will flow smoothly under the deep groove on the foot.
  • Dash lines on the foot show where stitching starts and can also be used as an alignment guide when pivoting a corner.

Notice the clear view in the center of the foot along with dash lines that show where the stitching starts. See Figure #2.

Figure #2

The deep groove extends from the front all the way to the back of the foot. See Figure #3.

Figure #3

Decorative sewing stitches on some Brother models fit within the 7mm opening on the foot. On other Brother models, you’ll find multi-directional stitches where the feed dogs move from side to side as well as front to back, forming large decorative patterns. The oversized base of sewing foot N helps keep the fabric flat and secure while these large stitches form on the fabric. See examples of 7mm stitches in pink and large, and larger multi-directional decorative patterns in purple in Figure #4.

Figure #4

Now that you know more about your Brother N monogramming foot, experiment with the wide variety of decorative patterns and character stitches built-in to your machine. Have fun sewing with presser foot N! See Figure #5.

Figure #5

This article has been republished from Brother Sews USA.
The original article can be seen here: http://blog.brothersews.com/accessory/accessory-spotlight-n-foot/

Top Eco-friendly Printing Tips For Home

Eco friendly printing tips for home

Are you looking for an eco-friendly printer that uses less resources, lowers utility bills, and saves costs? 

Keen to adopt eco-friendly printing of documents like letters, invoices, certificates, reports, manuals and others? 

If you do, consider adopting these best practices in eco-friendly printing.

Start by switching to environmentally friendly printers. Equipped with the latest green printing technologies, these planet-friendly printers can make printing sustainable and affordable for your home (or home-based business). 

These green printing features include:

✅ Duplex printing—uses 50% less paper 

✅ N in 1 printing—saves up to 93% in paper waste

✅ Toner saver mode—uses less toner while producing clear legible text & lower cost-per-page

✅ High-yield cartridges—fewer cartridges used  

✅ Energy efficient printing—uses less energy & saves on energy costs

✅ Recyclable parts—minimizes carbon footprint

View some of Brother’s high quality eco-friendly printers here: Brother MFC-L2750DW Laser Printer & Brother MFC-L3770CDW Laser Printer

Beyond this, consider these top environmentally friendly printing tips to lower your carbon footprint, save energy, and reduce costs:

Eco-friendly Printing Tips for Home

Green printing not only saves you resources and costs, but it saves our planet—a win-win solution! Find out more about Brother’s Eco Technology here

Free Design: Baby Bear Bib

With Spring just around the corner, I thought I’d share how to sew a fabric Easter basket. These homemade Easter baskets aren’t just for Easter though – they make great gifts for all different occasions, holidays, and themes! I sew these DIY fabric baskets for everything from baby showers to teachers’ gifts and more. Add machine embroidery for a nice custom touch. Use these homemade fabric baskets for custom storage bins as well! Get the tutorial below on how to sew your very own fabric Easter basket.

Materials and Supplies:

  • Brother sewing and embroidery machine. Note: Machine featured in this project is the Brother NV180D. You can use any machine with 4-inch hoop capability.
  • Brother Embroidery Threads and Bobbin Thread for embroidering.
  • SA5929 Brother Cut-Away stabilizer cut to fit hoop size.
  • Temporary adhesive spray specifically for machine embroidery.
  • Plain low nap baby bib, sized large enough for featured design.
  • Brother Free Design for MarchSee Figure #1a for original thread color and stitch information. See Figure #1b for modified colors.
Figure #1a
Figure #1b

Basic steps for creating embroidered baby bib:

  • Prepare bib for embroidery and hoop with stabilizer.
  • Create design using edit mode of sewing machine for changing size and configuration of lettering.
  • Embroider design and remove stabilizer.

1. Transfer design to machine. Create a combination design with bear and lettering as follows:

Select design, touch Set and then touch the Move key. Use arrow keys to move design to bottom of hoop and touch OK. See Figure #2a and Figure #2b.

Figure #2a
Figure #2b

Touch Add and select a block style font from the font menu. See Figure #3a and Figure #3b. Tip: Block style fonts work better than fonts with thin columns on this low nap fabric.

Figure #3a
Figure #3b

Program lettering using small font size, using arrows on machine to navigate through the lettering screens to select both upper and lower case letters. Add a space between the two words, and an exclamation point at the end. Tip: Be sure to select S for small, right after selecting the first letter. See Figure #4a, Figure #4b, Figure #4c, and Figure #4d.

Figure #4a
Figure #4b
Figure #4c
Figure #4d

Tip: I like to start with smaller, rather than larger lettering and then use the sizing feature to increase the lettering size to fit the hoop area. This is especially helpful when using the Array feature, as larger lettering will sometimes prevent you from using various array functions. Here is my formula: Start small, add the array, and then change sizing last.

Set your lettering, touch move key, and use arrow keys to move lettering above the bear head. Touch OK. See Figure #5.

Figure #5

Touch font edit key. Touch array key. Curve lettering over bear head. Touch OK, then OK again to return to embroider edit screen. See Figure #6a, Figure #6b, and Figure #6c.

Figure #6a
Figure #6b
Figure #6c

TipThere are many more options for editing embroidery fonts. Watch for more in future tutorials!

Touch size key and increase lettering until the machine stops at the maximum size. Touch OK. See Figure #7.

Figure #7

2. End editing. Center combination on the screen, then touch Embroidery. See Figure #8a and Figure #8b.

Figure #8a
Figure #8b

3. Hoop cut-away stabilizer and lightly spray with adhesive, following manufacturer’s directions on the can. Note: It is very important to avoid over spraying. Tip: To keep adhesive from getting on the hoop, I like to cut a window in a piece of scrap paper and tape it over the hoop to protect the edges. Spray over paper, then remove and discard. See Figure #9.

Figure #9

4. Center bib in hoop, securing it to the tacky surface. Place water-soluble over the bib to help tame the nap and keep the design from sinking in. Tip: Lightly dampen the outer edges of the stabilizer to make it tacky and it will adhere to your fabric. Embroidery design on bib. See Figure #10.

Figure #10

5. Remove from hoop and trim stabilizer, leaving a margin of ½ to 1-inch of stabilizer around the design. Tip: Bonding from temporary spray adhesive will usually disappear within 2 to 5 days. To dissipate earlier than that, iron the sprayed fabric with a warm dry iron. This type of adhesive does not wash out. You’ll want to make sure spray adhesive is gone before thoroughly washing out water-soluble as recommended on the package.

You are finished with embroidering your baby bib! Enjoy!

Options and ideas:

  • Feel free to sew your own multi-layer bib. Embroider on the top piece then add a lining to hide stitches on the wrong side.

This article has been republished from Brother Sews USA.
The original article can be seen here: http://blog.brothersews.com/free-design-of-the-month/free-design-baby-bear-bib/

How To Choose The Best Label Printer For Your Small Business

label printer for small business

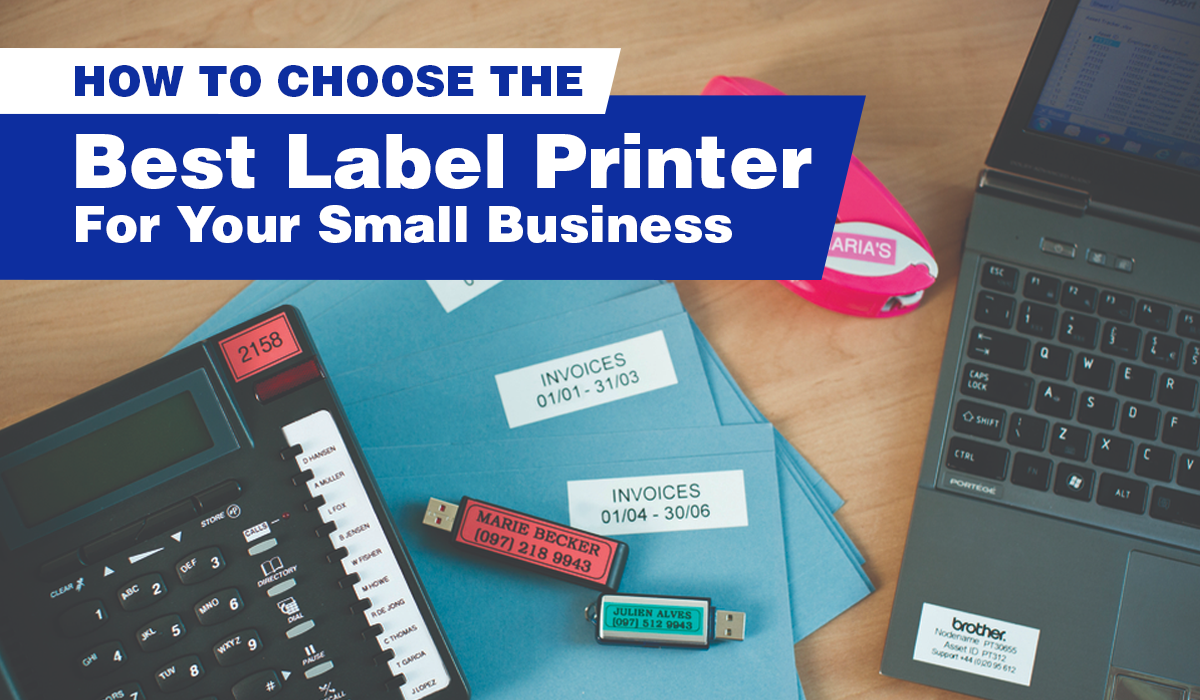
Looking for the best label printer for your small business can be quite a challenge for first time users. 

There are all sorts of label makers ranging in size, cost, and print speed—but which features should you consider to find the perfect label printer for your small business? 

Here are some of the top factors to consider:

  1. Types of Label Printers
  2. Price
  3. Printing Speed
  4. Volume of Printing
  5. Print Quality
  6. Portability
  7. Water Resistance
  8. Versatility
  9. Connectivity
  10. Usability and Comfort

With so many choices of label printers in the market, it’s easy to get lost as you weigh the different criteria while selecting the perfect label maker for your small business. In this article, you will learn what the most important attributes are in a label printer.

1. Types of Label Printer

Which type of label printer—thermal label printer or laminated label printer— best suits your business needs? 

There are pros and cons to each label printing technology so read on to find out more.

  1. Direct Thermal Label Maker

If your business requires labels used for barcodes, address labels, shipping labels, receipts, tickets or food packaging, the direct thermal label maker is a good fit for you. Thermal printing uses heat-sensitive label stock and burns text onto the label itself, without reaching dangerously high temperatures. 

Most thermal printed labels last a long time. However, they are not well suited for environments that expose them to heat, long periods of direct sunlight, or abrasion as the material will darken, making the text illegible or the barcode invalid. Hence, do keep in mind that direct thermal printing is not the best option for long-life products and applications. 

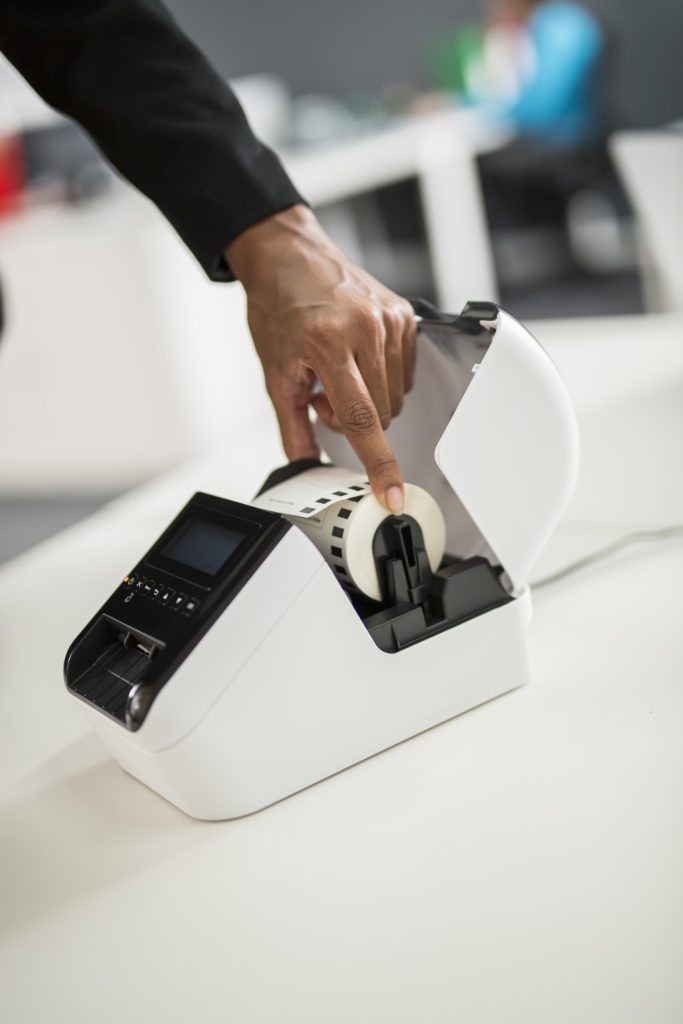
Brother’s QL-800 Label Printer, which bagged the PC Mag Editors’ Choice 2020, is one of the most popular label makers in Singapore utilising thermal printing technology. Brother’s DK-22251 series offers black and red printing, and is popularly used for address labels, shipping labels and food packaging as you can highlight important information such as use-by dates and allergens. Such label printers have a speed of 93 labels per minute, which makes labeling very efficient.

Developed for busy workplaces, you will be happy to know that this advanced label printer is easy to set-up and use. Simply connect the printer to your PC or Mac via USB, and run the built-in software—with P-touch Editor Lite, you need not install printer drivers.

  1. Laminated Label Printer

For businesses that focus on backend assets where labels are needed for shelves, office equipment, name badges, cabinets, and files, the laminated label printer may be your best bet. Laminated labels can withstand the test of time (fade resistant) and elements (heat/cold/water) better as the ink is printed onto the laminated labels.

For such uses, the Brother PT-D450 Label Printer might be the label printer of choice. The PT-D450 allows you to quickly generate labels up to 18mm wide, either using the printer’s own keyboard and high resolution backlit display to create them directly, or by sending your designs through your PC or Mac via P-touch Editor software. It is also one of the few label makers designed with a QWERTY keyboard, making it extremely user-friendly. 

lady working at desk with rows of files

2. Price

Cost is the next factor that you should consider—but don’t just focus on the cost of the label printer itself; also consider the cost of its consumables—ink cartridges, toners, print head, label tape, stickers, rolls, etc. You may be shocked by how quickly the costs of the consumables add up after snagging a cheap label printer. 

To avoid such surprises, it is wise to do the math and get a clearer picture of what your costs will be like in a year. You might be better off with a competitively priced label printer, with more affordable consumables that help keep the long-term running costs low.
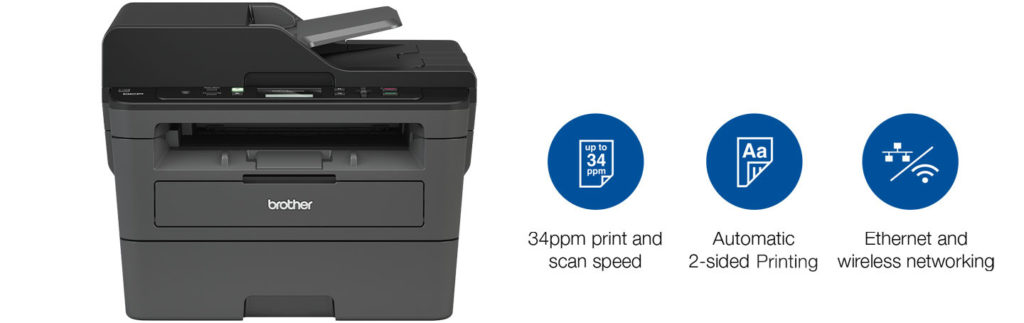
3. Printing Speed

The printing speed of the label maker can make or break your business—especially if your print volume is high or you operate in a time-sensitive environment. Having a label printer that can produce more labels at a faster speed will definitely streamline your business processes. The number of labels per minute or the inches per second are specifications that you have to look out for when choosing the ideal label maker. 

4. Volume of Printing

Similarly, the print volume of a label maker can affect your business. If you need to print a huge volume of labels, a more efficient label printer that has an auto cut function can help you save time spent on constantly changing cartridges or label rolls. This function aids in continuous printing by cutting your label to the precise length, for up to one metre.

5. Print Quality

Do you need to print high quality labels or would an above-average quality suffice? Do you need your label prints to be smudge-free and fade-proof? 

These are some questions to ponder upon, especially since print quality is typically correlated to its price. If print resolution is important to you, you may want to look out for a label printer that offers higher dpi (dots-per-inch).

6. Portability

Another factor to consider is the portability of the label printer. Do you need to constantly be on-the-go with your label printer, moving from product to product, shelf to shelf, warehouse to warehouse? With a portable label printer that has a built-in rechargeable Li-ion battery, you will be able to continue labeling for a longer period of time, keeping an efficient workflow. 

This is where you may have to decide between lightweight and portable label printers and the heavy-duty ones.

7. Water Resistance

The environment your business is in will also affect the type of labels you choose. Water-resistant labels would be extremely important if your business operates in high-humidity conditions or if there is a possibility of condensation at any point of the logistics process. 

8. Versatility

The versatility of a label printer provides you with multiple ways to send a print job from—standalone, PC, mobile device, network systems, etc. It is important to consider this attribute if your business taps on these diverse needs. For a more comprehensive read on these multiple ways of printing, click here!

9. Connectivity

In the digital and mobile age, you may need to consider how easy it is to connect your label printer to a computer for direct printing from common applications such as Microsoft Word or Excel. Most label printers can be connected to a computer via USB. Other more advanced models may come with Wi-Fi or Bluetooth connectivity. If you need your labeller to link up with other devices frequently, your ideal label printer will need to check this box.   

10. Usability and Comfort

Finally, the most important factor that trumps it all is the labeller’s ease of use. Is the screen big enough for you to preview the labels comfortably? Is the label printer intuitive to use? The overall user-friendliness of a label printer could be a deal maker (or breaker) so do try it out before you make the leap!

Conclusion

Choosing the best label printer for your small business can be a daunting task. We hope that the above tips are helpful in enabling you to decide on the best label printer for your business.

How to Set Up Your Home Office Space

Are you setting up your home office space and need help to determine what the most important home office essentials are?

Wish to choose the best all-in-one printer for scanning, copying and printing to supercharge your home office?

With so many things to consider, choosing the right office supplies for your work-from-home gig can be stressful. Whether you are looking to set up your home office from scratch or are looking for a few key pieces to get you started, we are here to help.

In this article, we give you the lowdown on how you can set up your home office space to maximise your productivity and efficiency. It includes the most essential items you need for a home office, along with the best home office multifunction laser printer options available in the market. 

How to Set Up An Efficient Workspace from Home

An efficient home office should ideally be a separate space in your home that is away from your bedroom. It could be a small study space or a corner of your living room. 

Here are some essential Work-From-Home (WFH) items to invest in that can last you for the long haul.

brightly lit home office space

Ergonomic Desk

Do you spend hours at your desk facing a computer screen? If so, an ergonomically-designed desk might be your new best friend.

With numerous adjustable desk options in the market, you’re totally spoilt for choice.

Pro-tip: How do you know if your desk is at the correct height? Check that your forearms are parallel to the ground and your wrist is not bent when you type on the keyboard or use the mouse.

Comfortable Backrest or Chair

A comfortable work-chair is one of the most crucial elements of any office. A good work-chair that provides ample lumbar support can prevent backaches and neck-aches in the long run. 

So take your time to shop for a good one, and where possible, test the chair before making a purchase.

Wi-Fi Booster

You know that feeling when you have an important video call and your Wi-Fi decides to take time off?  

This anxiety-ridden scenario can be easily avoided with a Wi-Fi signal booster. Depending on how strong a connection you need and how far away your workspace is from your existing router, prices are usually affordable for a basic Wi-Fi booster with a limited range.

Label Printer

The last thing you want is for things to get messy and disorganized in your home office. Investing in a good label printer can help you keep your workspace neat and organized – with all your documents, files, and stationery in their rightful place.

Which Home Office Multifunction Printer to Choose?

Choosing the right all-in-one laser printer or multifunction inkjet printer for your home office really depends on your expected print volume and the type of documents you need to print. 
Some businesses require only black-and-white printing while others need to print graphs and detailed business reports in colour. Creative professionals like photographers, designers, and artists working from home may even need to print high quality photos and posters.

Inkjet vs Laser Printer — Which Is Better for Your Home Office?

What is the difference between a laser printer and an inkjet printer? 

Let us compare laser and inkjet printers to see which may be best suited for your home office setup:

·  Laser printers offer fast print speed 

·  Laser printers result in sharp text quality

·  Laser printers are more suited for high volume printing

·  Inkjet printers often provide more vibrant colours 

·  Inkjet printers are usually affordable

·  Inkjet printers are usually compact

Now that you’ve learned the differences between laser and inkjet printers, your next step is to choose the best printer for your home office. (Alternatively, you can also choose to read up more on the differences between a laser printer and an inkjet printer.)

Best All-in-One Home Office Laser Printer

Brother multifunction laser printer DCP-L2550DW

A prime example of a highly-effective all-in-one laser printer is the Brother DCP-L2550DW Laser Printer. It is the ultimate mid-sized printer for your home or small office. Boasting a speedy 34 page-per-minute (ppm) print speed, you’ll be able to receive your documents in a jiffy. It also has automatic 2-sided printing that is eco-friendly and helps you to save paper.

With scanning, copying and fax capabilities, you may expect a rather cumbersome footprint, but you’ll be surprised – this 4-in-1 is actually very compact and does not take up much more space than your regular printer.

With wireless capabilities, you can easily connect to the printer through your Wi-Fi network. You can also use apps like AirPrint, Mopria, as well as Brother iPrint&Scan.  Another popular choice is the Brother DCP-L3551CDW Laser Printer – a cost-efficient and reliable printer that is perfect for small home offices. This fast monochrome and colour printer churns out stunning pages at a speed of up to 18ppm. It also features wireless connectivity and automatic duplex printing for eco-friendly and professional two-sided documents.

Best Home Office Multifunction Inkjet Printer

Inkjet printers also have their own set of advantages. They typically offer:

  • Vibrant colours for photo prints
  • Low upfront investment and running costs
  • Compact sizes
Brother multifunction inkjet printer DCP-T520W

A good example of a high-quality all-in-one inkjet printer is the Brother DCP-T520W Ink Tank Printer. Built for high-volume printing, the DCP-T520W is able to print, copy and scan, and can print up to 7,500 pages in black and 5,000 pages in colour, all at a low cost-per-print. What’s more, it supports various paper sizes and weights, so printing different print jobs is now a breeze.

Sew a Fabric Easter Basket

With Spring just around the corner, I thought I’d share how to sew a fabric Easter basket. These homemade Easter baskets aren’t just for Easter though – they make great gifts for all different occasions, holidays, and themes! I sew these DIY fabric baskets for everything from baby showers to teachers’ gifts and more. Add machine embroidery for a nice custom touch. Use these homemade fabric baskets for custom storage bins as well! Get the tutorial below on how to sew your very own fabric Easter basket.

Supplies:

  • Brother A150
  • Brother NV800E was used for the embroidery
  • 1 yd. cotton fabric exterior
  • 1 yd. cotton fabric liner
  • 1-2 yds. fusible fleece
  • General sewing/cutting supplies

Cutting:
Exterior: 2 pieces that measure 17” (wide) x  13” long
Liner:  2 pieces that measure 17 x 13”
Fusible Fleece: 4 pieces that measure 17 x 13”
Strap: 1 piece 17 x 6”
Fusible Fleece: 17 x 6”

For the 2 piece (Blue Checkered)
Exterior: Top section: 17 x 3 x  ¾”
Exterior: Bottom section:  17 x 10 ¼”
The rest of the pieces measure the same as above.

Fuse the fusible fleece to the wrong side of all pieces.

Use a grid ruler and mark off a 3” square at the bottom corners for both exterior and liner and cut.

Place exterior and liner pieces right sides together. Stitch the sides and bottoms with a 1/2” seam allowance.

For the corners: With right sides together, connect the seam so it’s centered to the other side and clip or pin.

Stitch together and repeat for all corners. (1/2” seam allowance).

The bottom should look like this when complete.

Now let’s sew the handle.

Fuse the fleece to the wrong side.

Fold the sides into the center and press.

Fold in half so the edges are together and press.

Top stitch down both sides (about 1/8” from the edge).

Find the center front and center back  of the basket and mark. Place the handle right sides together with the basket over those marks and sew (1/4” seam allowance).

Flip the basket so right sides are out including the handle.

Place the basket into the liner so the right sides are together. Attach seams to seams and pin or clip all the way around.

Sew ½” seam allowance all the way around the edge leaving a 3” opening just an inch off one of the handles. This will be the opening to flip right sides outs.

Flip right sides out through the opening.

Press the basket. Top stitch with a 3.0 stitch length and just off the edge (1/8” or so) around the top edge of the basket, closing the opening as well.

Now fill your homemade Easter basket with all sorts of goodies. I sew these fabric baskets for gifts, but they’re also great to use as homemade storage bins. You can add some machine embroidery to customize them. For the blue checkered basket, I embroidered the name on the top section. I also embroidered a sash to tie around the floral basket. Make these for all different occasions: I love sewing them for party favors, Mother’s Day gifts, and more. Use your imagination and take your homemade gift baskets to the next level of fun!

This article has been republished from Brother Sews USA.
The original article can be seen here: http://blog.brothersews.com/projects/sew-a-fabric-easter-basket/

How To Print Anything From Anywhere

businesswoman using laptop for wireless printing

Looking out for ways to print any document from anywhere — be it in a shared workspace, office, retail shop or even at home? 

Tired of getting all tangled up by multiple wires from various IT devices?

Welcome to the world of wireless printing technology — one where mobile printing doesn’t have to be mind-boggling or reserved for IT experts.

With a wireless printer at home or at your office, you can easily access your printing device without the hassle of plugging and unplugging wires. Many modern printers are able to access your home network via Wi-Fi, allowing you to print to your home printer from anywhere at any time.

In this article, we will address your most common questions in wireless printing:

  1. How Do You Print Anything From Anywhere?
  2. Print-from-Anywhere From Your Mobile Device
  3. How to Print On-the-Go (Best Portable Printers)
  4. Can you scan a document to your mobile device?
  5. Best Mobile and Cloud Printing Solutions

How Do You Print Anything From Anywhere?

To print anything from anywhere, you’ll need to first consider the context of where you are printing your document from. Perhaps you are trying to print a document at home from your personal devices such as a laptop, smartphone, or tablet, or you are trying to print something at your office or coworking space.

Printers with a Wireless (Wi-Fi) Connection

If it is a mobile device, printing can be done by connecting your mobile device to the same wireless (Wi-Fi) network as your printer. There is no need to even install a printer driver. As long as your phone and printer is connected to your office or home’s wireless network, you can print to it directly from a nearby location.

Printers with an Internet Connection

If the remote printer has a web connection, you can use your email application to send your print jobs to it without needing to be in the same location.

lady sipping coffee and working from home

How to Print-from-Anywhere From Your Mobile Device

If you use an iOS device, Apple Airprint lets you print from your device to any wireless printer that shares the same wireless network. You don’t even need to download and install additional software (drivers). Do check this list to make sure your printer is compatible with AirPrint.

Here is a step-by-step guide:

  1. Make sure your phone and your printer are on the same Wi-Fi network.
  2. Open the app you want to print from and find the print option. This may fall under ‘Share’, ‘Print’ or ‘Other Options’. 
  3. Tap ‘Print’ or the printer icon and select ‘Choose an Airprint-enabled Printer’.  
  4. You should then be able to identify and select the printer of your choice, specify your printing needs (number of copies or customised pages, etc.), and send your print job off!

Major printer makers—such as Brother, Canon, and HP—cover iOS devices and are compatible with AirPrint.

Android users are not left out of the action. They can also tap on a range of wireless apps for direct printing from most printer vendors. There are also printing apps, such as Mopria Print, that you can download and use.

How to Print On-the-Go (Best Portable Printers)

If your business finds you constantly on the road, and you often have to whip up (and print out) documents on a whim, it may be best to invest in a reliable portable printer.

When selecting a portable printer, ensure that their form factors are compact enough for bringing it along with you. Do also consider the electrical plugs needed (especially if you’re travelling abroad for business), as well as their ability to accept wireless printing from multiple devices.

If you’re using iOS devices, make sure you choose one that is compatible with Apple Airprint. Here is a list of the best portable printers to look out for. 

Can You Scan a Document To Your Mobile Device?

The answer is a resounding “Yes!” Using Brother’s Cloud Apps, you can scan any document and save it on your mobile phone. Simply use your mobile phone to scan the QR code on the printer’s LCD screen and the scanned document will be saved on your device.

The Best Mobile and Cloud Printing Solutions from Brother

If you are looking for mobile or cloud printing solutions that are suited for road warriors, consider Brother’s range of mobile and cloud printing apps and solutions.

1. iPrint&Scan

Brother’s iPrint&Scan app allows you to print or scan effortlessly from your smartphone, tablet, or notebook – without the need for cumbersome wires.

The app also comes with a range of advanced features such as document editing, faxing, and machine status updates. You can also use the app as a scanner and save scanned images or documents directly to your device. It is also compatible with AirPrint, Mopria, and Windows Mobile Print.

2. WebConnect

Brother WebConnect allows you to share and collaborate anywhere in the world in an instant.

You can readily access and print documents from the cloud and improve workplace collaboration with your Brother WebConnect supported printing device, enabling true on-the-go printing.

3. Cloud Apps

Brother’s free suite of innovative, cloud-based applications lets you create, edit, and convert files – without even touching a computer!

Designed for busy professionals who seek to enhance their productivity, noteworthy features include Brother CreativeCenter, Cloud Secure Print, and Easy Scan to Mobile or Email. There is even an OCR (Optical Character Recognition) scanning function to editable and searchable file formats. 

Conclusion

Brother smart wifi-enabled printer

With wireless and on-the-go printing, your home office will never feel the same again. If you’re looking for a smart, reliable wireless printer to up your work-from-home game, do check out these bestsellers from Brother:

A Brother to the Earth: Working Together for a Sustainable Future.

As a champion for greater sustainability, the Brother Group is determined to use resources effectively as much as possible to minimise our environmental footprint. This is the foundation for “Brother Earth”, our ongoing commitment to reducing the burden on the environment across all aspects of development, designing, manufacturing, transporting, and recycling, and to infuse the latest eco-conscious technology in our products. This dedication can be found in the development and implementation of innovations in not only our printing technology, but throughout our manufacturing factories and packaging processes as well, resulting in some of the most environmentally friendly printers ever.

Energy efficiency through improved airflow

When it comes to designing for sustainability, we realised that the biggest solutions are often found in the small details. As increased printer performance generates more heat and thus, expands more energy, we took on the challenge of how to effectively release the heat generated from our high-performance printers and maintain optimal temperatures. With that in mind, our engineers turned to cutting-edge simulation technology to predict air flow at the design stage. This allowed us to make fine-tuned adjustments and formulate new products with unprecedented airflow efficiency. This not only means that our printers require fewer cooling fans to operate, but also helps improve reliability and product lifespan due to stabilised internal temperatures.

Lightening the environmental burden through packaging

Brother products are shipped around the globe on journeys of up to several thousand kilometres, and our products must be well-protected until they reach the hands of our customers. However, traditional packaging designs are large and bulky, requiring more materials to produce and taking up greater volumes of storage and shipping space. We made it a mission of making our packaging more environmentally friendly, and went back to the drawing board to create an optimised new packaging design that’s not only lighter and smaller, but also stronger and safer. Today, Brother continues to reduce packaging size to improve the efficiency of transportation and minimise the burden on the environment.

A responsibility that starts within our factories

The goal for Brother has always been the same: to reduce CO2 emission while still maintaining maximum productivity. To see this in effect, you need not look any further than within our manufacturing facilities where we are always striving to reduce materials and energy usage to meet environmental standards. In our Xian factory in China, skylights were installed to lower electricity consumption, and smart technology has been deployed to automatically turns lights off when enough natural light is detected.  In the Philippines, we’ve fitted our factory with 100% LED lights to reduce the number of lights utilised by 40%. This has led to the factory being recognised as one of the highest energy-saving production factories in the Brother group. Each year, more such activities are being implemented across Brother production plants around the world, for we know that the journey towards sustainability is a never-ending effort.

Working towards Zero Standby Power

While most devices such as your television, microwave oven, and yes, even your printer is likely to feature a “Standby Mode”, the power that is consumed even when in that state can be significant when you consider that these are often left on 24 hours a day, 365 days a year. Brother’s goal is to make this power draw as close to zero as possible with our low energy standby technology known as “Green Standby”. This technology decreases the electricity consumption as the number of times charged by the capacitor is reduced, and the longer discharge time means that standby power can be maintained close to zero. Since its announcement, Green Standby has been further developed, achieving a power consumption that is a mere 0.002% compared to a standard low–capacity power supply. However, we believe that even lower power consumption is possible, and we will continue to work on making our dream of Zero Standby Power a reality.

These are just a few examples of the many steps Brother is always taking to create a brighter, more sustainable world for our future generations to enjoy. To explore our ongoing efforts, learn more here.

Is there an affordable way to print for your home business? Read on.

If you are reading this, chances are, you are either the owner of a home-based business, or someone who is considering starting one of your own – and you’re not alone! With the added flexibility, agility and freedom that running a business from your home affords, it is easy to see why a large portion of start-ups across the world are doing so. This, however, comes with certain challenges, one of which being that most business-grade printing solutions were made for traditional office environments, with very few options designed to be truly suitable for the home office.

With that in mind, what are some of the options you should consider when choosing a printing solution for your very own home-based business?

Laser or Inkjet? It depends.

One of the main benefits of inkjet printers is that they are an affordable option for any home business owner while being capable of delivering vibrant colour image and photo prints. However, with the high prices of printer ink, they could end up being significantly costlier once you start printing larger volumes. But that’s all about to change with Brother’s range of Refill Ink Tank Printers, a new breed of business-oriented ink printers designed for greater cost-savings while delivering outstanding print quality and print speeds.

Or, if you are looking for more document-focused printing capabilities, then look no further than Brother’s range of Laser and LED printers. With either mono or colour printing options, these capable solutions provide speedy, stable performance that’s ideal for high-volume printing of documents with crisp and easily readable text – even on smaller font sizes.

Print productivity that doesn’t cost you dearly.

Printing costs can make up a significant part of your expenses, which is why Brother’s Refill Ink Tank and Laser print solutions are designed with small businesses and home offices in mind. Our ultra-high yield refill ink bottles and toner cartridges offer affordable, high-quality prints for all your marketing, invoicing, presentation or reviewing needs that not only translates to a low cost-per-page, but also allows you to print thousands of pages before requiring a refill or cartridge change.

Form and functionality bundled in one compact package.

Forget about those large, costly copiers that are commonly found in big office departments. Aside from being affordable, Brother’s print solutions take up a significantly smaller footprint than traditional copiers and are perfectly suited for your home office. Packed with wireless networking capabilities that allow staff to easily connect to a single printer, high print speeds, flexible paper handling, high-volume duplex printing, and innovative Cloud Apps that offer seamless mobile printing and scanning on the go, they deliver amazing value and functionality for the modern home office.

Made for the home, built to last

Another major concern about compact printers is that they aren’t designed to withstand the vigours of high-volume business printing. The thought of costly supplies and frequent breakdowns are the main reasons why many are put off by the idea of utilising them.

But Brother has got you covered.

All of Brother’s genuine supplies are optimised to work perfectly with our printers for unmatched consistency and reliability, which results in less wastage, repair and maintenance costs in the long run.  And with over 100 years of award-winning reliability and customer service to its name, you can be assured that any Brother printer is built to last.

With that being said, there’s certainly no one-size-fits-all solution for your unique business model. Do you require a solution with only print functionality? Or maybe you’re looking for a Multifunction Centre that’s capable of scanning, copying and faxing as well? Whatever your needs, we’re sure that you’ll find the ideal solution right here .

Update an Old Shirt with Embroidery

Hello everyone. Laura here from Trash to Couture. For this post, I will share with you how to embroider onto a collared shirt with the Brother SE625 Sewing and Embroidery Machine. This is a great way to update old or boring clothing. The SE625 has a set of built in floral patterns that I will be using on this denim shirt. Get the details below on how to embroider you own custom look.

Supplies:

  • Brother SE625 Sewing and Embroidery Machine
  • Stabilizer: Choose the best one for your material
  • Embroidery thread
  • Embroidery pattern
  • Shirt to embroider
  • Marking tool
  1. Begin by pressing your garment. Then use the template to mark where you want your design to be. I mark both right and wrong sides with a fabric marking tool. Choose an area of the shirt that is flat. For this design, I will be using the yoke and the back panel.

Tip: Use a stabilizer that works with your fabric and place at least 1 inch over the markings. I love the ones that you can cut to measurement, peel and stick it right on.

2. Hoop it. Hooping Tip: You don’t want it too tight or too loose. It should sound like a drum when tapping it.

3. Set up your machine to embroider. You can adjust the size and placement of the pattern which makes it easy to place the design exactly where you want it.

4. Once the first set of embroideries is complete, continue to repeat the previous steps for more designs wherever you’d like. The SE625 makes it easy to mirror images to create patterns like I did on the yoke.

5. If the yoke isn’t enough, the back panel is another great place to embroider.

The options and ideas are endless on what you can add embroidery too! Watch my video to get the steps on how to embellish your shirt with embroidery:

Watch Video:

Speed simulated for demonstrative purposes. Actual speeds will vary.

This article has been republished from Brother Sews USA. The original article can be seen here: http://blog.brothersews.com/embroidery/embroider-shirt/