Update an Old Shirt with Embroidery

Old Shirt with Embroidery-01

Hello everyone. Laura here from Trash to Couture. For this post, I will share with you how to embroider onto a collared shirt with the Brother SE625 Sewing and Embroidery Machine. This is a great way to update old or boring clothing. The SE625 has a set of built in floral patterns that I will be using on this denim shirt. Get the details below on how to embroider you own custom look.

Supplies:

  • Brother SE625 Sewing and Embroidery Machine
  • Stabilizer: Choose the best one for your material
  • Embroidery thread
  • Embroidery pattern
  • Shirt to embroider
  • Marking tool
Old Shirt with Embroidery-02
Old Shirt with Embroidery-03
  1. Begin by pressing your garment. Then use the template to mark where you want your design to be. I mark both right and wrong sides with a fabric marking tool. Choose an area of the shirt that is flat. For this design, I will be using the yoke and the back panel.

Tip: Use a stabilizer that works with your fabric and place at least 1 inch over the markings. I love the ones that you can cut to measurement, peel and stick it right on.

Old Shirt with Embroidery-04

2. Hoop it. Hooping Tip: You don’t want it too tight or too loose. It should sound like a drum when tapping it.

Old Shirt with Embroidery-05

3. Set up your machine to embroider. You can adjust the size and placement of the pattern which makes it easy to place the design exactly where you want it.

Old Shirt with Embroidery-06
Old Shirt with Embroidery-07
Old Shirt with Embroidery-08

4. Once the first set of embroideries is complete, continue to repeat the previous steps for more designs wherever you’d like. The SE625 makes it easy to mirror images to create patterns like I did on the yoke.

Old Shirt with Embroidery-09

5. If the yoke isn’t enough, the back panel is another great place to embroider.

Old Shirt with Embroidery-10

The options and ideas are endless on what you can add embroidery too! Watch my video to get the steps on how to embellish your shirt with embroidery:

Watch Video:

Speed simulated for demonstrative purposes. Actual speeds will vary.

This article has been republished from Brother Sews USA. The original article can be seen here: http://blog.brothersews.com/embroidery/embroider-shirt/

Quick Tip: Exploring Options for Elongation Stitches

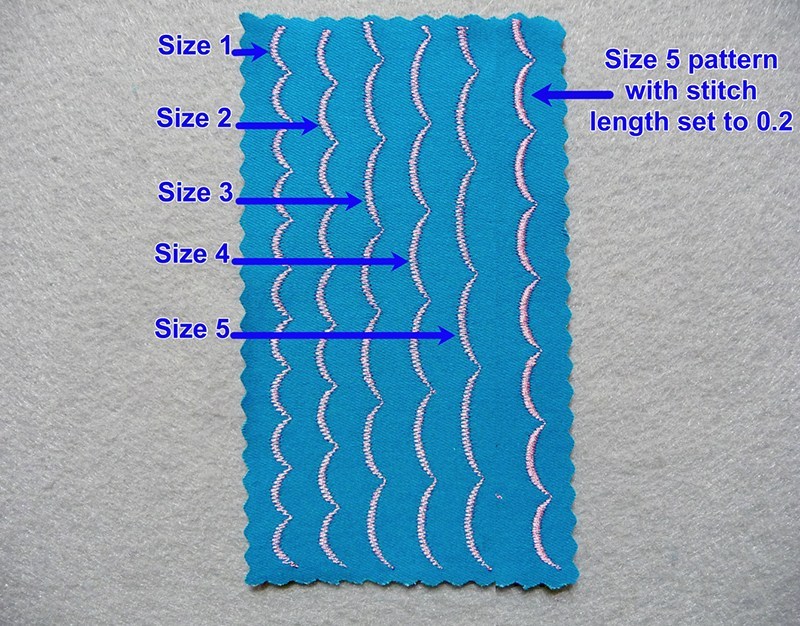
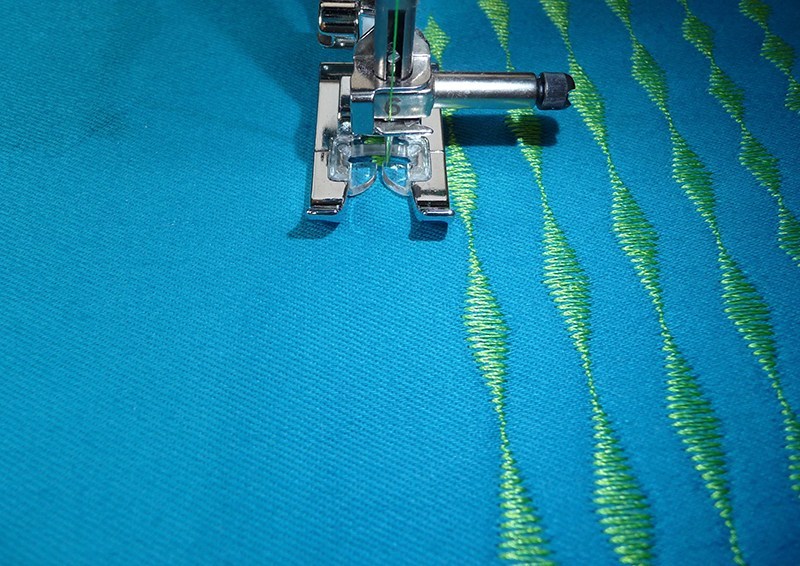
Elongation style stitches are much more fun than their rather technical name implies. The term elongation simply means that patterns in this category of decorative stitches can be re-sized in a range from 1 to 5. As they are re-sized, the pattern or shape of the stitch is maintained. Examples in the photo above show patterns stitched out in all the different sizes. Although the size varies, the density remains the same and the general shape of the stitch does as well. Depending on the size and the stitch selected, different sizes can produce interesting variations. In addition, changing the length of the stitch makes the pattern denser but also shortens the length of the pattern. One of my favorite tricks is to select a larger size pattern and then shorten the stitch length. This results in a fuller looking stitch that is a bit shorter than the original pattern. See examples of sizes below in Figure #1b:

Quick-Tip_Fig1b
Figure #1b

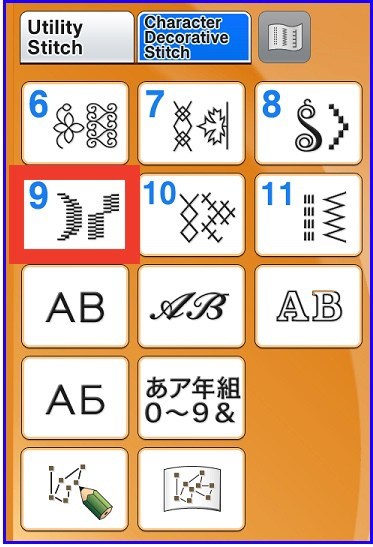
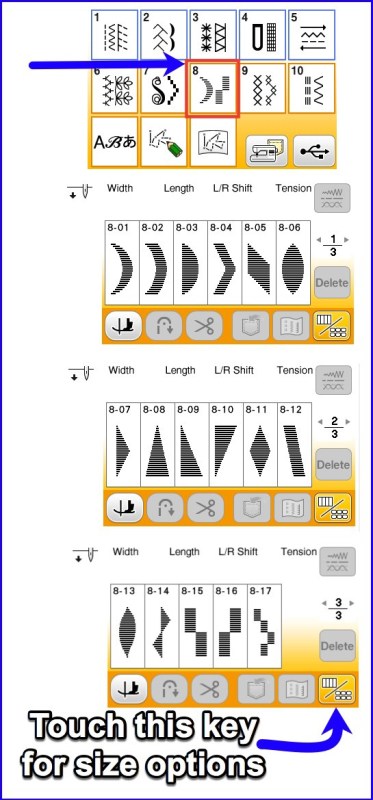
You’ll find these 7mm satin style elongation stitches built into many Brother machine models. They’re located in the Character/Decorative stitch menu of the machine. See examples of stitch menus below in Figure #2a and #2b:

Quick-Tip_Fig2b
Figure #2a
Quick-Tip_Fig3b
Figure #2b

The size key allows for elongating the stitch in a range from 1 to 5.

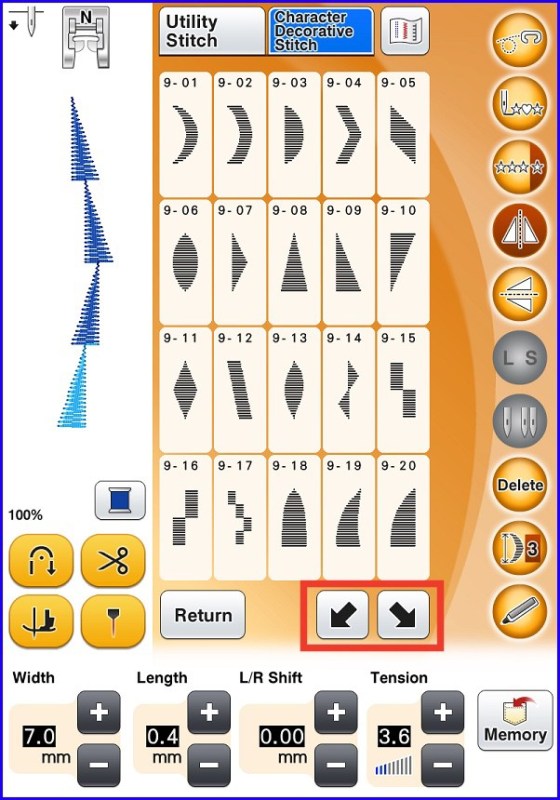
Some machine models include an additional feature for creating step stitch patterns. This technique allows for moving stitch patterns left and right to sew wide patterns with multi-directional stitching. See Figure#3 below:

Quick-Tip_Fig3
Figure #3

Remember to change to presser foot “N” when sewing these decorative stitches. This foot has a groove on the underside, so it flows easily across bulky satin stitches. See Figure #4.

Quick-Tip_Fig4
Figure #4

It’s also important to be sure fabric is firm and well stabilized before sewing these decorative stitches. A layer of tear-away stabilizer is a good choice for many situations. Be sure to test stitches on scraps before sewing your actual project. Have fun experimenting with elongation stitches, trying different sizes, patterns, and combinations. Enjoy!

This article has been republished from Brother Sews USA. The original article can be seen here: http://blog.brothersews.com/tips-tricks/elongation-stitches/

Get Creative with a Customized Cell Phone Case

Need a little pizazz? Time to get busy and dial in your own cool style with a customized cell phone case!

Supplies:

Note: Smartphone sizes change so quickly, so we recommend basing measurements to the size of your
preferred phone model. This sleeve is supposed to fit very snugly to keep the phone from falling out. If you want to make it larger so it does not fit so tightly (or to accommodate a larger phone in the future), you could add a tab closure to the top.

Steps:

1. Choose 3 different types of fabric—one will serve as the main pocket of your phone case and the 2 layers will be for your cards and earbuds. You will want to cut the main pocket to be twice as wide as your phone (with case if you keep it in a case) plus about 2-3 inches. For example, the phone we used here is 2.5 inches wide, so we cut the fabric to be 8-9 inches wide. The other 2 pocket layers will be 2-3 inches plus your phone size.

Get Creative with a Customized-01

2. Cut 3 piece of felt the same size as your phone and pin one to the back of each piece of fabric, with the long edges pinned over. This will add an extra layer of protection.

Get Creative with a Customized-02

3. For what will be the 2 smaller front pieces, fold the 2 layers on a diagonal and sew along the top edges. Keep the larger back piece unfolded for now.

Get Creative with a Customized-03
Get Creative with a Customized-04

4. Sew the two front-pieces along each side at one edge of the back piece. Then, fold over the back piece to
cover the entire case.

Get Creative with a Customized-05
Get Creative with a Customized-06
Get Creative with a Customized-07

5. Sew along the bottom and sides, then cut off any extra fabric from the sides after you’re finished sewing. Turn inside out to reveal!

Get Creative with a Customized-08

6. Grab your cards, phone and earbuds. You’re ready to go!